If you are not familiar with acrylic pour painting techniques and recipes but were always dreaming about creating good-looking DIY wall art, then here is your lucky chance! Easy enough for anyone with a pair of hands and a few bottles of fluid acrylic paint, this paint pouring art hobby may really make an acrylic pour addict out of you.
All you need to start creating your own wall art masterpieces is just one trip to your local craft supplies store, like Michaels or Hobby Lobby, and a few minutes of watching “how to pour acrylic paint” youtube videos. No taking long art classes, no buying expensive courses or step-by-step books – just start discovering your inner Jackson Pollock in your home studio without any delay!
Sounds like a dream, right? No, it’s not. Acrylic pouring is, indeed, surprisingly easy. There are only a few things that you have to learn before spending a fortune on experimenting with expensive art supplies.
(See this article about the most economical pour painting art supplies sets)
The main acrylic pour painting technical terms
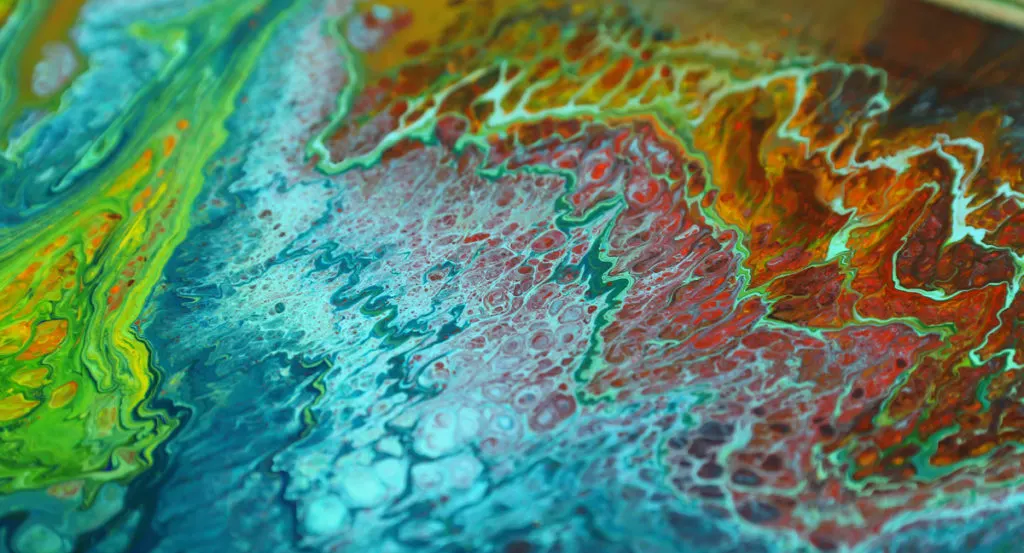
- Cells – irregular organic pattern created by either heavier pigment weight of top paint layers sinking through lighter layers of fluid acrylic paint or by oil added to this water-based paint which creates random “puddles” on the top layer of the painting showing underlying color.
- Floetrol – is the main part of most of the acrylic pouring recipes that help water-based paints perform more like oil-based paints which ultimately helps with reducing brush marks in your paint finish. It can be purchased at Lowes or Home Depot.
- Pouring medium – see Floetrol and Liquitex Pouring Medium
- Dimethicone – a “skin-safe” form of silicone oil, commonly added to fluid acrylic paint to promote the creation of pour painting cells.
- Silicone oil – a liquid polymerized siloxane with organic side chains widely used as lubricating agents. Silicone oil often is mixed with acrylic colors to facilitate the creation of cells during acrylic pouring. See also Dimethicone.
Important note
The use of Silicone oil and Dimethicone is considered to be almost “the classic” component in many acrylics pouring recipes. There is a problem with this oil. It was formulated as a non-evaporating lubricant designed to stay liquid without polymerizing or hardening.
Michael Towsend (Materials Specialist at Golden Artist Colors, Inc.) writes:
At this point in time, we do not endorse the use of silicone oil in painting mixtures that are expected to last. There are many reasons for this stance. Most silicone oils do not evaporate out of the paint, therefore they stay within the matrix of the paint and could potentially cause film formation issues. At the very least, the silicone oil will impede the intercoat adhesion between the surface of the pour and subsequent product layers, such as mediums and varnish. As an artist, you are free to do what you want to to make your artwork, but until we gather enough evidence that there aren’t any long-term issues, we won’t suggest artists add silicone into the paint.
Don’t cry in desperation – there is a perfect, time-tested, and far better alternative to your precious silicone oil. Linseed oil has been used by generations of artists from the Renaissance until modern days. It also smells much more “artistic” than silicone spray.
Another silicone oil substitute to consider would be Isopropyl Alcohol.

Source: www.justpaint.org where Michael Towsend explains why and how it works with the acrylic pouring technique (more details here).
Pours of GAC 800, GOLDEN High Flow Acrylic & Isopropyl Alcohol create cellular patterns as the alcohol tries to escape the paint during drying.
Acrylic Pouring medium techniques: How Much Silicone & Floetrol to Use?
3 experiments by Odeta Dixon for beginners. Very informative and to-the-point pour painting tutorial. It contains some basic acrylic pouring recipes.
Dirty pour demo of fluid acrylic painting with Cells
Acrylic pour painting done in a dirty pour technique on 10×20 stretched canvas by Emily Meder!
Why is this particular acrylic pouring recipe and demonstration worth your attention?
Because it shows that you don’t have to dump every color you possess onto canvas each time acrylic pouring inspiration hits you.
This time-lapse video is short and will just show you the process without extra comments.
Acrylic Dirty Pour – Golden Oldies
Bakerboo Paints show you how acrylic pouring is done in “Golden Colors.” Beautifully balanced earth colors and well-pronounced cells make these canvasses stand out among the sea of other rainbow-colored acrylic pours. One more example confirming that simply mastering pouring or any other technique will not make artwork an instant masterpiece – there are other things that you have to master as well…
Olive Oil Pouring Recipe: Replace Silicone in Acrylic Pour Paintings
So far we have analyzed a few pour painting tutorials promoting acrylic pouring with silicone oil. In this video Souffle Art simply shows that replacing silicone oil with any other oil will produce similar results. They write:
As an extra point of clarification, this test was performed because some viewers didn’t have access to silicone or dimethicone oils where they lived, and they wanted to know if other oils would produce similar looks. Cooking oils are obviously not intended for painting or professional use. This video is simply demonstrating the performance of non-silicone oil to encourage cell formation in fluid acrylic paint.
Acrylic dirty pour with linseed art oil
Suzana Dancks really surprises some of the Youtube viewers by substituting silicone oil with linseed art oil. Strangely, for some, the idea of using the traditional art oil on an art canvas seems to be completely foreign. Good tutorial in any case even if you are a linseed art oil doubter. Rembrandt was using it, so, perhaps you should consider trying it as well?
Not without some additives to make reduce the viscosity of these oils that were specially formulated to be thick.
Fine art supplies stores sell different variations of slow and fast-drying linseed oil.
You will not find silicone oil there!
Can you substitute silicone with linseed or walnut oil?
Not without some additives to make reduce the viscosity of these oils that were specially formulated to be thick. to make reduce the viscosity of these oils that were specially formulated to be thick.
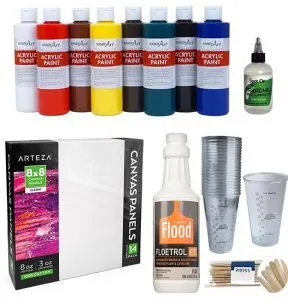
What do you need to get started with acrylic pour painting?
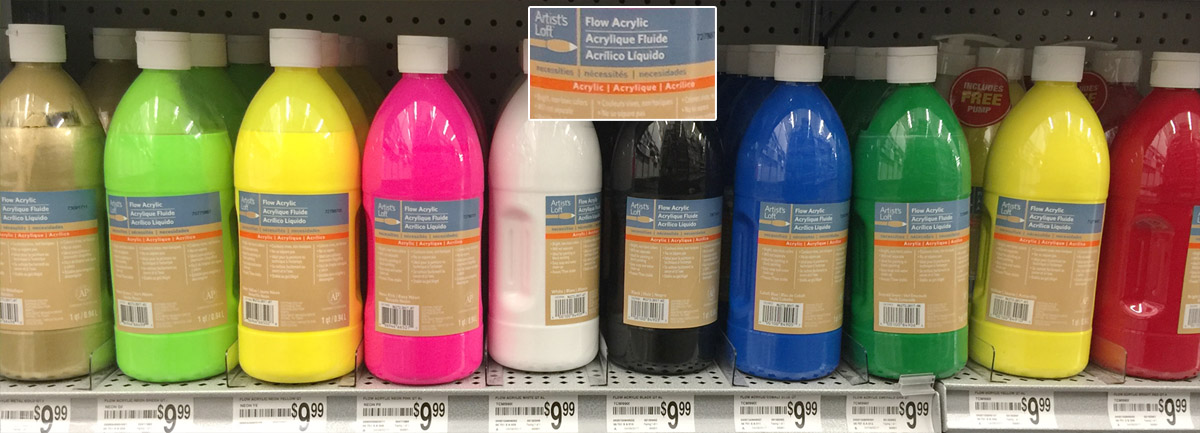


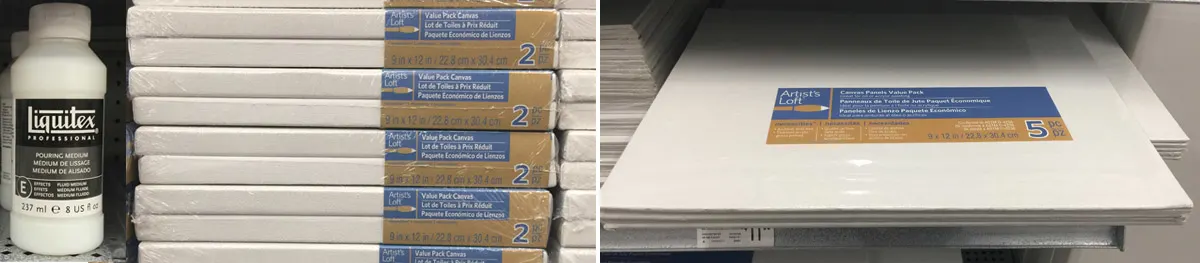
Get Floetrol, Thin-X, or another pouring medium, like the one below by Liquitex, and a few stretched canvases or canvas panels (for practicing). Lastly, get oil for making pour painting cells and you are ready to go!
Get the Basic Acrylic Pouring Set from Amazon
(Check out other sets and supplies here)
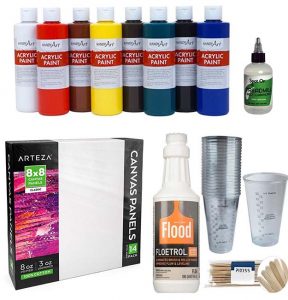

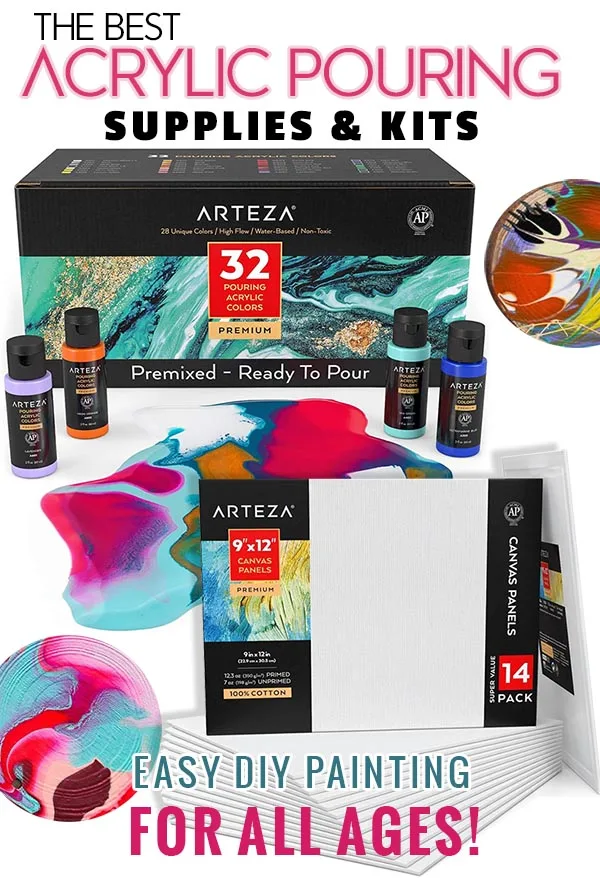
Alternatively, you may check out these paint-pouring kits from Arteza that include specially-formulated paints that require no additives (besides silicone oil)

After reviewing these acrylic pouring tricks, let’s quickly mention a few alternative techniques. Why mention them here at all?
A few reasons:
- More and more people are getting concerned about polluting Earth with plastic and acrylic paints which are not biodegradable;
- Acrylic paint pouring art requires a sizable initial purchase that is not affordable for everyone;
- You want your kids to try it but you don’t want to be stuck with a pile of unused expensive art materials in case they decide to quit after the first session;
- Simply because they are fun too!
So, sequential pouring of undiluted fluid acrylic paints of different colors directly onto canvas or a panel creates a marbelizing glaze effect, and, most importantly, you’ll have lots of fun doing it. An outcome is often unpredictable, in times full of exciting surprises and, sometimes, disappointments.
Now, this marbelizing effect can be also achieved by another quite old technique widely used for producing marble paper.
3D Objects and Paper Marbling Techniques and Recipes
All Craft stores and Martha Stewart sell paper marbling kits, like this Suminagashi set, for ~$15.
One thing that most people do not realize is that you can marbelize this way not only paper but the whole range of other things including canvas and 3D objects.
Super easy to start, especially if you already have some acrylic, oil, or even nail polish at home. Then the only 2 things you’ll need are a tray or a bucket and liquid starch. Watch these videos to see what’s possible.
Learn to Marble Paper
Awesome tutorial on paper marbling.
SWIRLING (Ibanez Guitar)
Swirling, as acrylic pour painting, is easy and fun to do and watch. Millions of people enjoyed this video – far more than any other acrylic pouring tutorial. Perhaps, there is something to it…
Imagine what you can achieve with more colors and different objects like gift boxes, flower pots, and, of course, canvas as well.
How to Swirl Paint Tutorial
This video is showing that swirling, as an acrylic pour painting technique, is easy and fun.