This easy crochet pumpkin pattern is a great way to embrace the season and make your home feel cozy. Of course, pumpkin crafts are especially popular in the fall.
How to crochet a pumpkin?
If you never tried crocheting pumpkins, you’ll be surprised how easily you can create a fluffy 3-D pumpkin from a simple rectangle. Our crochet pumpkin pattern is absolutely FREE and comes with a handy PDF printout.
Most importantly, you can use leftover yarn tucked away in your craft storage. Pick a few balls of yarn in white, green, or grey to create wonderful rustic crochet pumpkins.
As a matter of fact, you can create a great modern farmhouse centerpiece that will last from fall to Thanksgiving! Nothing will spoil or go to waste.
Equally important, for your crochet pumpkins, you can use a variety of yarns and simple crochet stitches. With this in mind, create a plethora of different size pumpkins for your home!
Check out our post about DIY fall crafts that includes a variety of crocheted pumpkins:
Pumpkin Crafts and DIY Fall Crafts
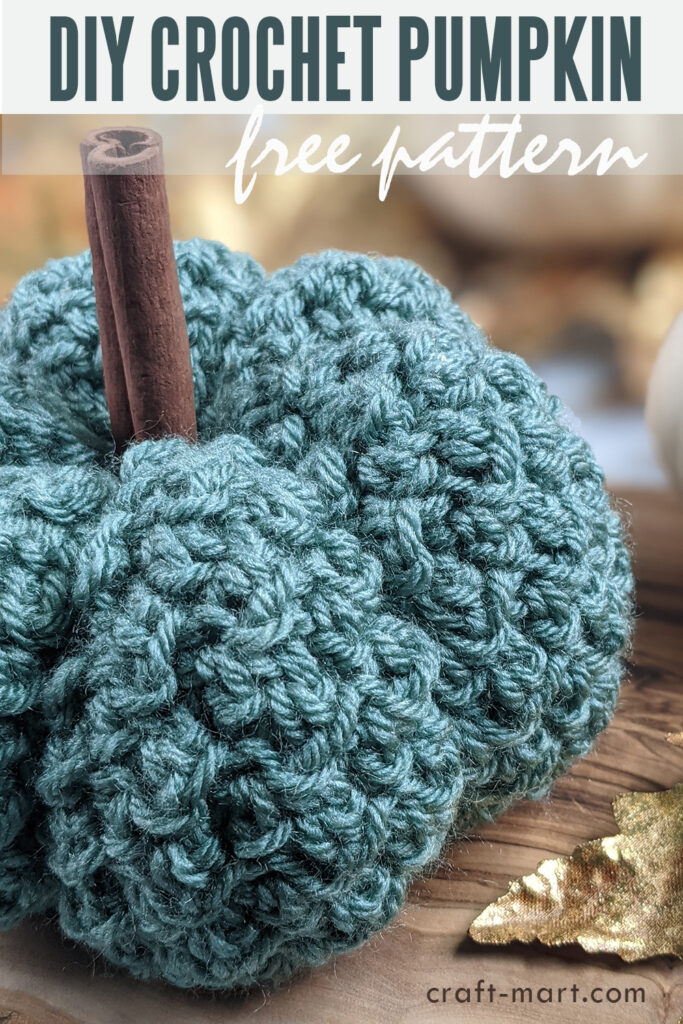
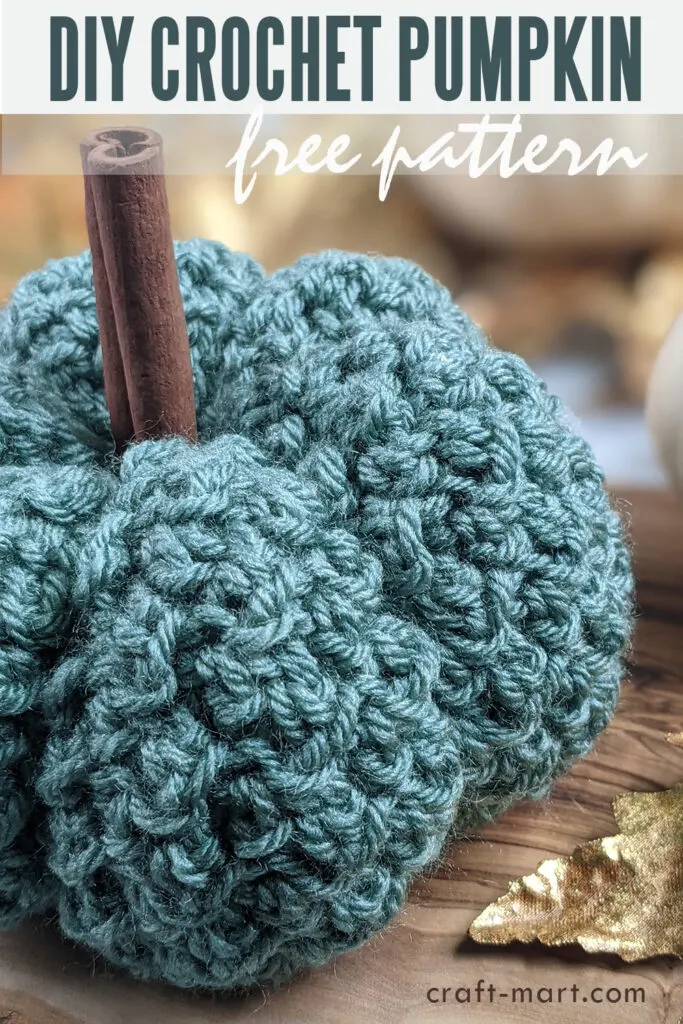
As an illustration, this textured crochet pumpkin is created using a simple crochet stitch that is also full of texture. Accordingly, you can use any crochet stitch that is not lacy to create your own.

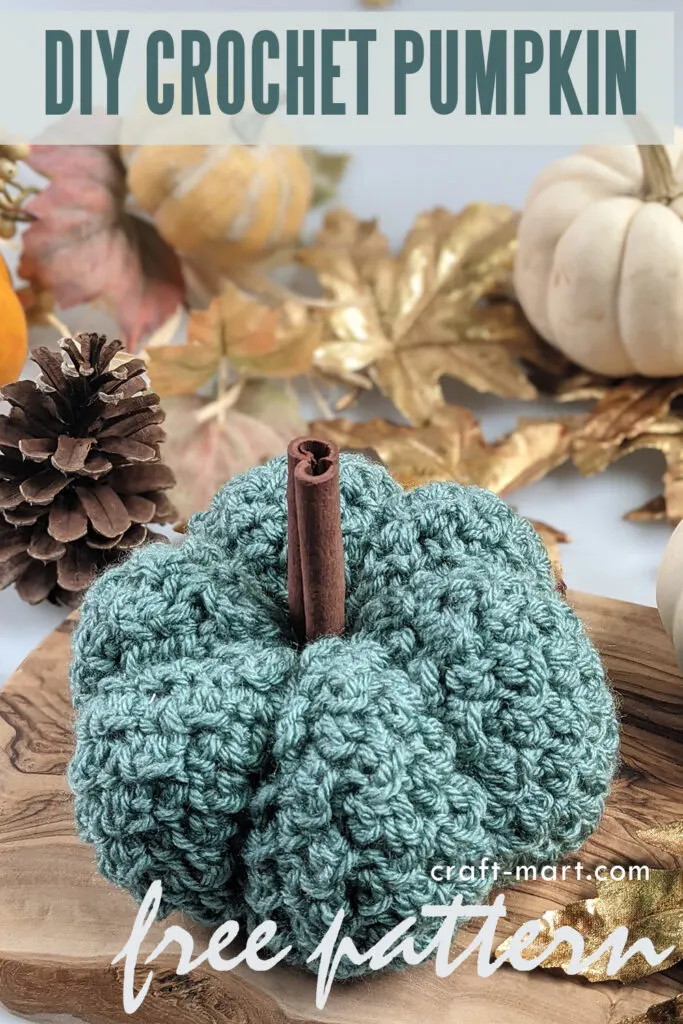
Generally speaking, we are not thinking about waste when we are picking fall decor ideas. In fact, crochet pumpkins will not end up in your garbage bin (or compost) and will last from fall through Thanksgiving and until Christmas.
Crochet Pumpkin Pattern (free)
Crocheted pumpkins add so much warmth to the home and make it cozy for the holidays! Please note that this pattern is given just for reference as you can create pumpkins using any yarn.
In any case, even a small ball of leftover yarn will be enough to create a small crochet pumpkin. Feel free to create many pumpkins of different colors and sizes to fill up your home with handmade happiness.

Materials for crochet pumpkin
- Medium weight yarn (4) in your favorite color; I’ve used leftover Vanna’s Choice yarn from this baby blanket
- Crochet hook J-10 6 mm
- Polyfill (you can even upcycle one of your gently used pillows)
- Scissors
- Tapestry needle
- Cinnamon stick (or a vine cork, small twig, etc)
Abbreviations
CH – chain
ST – stitch
SL – slip stitch
HDC – half double crochet
FHDC – foundation half double crochet

Crochet Pumpkin Pattern Notes
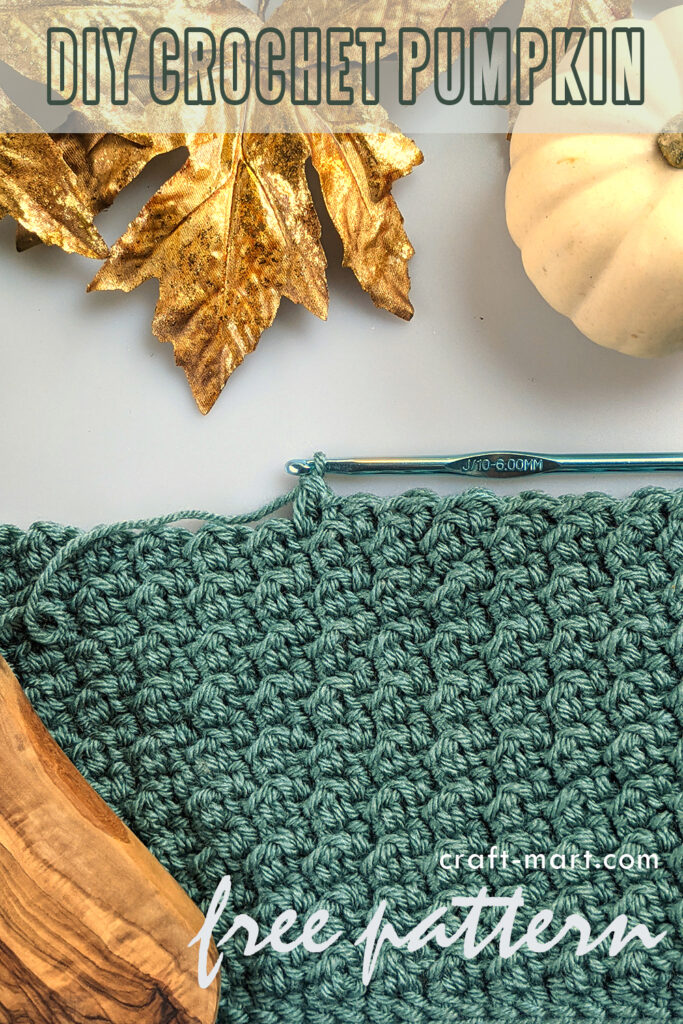
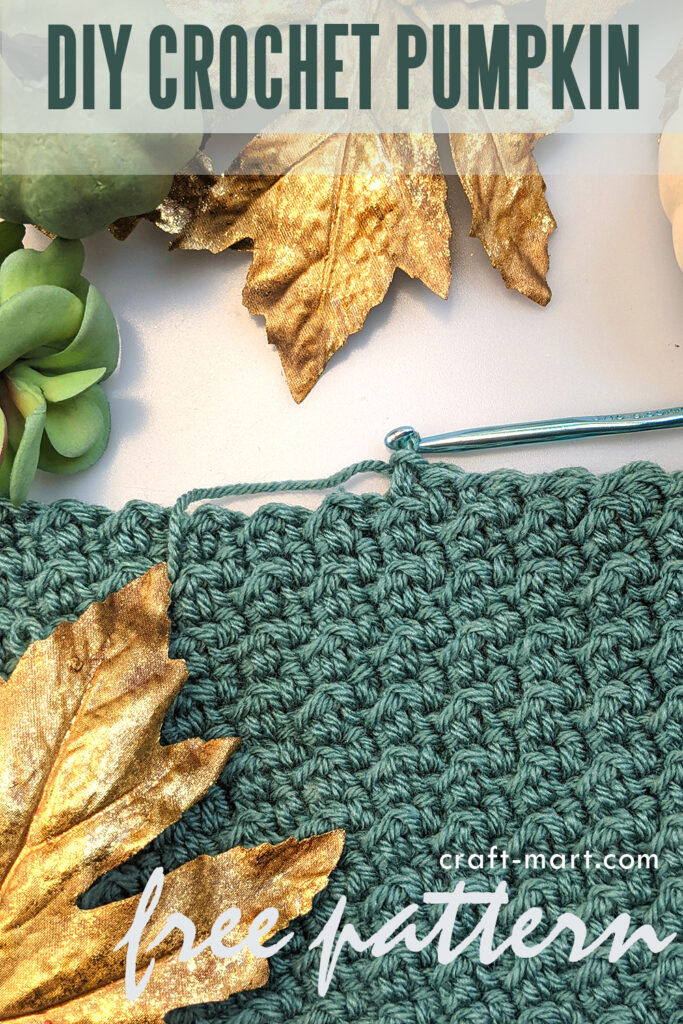
First, chain any even number (or do FHDC – foundation half double crochet). FHDC is a wonderful way to start any project as it creates an even border.
As illustrated above, this easy crochet stitch is worked in pairs/clusters of 2 stitches: SL (slip stitch) & HDC (half double crochet).
There is no wrong or right side as this crochet pumpkin pattern is reversible. The pattern is worked back and forth, not in the round.
Equally important, this easy pattern is a one-row repeat.
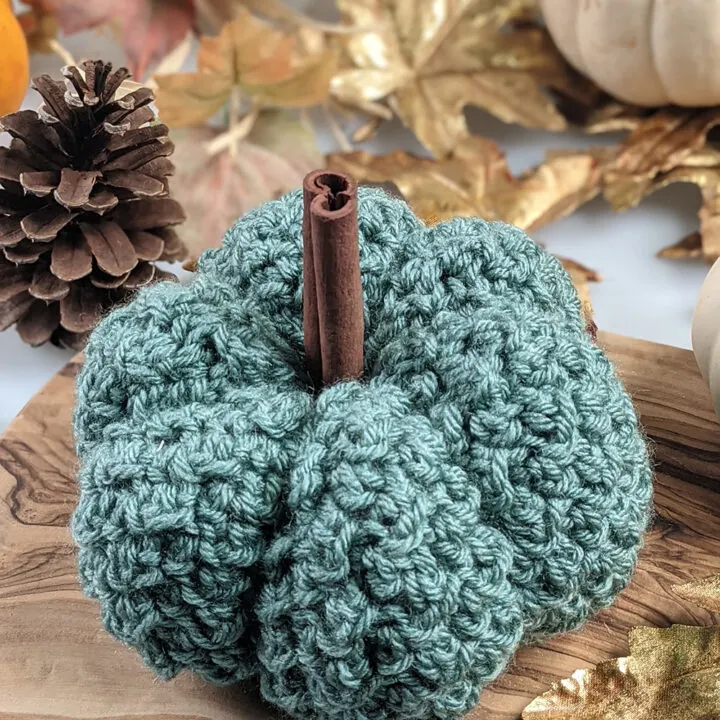
Finished Size of Crocheted Pumpkin
3-D Pumpkin dimensions: 5.5″ (diameter) x 3″ (height);
16″ x 7″ rectangle used to create the final shape of the pumpkin.

PATTERN INSTRUCTIONS
CH 52 + 1.
Row 1: *SL into second ST from the hook, HDC into next st.* Continue between * * to the end of the row. The last stitch will be HDC. CH 1, turn.
Row 2: *SL into HDC from the previous row, HDC into SL ST below.* Continue between * * to the end of the row. The last stitch will be HDC into SL ST below. CH 1, turn.
Row 3 – 26 (all other rows): repeat row 2.
Finally, you’ll have a 16″ x 7″ rectangle that we’ll use to create a pumpkin.
Lastly, fasten off leaving an approximately 30-inch tail. It will be used to connect the sides of the rectangle and shape the pumpkin.
Shaping Your Crochet Pumpkin
Next, sew the short sides of the rectangle together forming a tube. Then cinch the bottom closed by using a tapestry needle and pulling on the yarn as hard as necessary to close it.
Now stuff the pumpkin with polyfill to make it round and fluffy but don’t overstuff it. Next, cinch the top of the crocheted pumpkin with the same long piece of yarm. However, don’t close it completely so you can insert the stem later.
Finally, in order to shape your pumpkin, put the needle with the yarn through the top and pull it through the bottom hole. Next, work about 6 times around the pumpkin spreading the thread evenly around creating 6 equal intentions.
Lastly, make a double knot and secure the thread. Pull it through the side of the pumpkin and cut it to hide the tail.
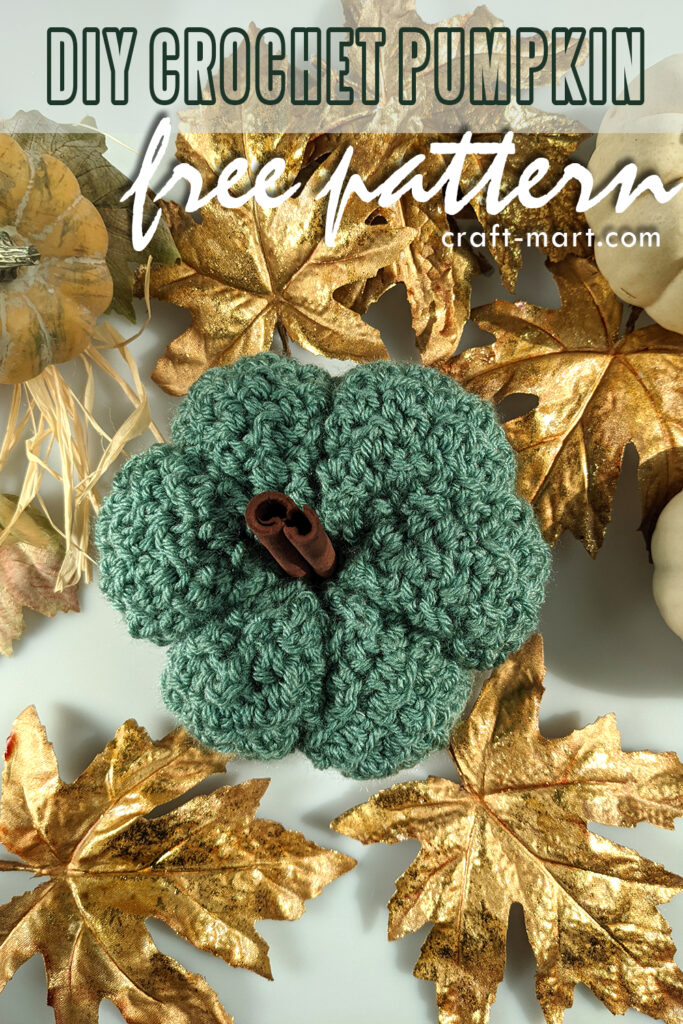
As a finishing touch, put a cinnamon stick into the top opening to create a stem for your crochet pumpkin. You can also add a few drops of cinnamon, orange, and clove oil to lightly scent it.
Most importantly, your kitchen or living room will fill up with a wonderful aroma of fall and pumpkin spice.
Now you’ve created your own crocheted pumpkin. Furthermore, don’t stop there and crochet a couple more using the same easy crochet stitch.
As a matter of fact, you can crochet a few pumpkins in different sizes and colors to fill up your home with handmade goodness.
Here is a FREE PRINTABLE PDF of this Crochet Pumpkin Pattern:

Crochet Pumpkin Pattern
This Easy Crochet Pumpkin pattern is FREE and comes with a FREE PDF printout. Use just two basic crochet stitches to craft this textured pumpkin for your cozy home! What a great fall décor idea! This rustic crochet pumpkin will last from fall through Thanksgiving and until Christmas. You can create a variety of pumpkins in all different sizes using just two basic crochet stitches.
Materials
- Medium weight yarn (4) in your favorite color
- Polyfill stuffing
- Cinnamon stick
Tools
- Crochet hook J-10 6 mm
- Scissors
- Tapestry needle
Instructions
- CH 52 + 1.
- Row 1: *SL into second ST from the hook, HDC into next st.* Continue between * * to the end of the row. The last stitch will be HDC. CH 1, turn.
- Row 2: *SL into HDC from the previous row, HDC into SL ST below.* Continue between * * to the end of the row. The last stitch will be HDC into SL ST below. CH 1, turn.
- Row 3 - 26 (all other rows): repeat row 2.
- Finally, you'll have a 16" x 7" rectangle that we'll use to create a pumpkin.
- Fasten off leaving an approximately 30-inch tail. It will be used to connect the sides of the rectangle and shape the pumpkin.
- Sew the short sides of the rectangle together forming a tube. Then cinch the bottom closed by using a tapestry needle and pulling on the yarn as hard as necessary to close it.
- Now stuff the pumpkin with polyfill to make it round and fluffy but don't overstuff it. Next, cinch the top of the crocheted pumpkin with the same long piece of yarm. However, don't close it completely so you can insert the stem later.
- Finally, in order to shape your pumpkin, put the needle with the yarn through the top and pull it through the bottom hole. Next, work about 6 times around the pumpkin spreading the thread evenly around creating 6 equal intentions.
- Lastly, make a double knot and secure the thread. Pull it through the side of the pumpkin and cut it to hide the tail.
- As a finishing touch, put a cinnamon stick into the top opening to create a stem for your crochet pumpkin. You can also add a few drops of cinnamon, orange, and clove oil to lightly scent it.
Notes
This easy crochet stitch is worked in pairs/clusters of 2 stitches: SL (slip stitch) & HDC (half double crochet). There is no wrong or right side as this crochet pumpkin pattern is reversible. The pattern is worked back and forth, not in the round. Equally important, this easy pattern is a one-row repeat.
- CH - chain
- ST - stitch
- SL - slip stitch
- HDC - half double crochet
- FHDC - foundation half double crochet