A delicate crochet heart is a perfect Valentine’s DIY. Notably, you can use any scrap yarn for this quick and easy crochet project.
Furthermore, clean and organize your craft room, and in the process, create this lovely crochet heart from leftover yarn. Additionally, it is a lovely Valentine’s crochet project and a great way to say ‘I LOVE YOU’ to someone any day of the year.
Let’s crochet a heart using a free crochet project and a free diagram. With this in mind, gather your yarn, and crochet hook, and let’s get started!
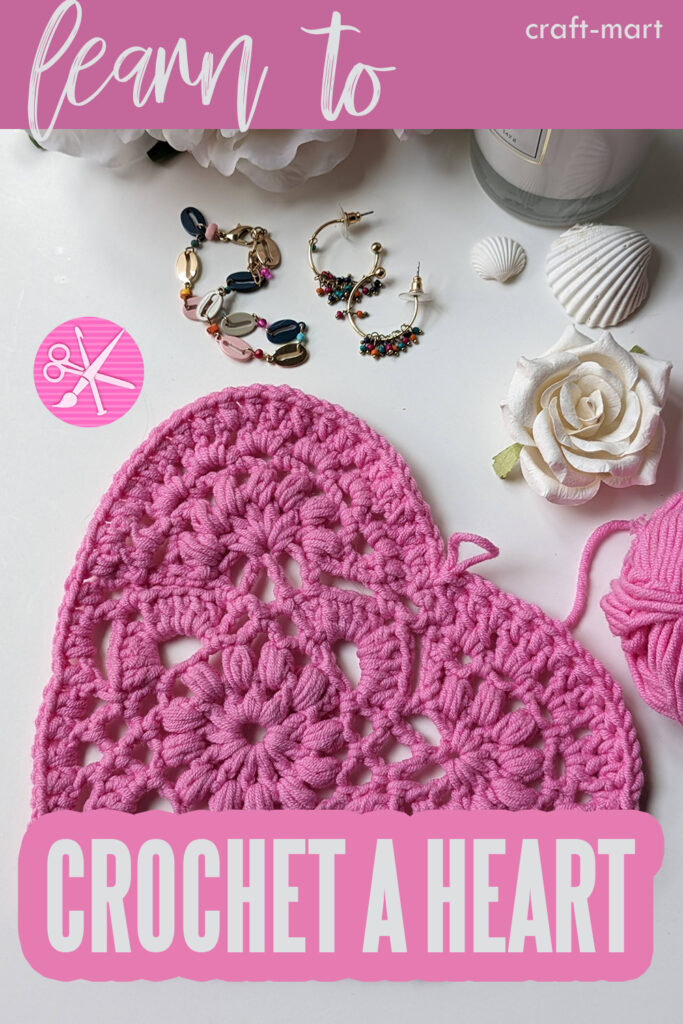
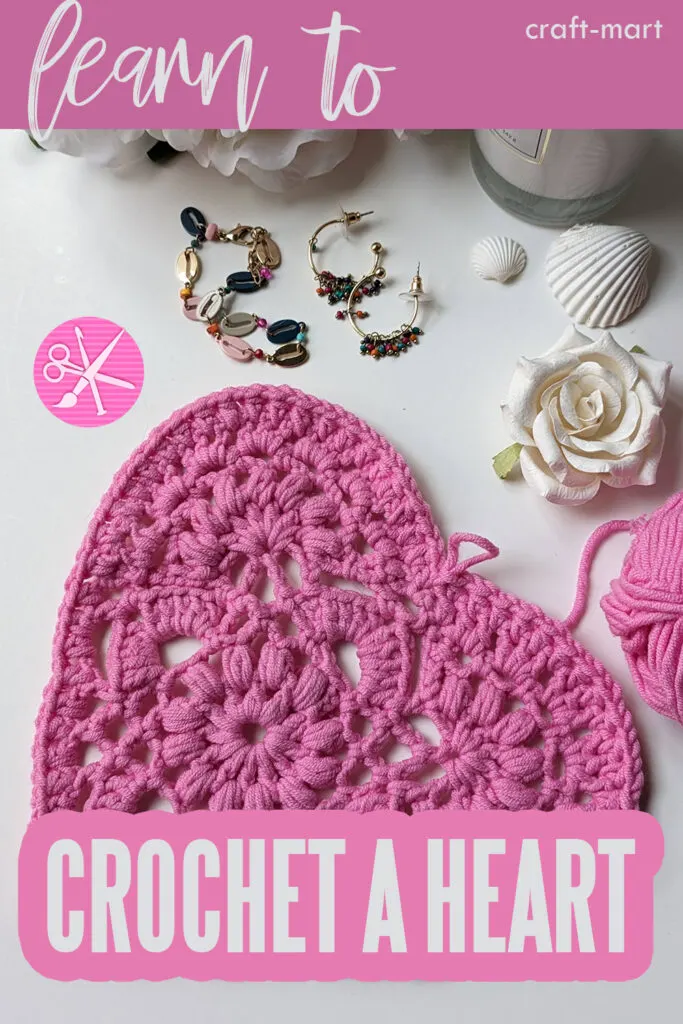
For this tutorial, we will refer to a lacy crochet heart pattern by Garnstudio. With a few modifications, this vintage crochet heart turned out to be a delightful project for Valentine’s Day.
Important to realize that this crochet heart is composed of a square and two semi-circles. As illustrated, you will crochet a square first and then add semi-circles to shape a heart.
Abbreviations of Stitches for Crochet Heart (US terms)
- CH – chain
- CH SP – chain space
- SC – single crochet
- DC – double crochet
- PS – puff stitch
- SL – slip stitch
- HDC – half double crochet
For this quick crochet project, you will use several crochet stitches: chain, slip stitch, single crochet, double crochet, and puff stitch or bobble crochet stitch. Check out our tutorial if you are not familiar with this stitch.
Crochet Heart Step 1 – Round 1
CH 5 stitches, slip stitch into the first chain to make a circle.
Step 2 – Round 2
CH 3 for the beginning of round 2 (counts as first DC), CH1. Next, eleven DC + CH1 into the circle. Slip stitch into the top of the beginning chain 3 to finish the round. (12 DC, 12 CH1)
Step 3 – Round 3
CH3, PS (puff stitch or bobble stitch) worked into CH1 space, CH3; repeat this cluster for the whole round. (12 PS, 12 CH3).

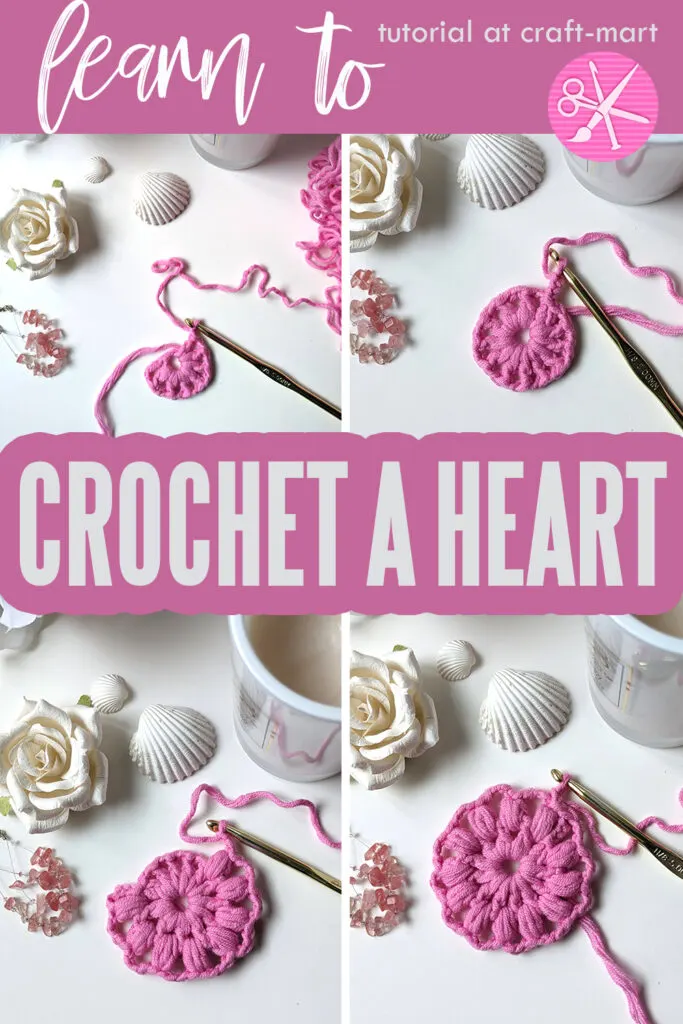
Step 4 – Round 4
In this round, we will be forming the 4 corners of the square. Consequently, the project no longer looks like a circle but now resembles a square shape.
So, start with CH1, then SC into the next CH3 SP. * CH4, SC into the next CH3 SP. CH4, SC into the next CH3 SP. As illustrated, this sequence creates the first side of the square.
Next, we will create the first corner. CH6, SC into the next CH SP. * SL into beginning CH1.
Repeat the sequence of stitches between * * three more times. As a result, you’ll have a square with 4 corners.
Step 5 – Round 5
Next, we’ll make the square more defined. As a result, you will have 4 corners connected with 5 chain stitches.
CH3 + CH1, SC into the next CH SP. CH5, SC into the next CH SP, CH1.
Now we are at the corner. We will work 5DC into that CH6 SP+ CH3, 5DC.
Finally, repeat the sequence between * * 3 more times to complete the square. SL into the top of the beginning CH3.
Step 6 – Round 6
Finally, this is the last round to complete the square for our crochet heart. As illustrated, it has chain stitches and double crochet stitches to form a perfect square.
First, CH3+CH3 (represents DC and CH3 space). Second, *DC into the CH SP, CH3, DC into CH SP. CH5, DC into CH SP of the corner, CH4, DC into the same CH SP, CH5.*
Lastly, repeat the sequence between * * to complete the round. SL at the top of the first CH3.
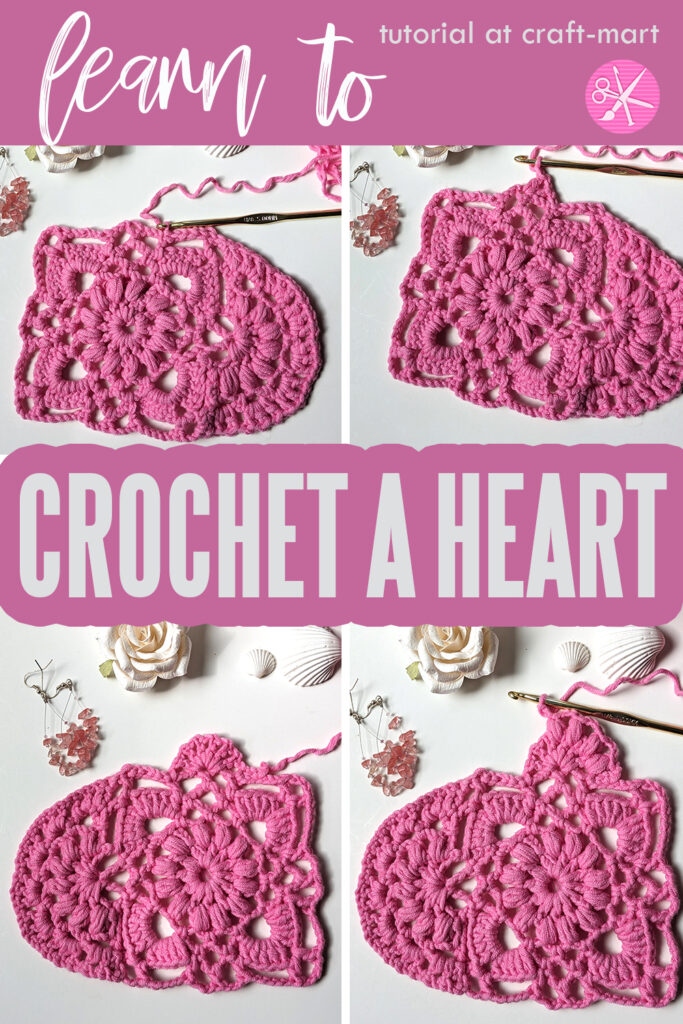
As can be seen, you have finished the first part of the project – a SQUARE. Next, we’d add 2 SEMI-CIRCLES to shape a heart.


Crochet Heart Step 7 (row 1 of the semi-circle)
As illustrated above, we’ll start adding a semi-circle to one side of the square. First, CH1.
*DC into the middle DC stitch from the previous row, CH1*. Repeat * * 5 more times (total 6DC, 7 CH1).
Lastly, SL stitch 3 times to the middle of CH5 of the previous row, CH1, turn. Now you are ready to start the next row.
Step 8 – row 2 of semi-circle
In short, this is a row of puff stitches separated by chains 3. In fact, you are familiar with this sequence already. It is similar to step 3 in creating a square.
Start by making puff stitches in the chain spaces of the previous row. *PS, CH3*, repeat 5 times between **. Finally, at the end of the row PS, CH1, SL in the middle of CH5. SL 3 times to the DC of the previous row, CH3, turn.
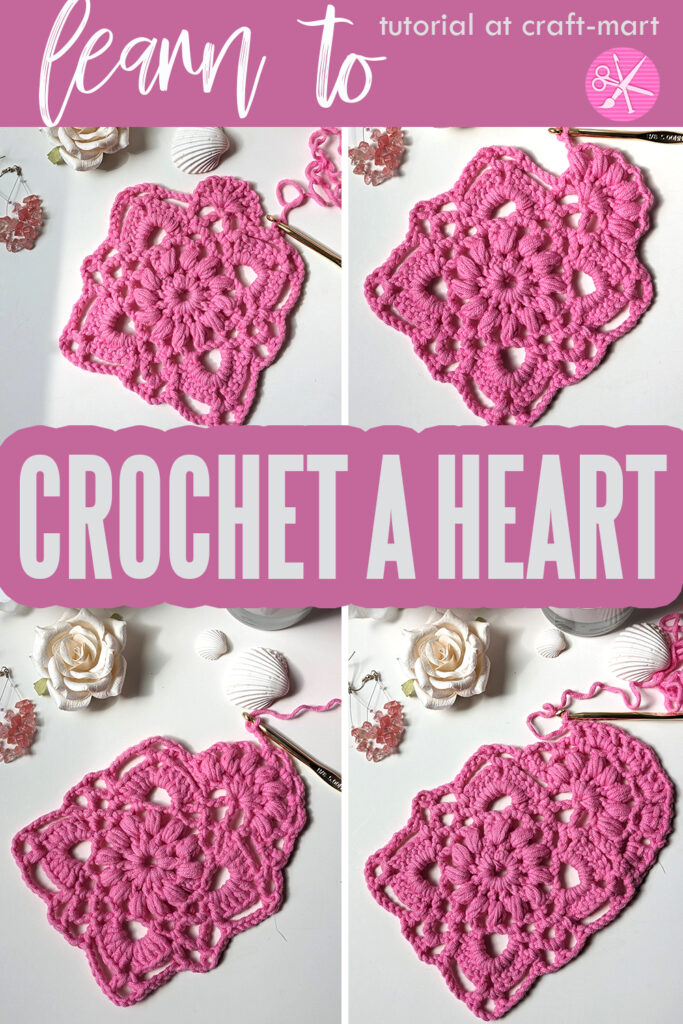

Step 9 of Crochet Heart
SC into CH SP between the first and second PS, CH5. Repeat between ** four more times, CH3, SL on top of DC of the previous row. Now you are ready for the final row of the first semi-circle. SL three times until you reach the corner of the square. CH1, turn.
Step 10 – finishing the semi-circle
2 DC into the first CH SP, CH1, *3 DC into the next CH SP, CH1*. Repeat ** five more times, SL into the corner. SL 5 times to start a second semi-circle.

Step 11
You will have to repeat steps 7-10 to finish the second semi-circle. Now the heart shape is done and we will add a border and finishing touches to complete the project.

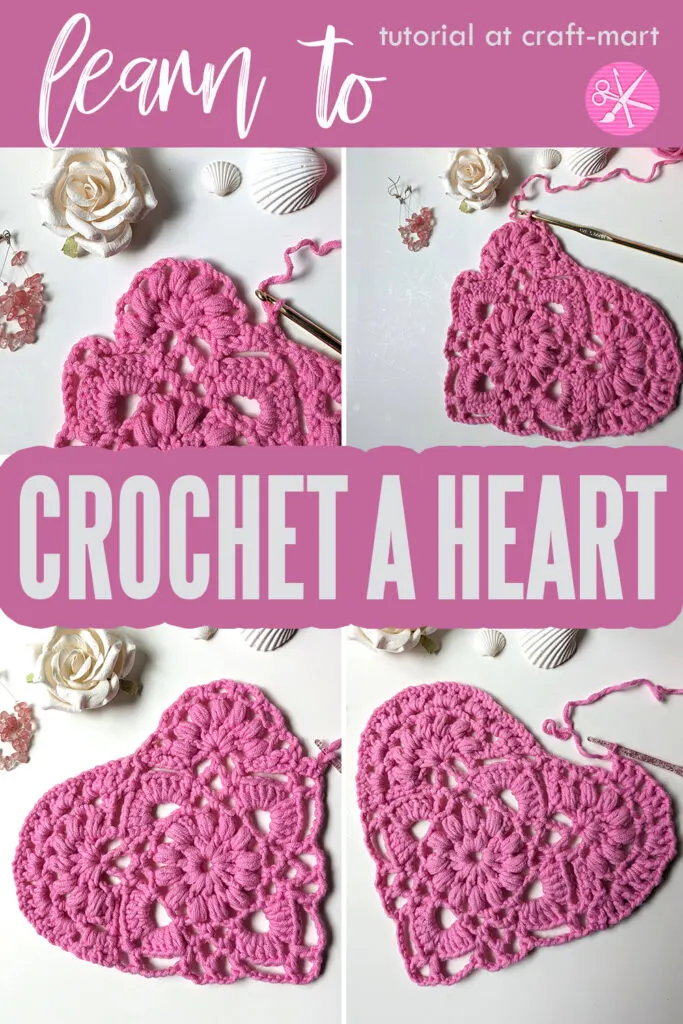
As a result, your crochet heart is almost finished. SL in the corner of the square as you finish the last round for the second semi-circle.

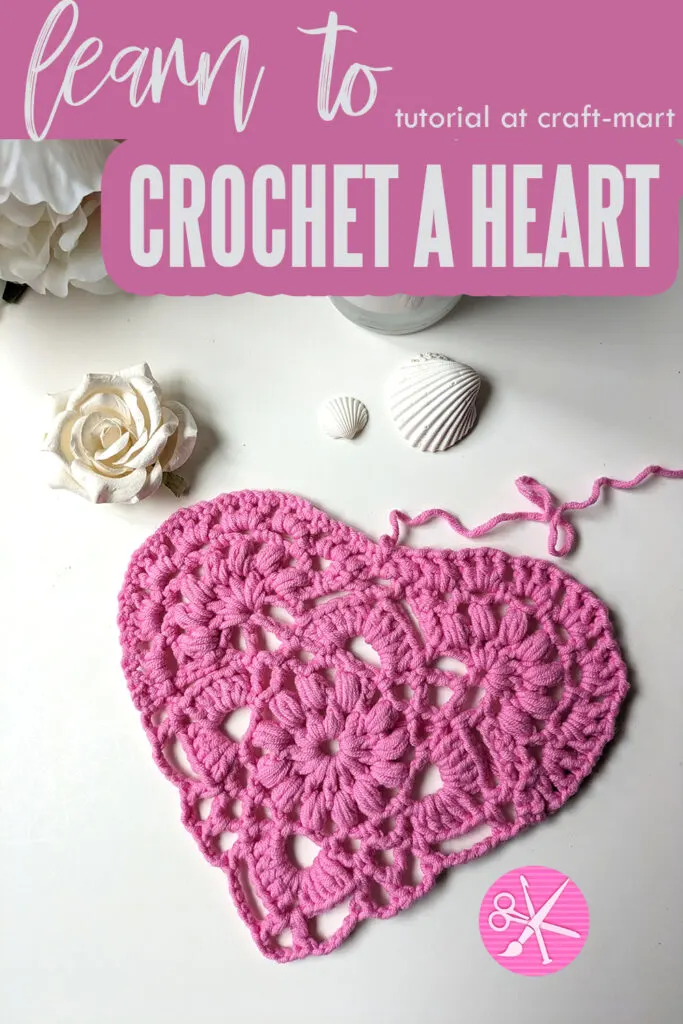
Step 12 – adding a border
Lastly, we will add a border to our crochet heart. It is comprised of easy HDC and CH1 stitches. As shown below, go all around the heart to complete a border and end it with a slip stitch.
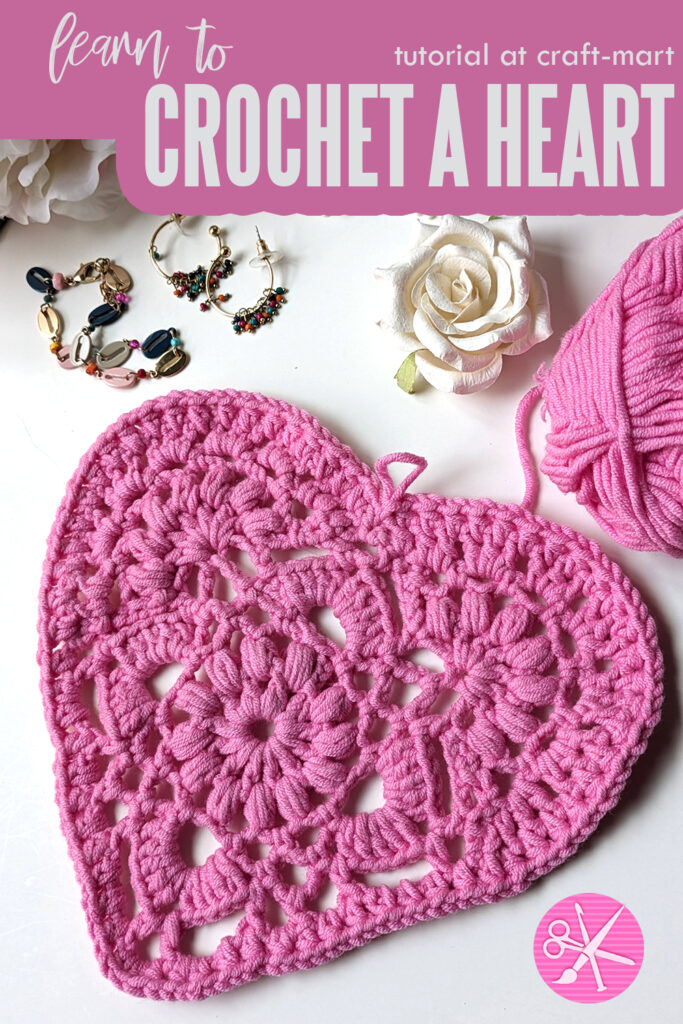

As a result, you have a beautiful vintage crochet heart that you can use for home decorations, as a birthday present, or Valentine’s gift. Furthermore, you can put it on canvas as a lovely handmade Valentine’s Day decor.