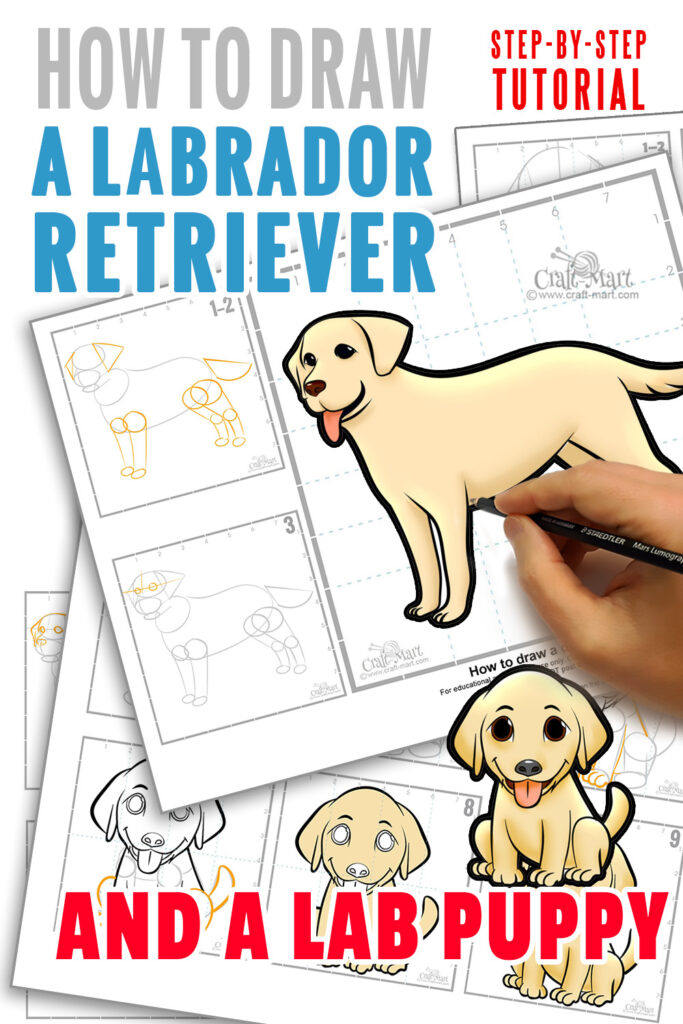
Learn how to master a cute puppy drawing and a grown-up dog! In this tutorial, we will draw a Golden Retriever – one of the most popular breeds of dogs in the US and many other countries.
Hopefully, this tutorial will help kids draw a cute Lab puppy with all their adorable “puppy eyes.” As a matter of fact, the distinct feature of this breed is floppy ears that other species of dogs don’t have.

Year after year, Labrador Retrievers are named the most popular breed in the U.S. Their easy-going personalities, gentleness, and excellent trainability make them the perfect family pet.
It would be so fun to learn how to draw your best friend and end up with a cute puppy drawing!
Download our Lab Puppy drawing guide here
Cute Puppy Drawing
Let’s see how to draw a cute lab puppy in 9 easy steps. Most importantly, use vertical and horizontal guidelines if you’re just starting. Later on, you may not need them at all. After all, it all depends on how much time one invests in getting drawing skills.
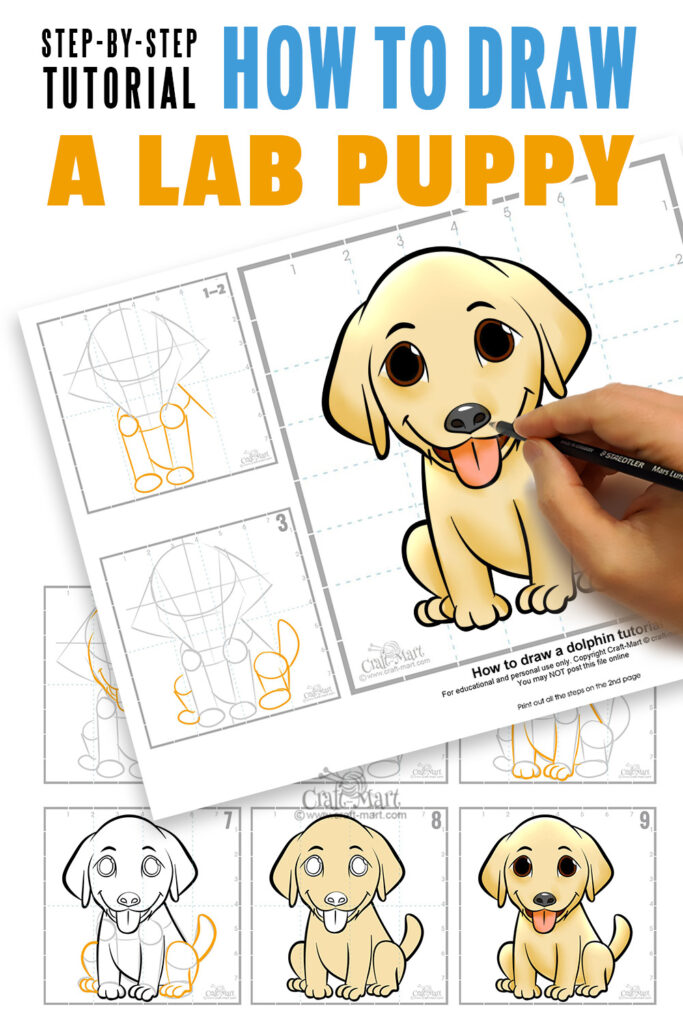
Step 1
First, start with outlining the head of our puppy. You may notice that the size of a head is pretty significant. Like human babies, puppies have large heads. Remember, that at his stage we’re simply defining the general shapes of different body parts. Consequently, all the details will come later.

Note that the center of our puppy’s head is not in the middle of the drawing area. So, it’s always a good strategy to use vertical and horizontal axes for the correct positioning of symmetrical body parts like eyes or ears, for example.
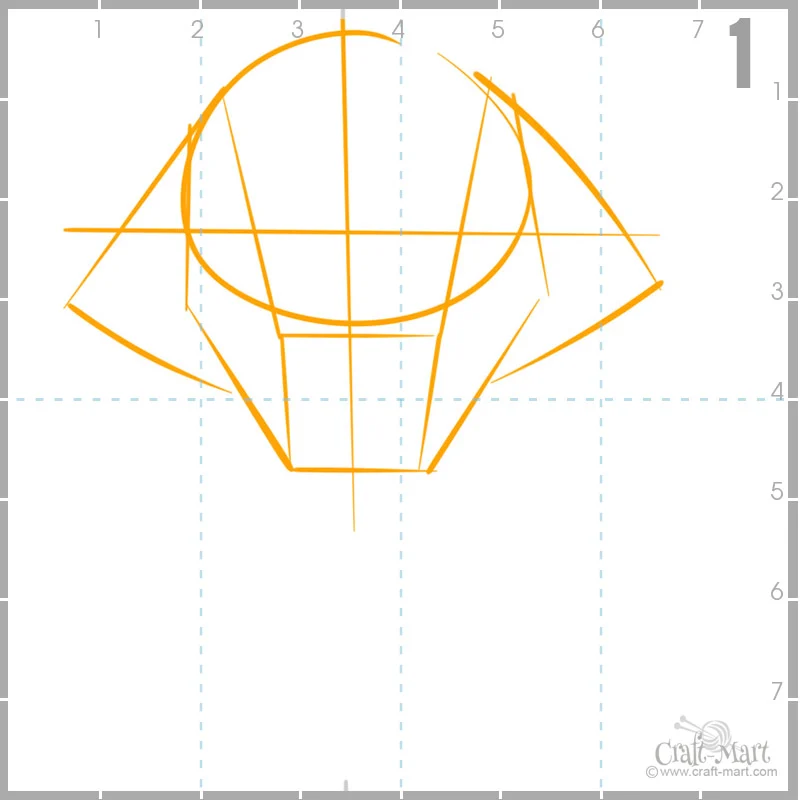
Step 2
Second, continue by drawing the front legs and the puppy’s body. Pay attention to guidelines

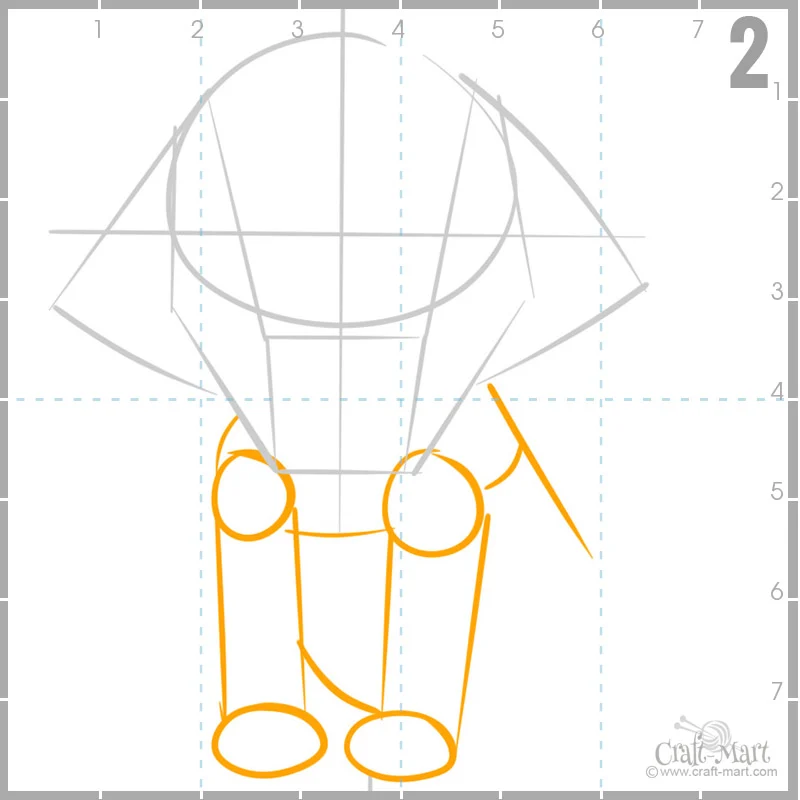
Step 3
Third, add hind legs and tail. As a result, we are done with general outlining in this cute puppy drawing.

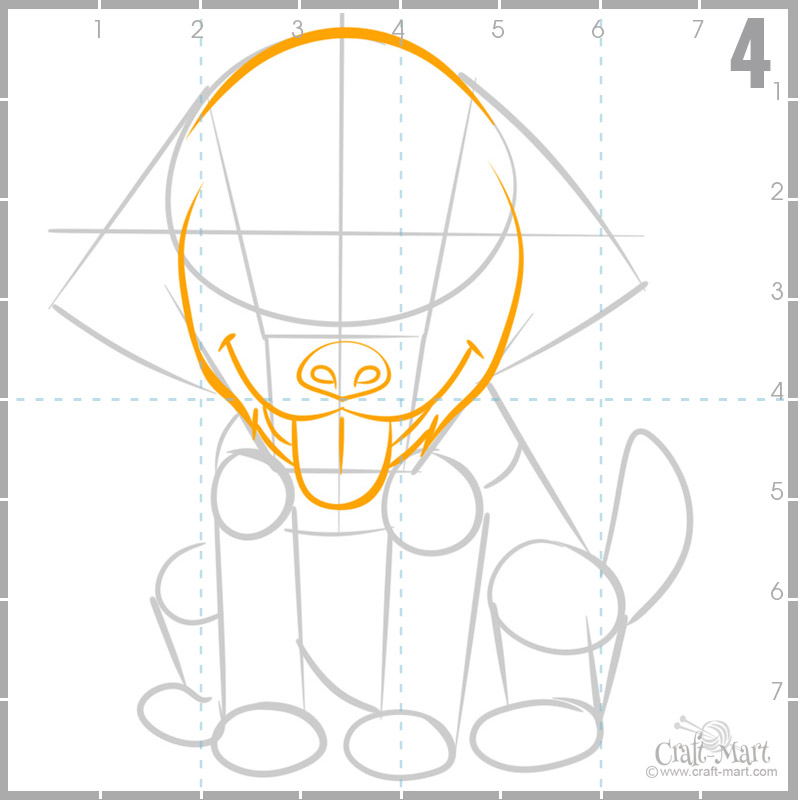
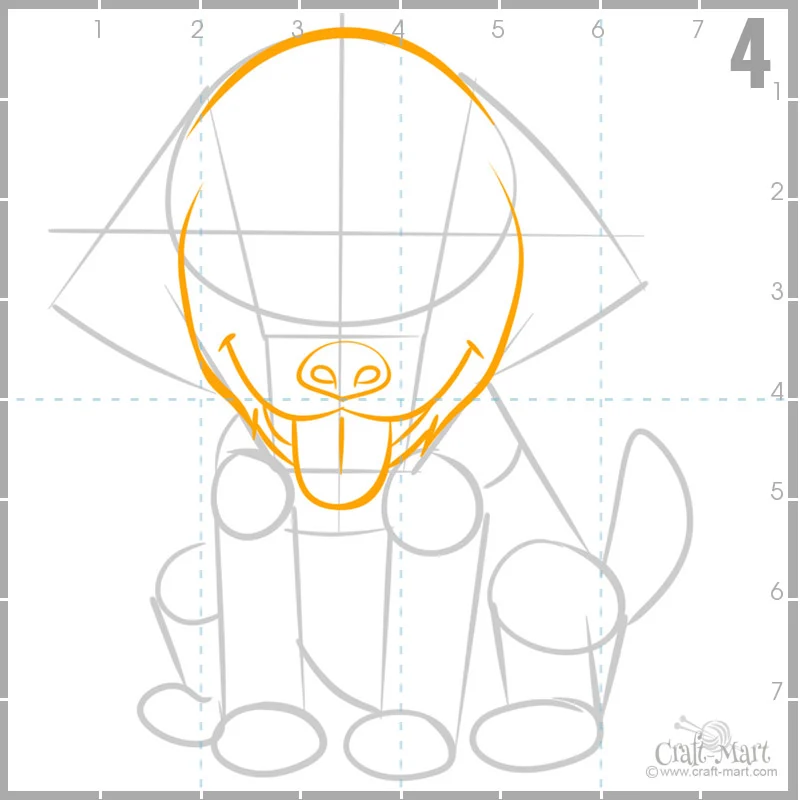
Step 4
Let’s do some finer details starting from the lower part of the puppy’s head. Make a cute puppy smile.
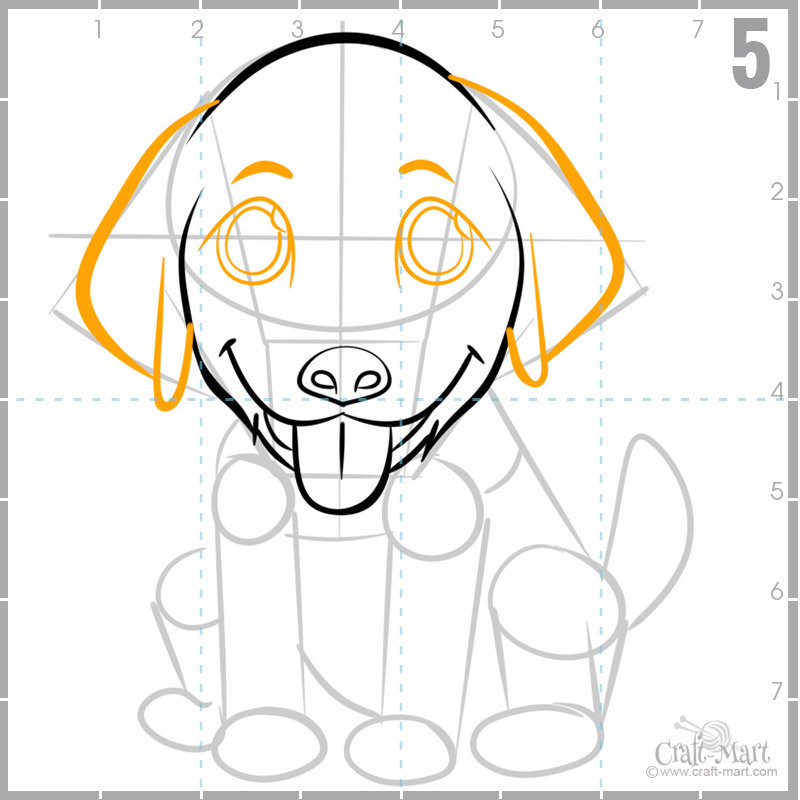
Step 5
Draw cute puppy eyes, eyebrows, and big floppy ears.

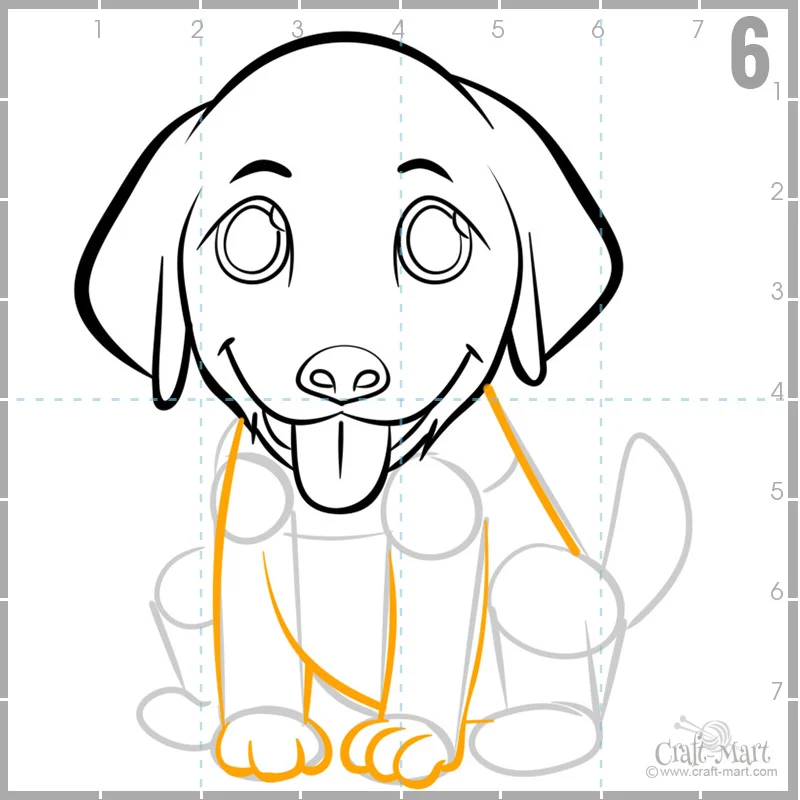
Step 6
Make the front legs just a little curvier, and add fingers and claws.

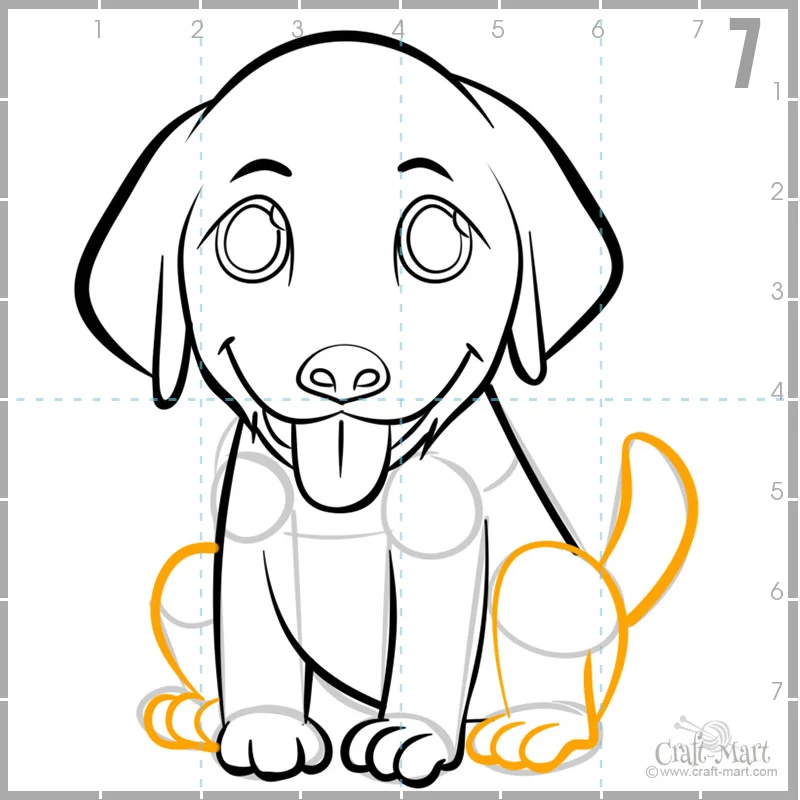
Step 7
Draw hind legs and tail in a “happy” upright position.

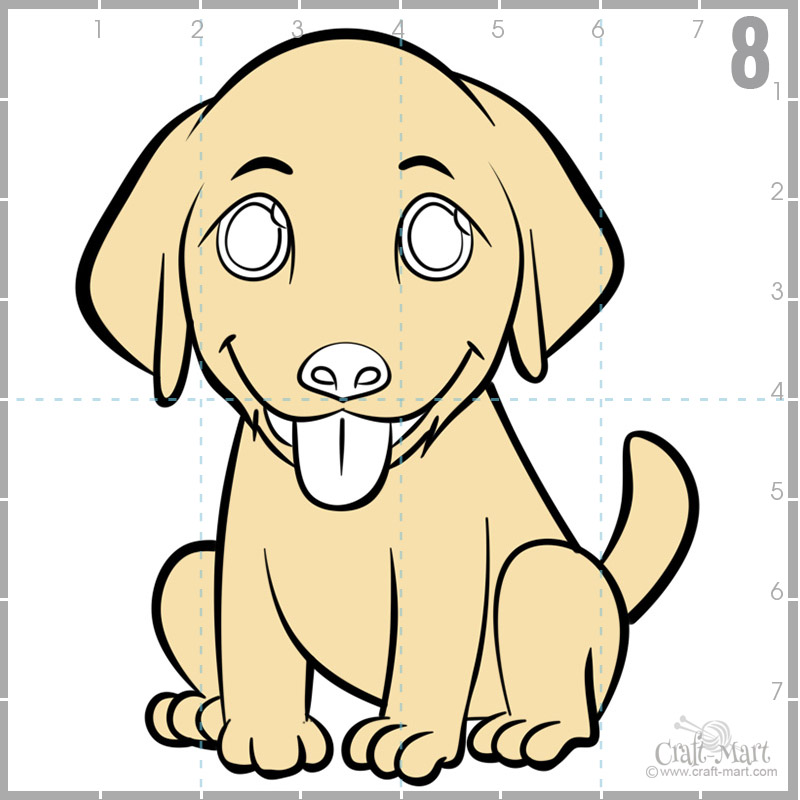
Step 8
Finally, let’s give this puppy some golden color.

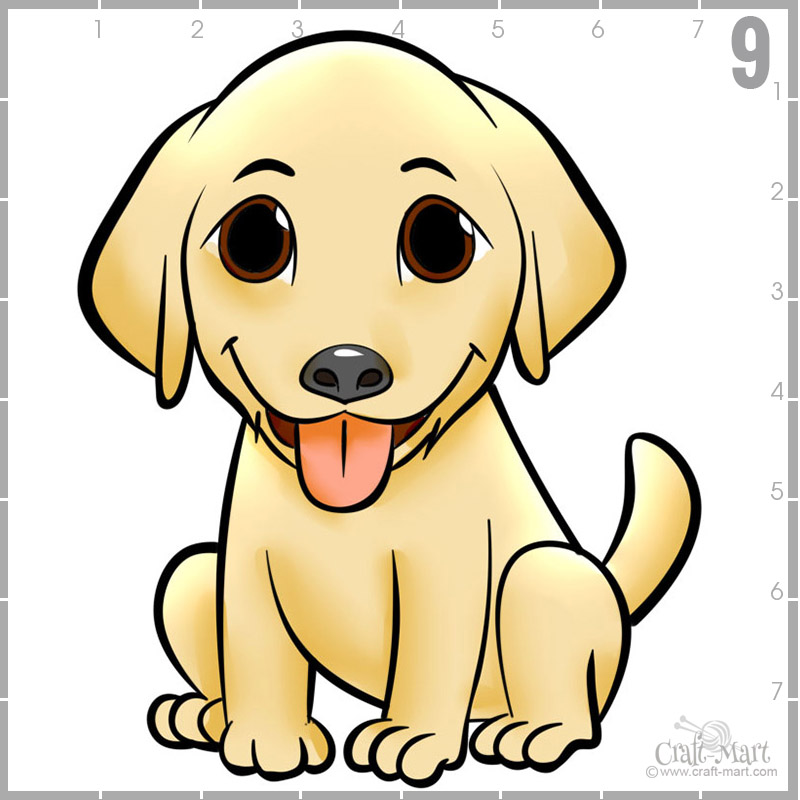
Step 9
Our cute puppy drawing is done! Of course, you may choose any of all other colors for Lab dogs’ coats like Chocolate, White, Silver, etc.

We finally finished our cute puppy drawing. Now, if you feel that it was too easy for your drawing skills, let’s draw something without dashed guidelines.
How to draw a grown-up labrador retriever
Download this Labrador drawing guide here
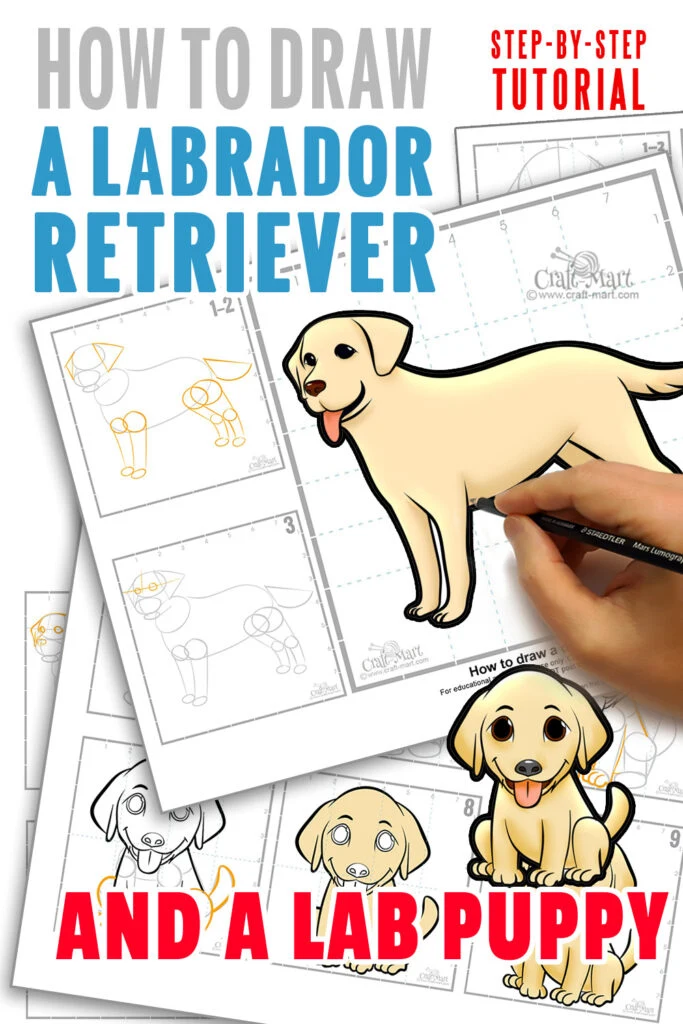
Step 1
First, let’s outline the head and the body. Grown-up dogs have different head-to-body size proportions. We are not using guides but still have vertical and horizontal scales to help with positioning the dog’s body.
Also, the tail is much longer, so make enough space left for it in your drawing.
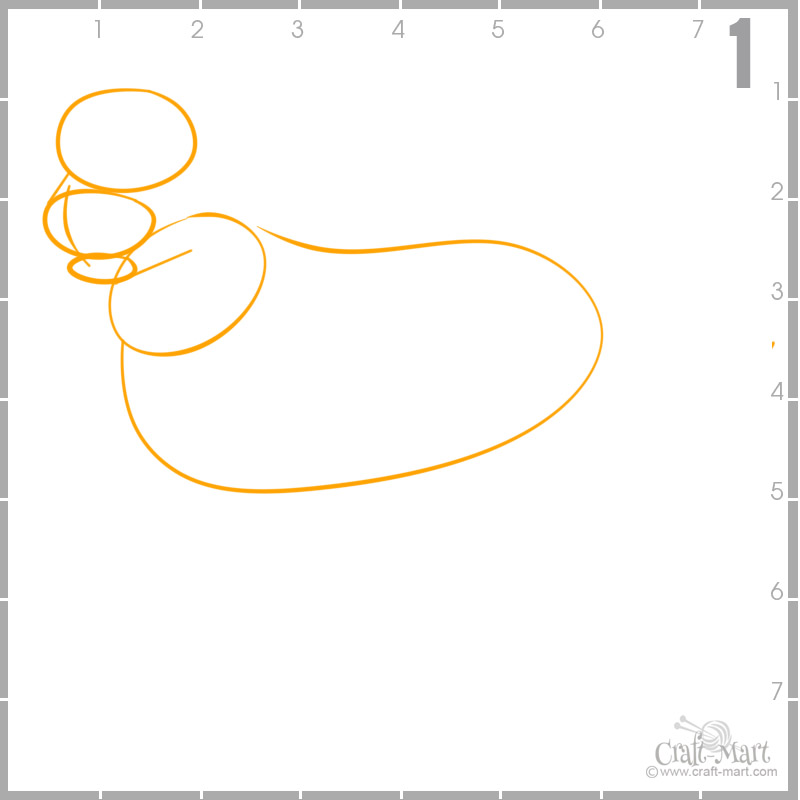

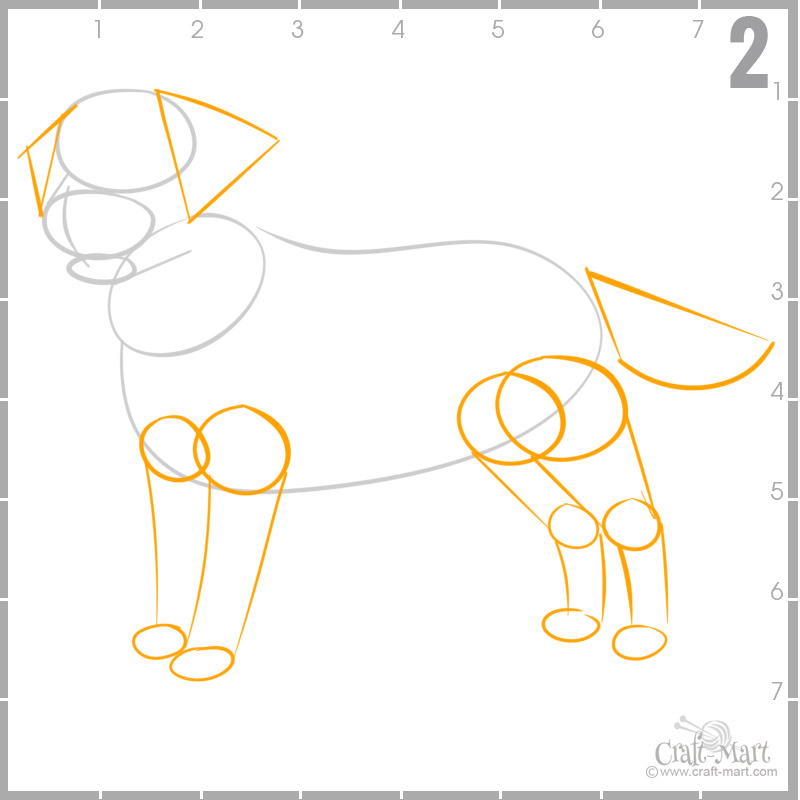
Step 2
Second, add rough shapes of other parts of the body: legs, tail, and ears.
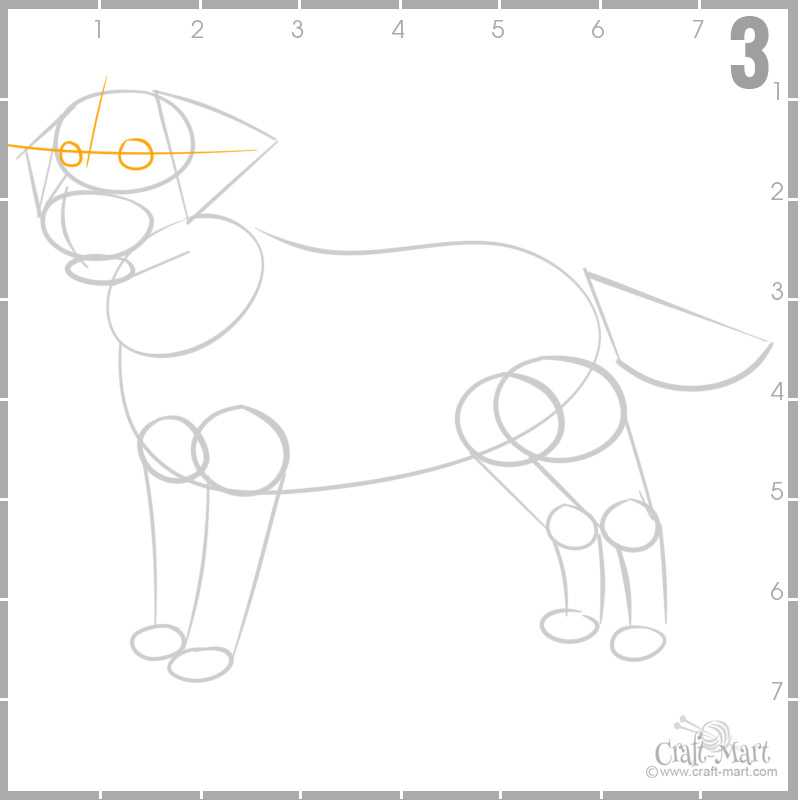
Step 3
Find a center of the Lab’s face and make vertical and horizontal axes. Place two circles to mark places for the dog’s eyes. Notice, the left eye looks smaller because it’s further from us.

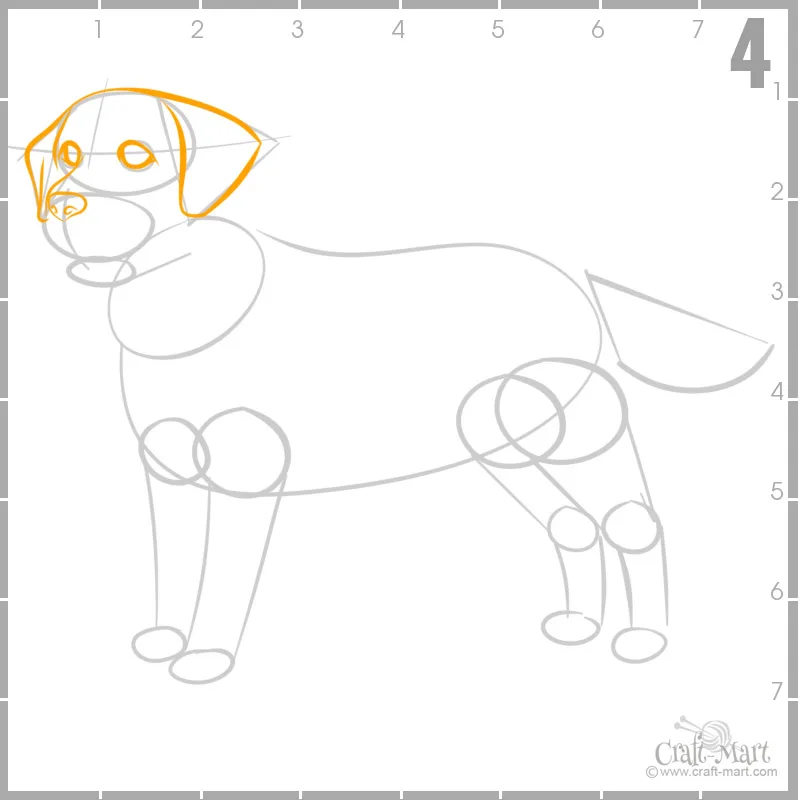
Step 4
Now, we start bringing more detail to the dog’s head and face. We use outlines for each body part as your guide.

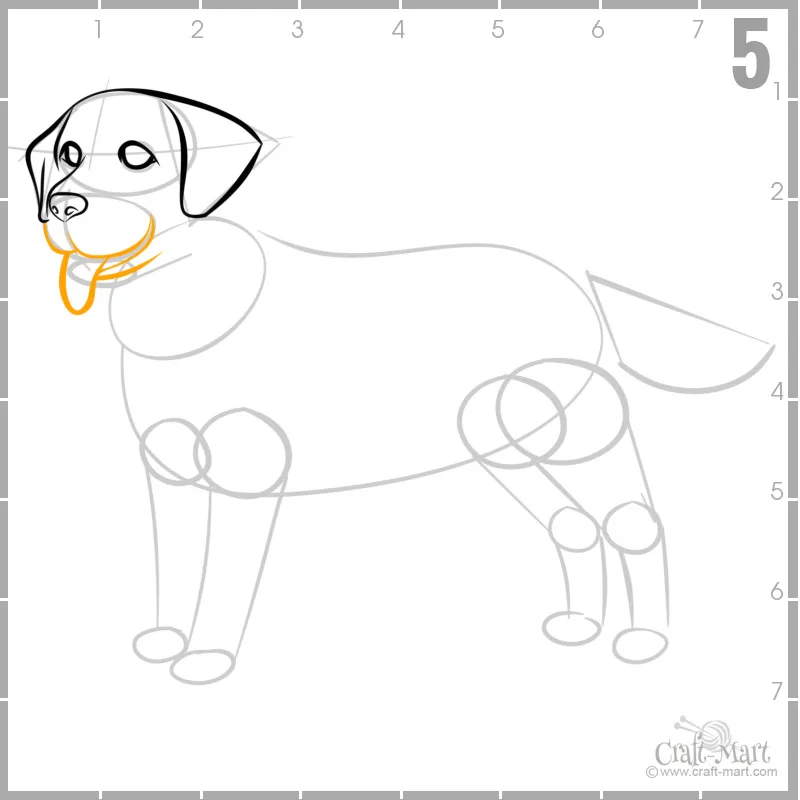
Step 5
Continue drawing the dog’s face. Add a mouth and a tongue.

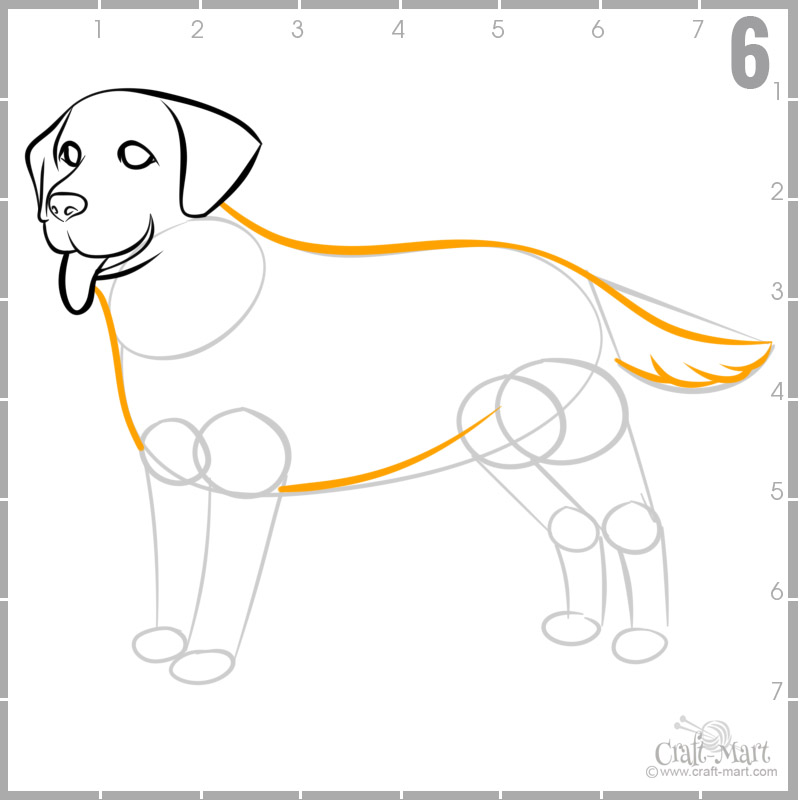
Step 6
The head looks nice. Next, draw Lab’s neck, body, and tail.
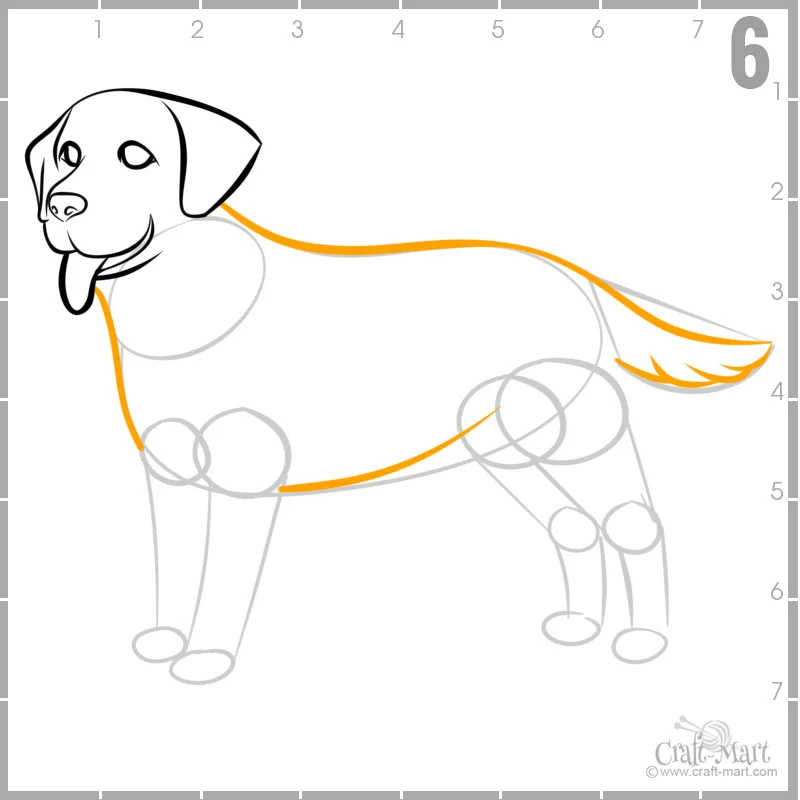
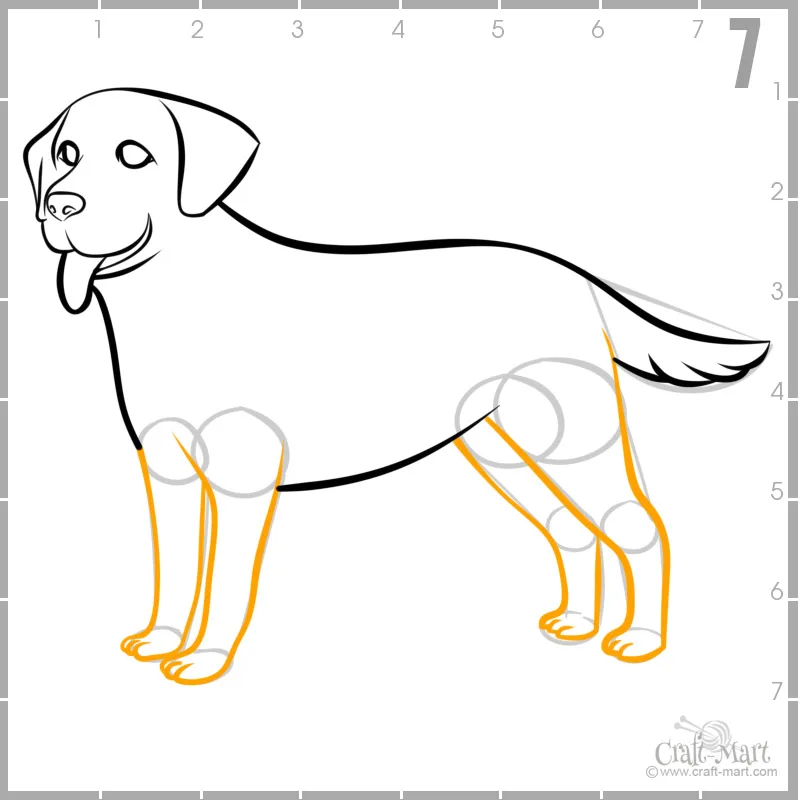
Step 7
Make legs look more realistic.

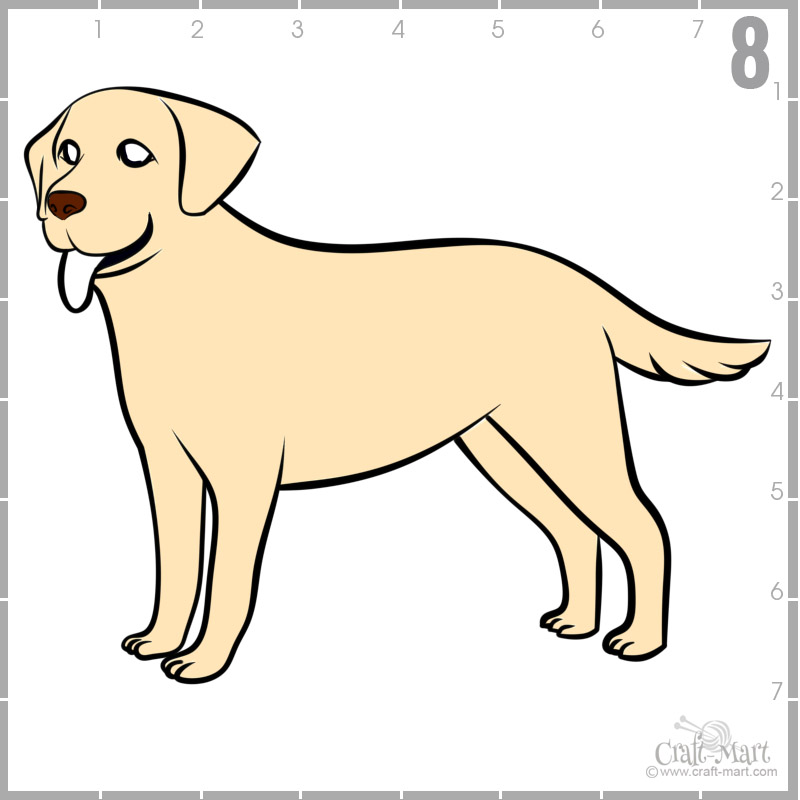
Step 8
Finally, color your Labrador Retriever.

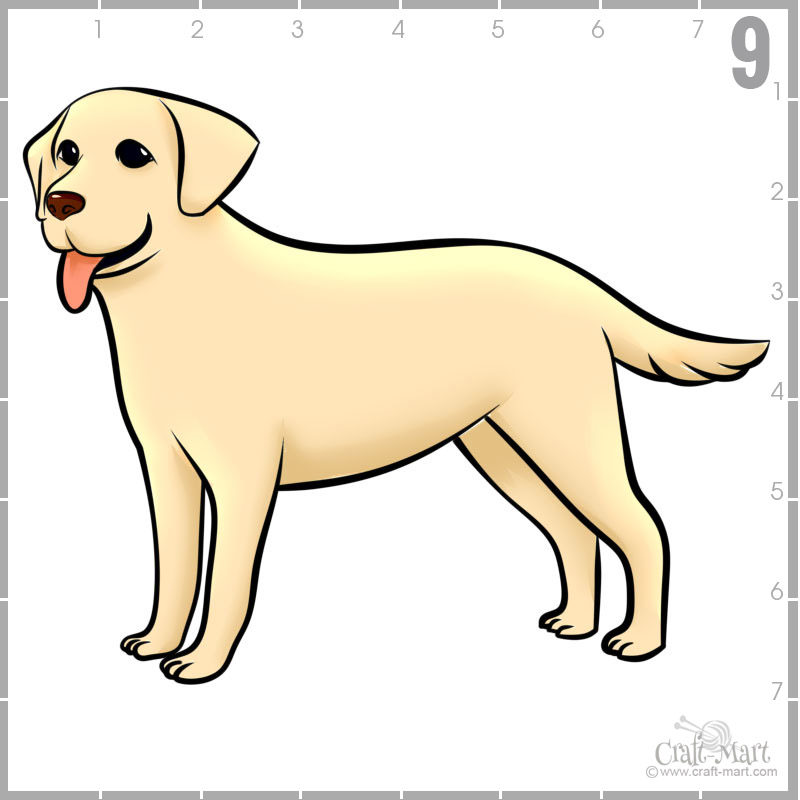
Step 9
Our drawing is finished. Naturally, after this step, you may add as many small details as you want.

Other drawing tutorials
Start