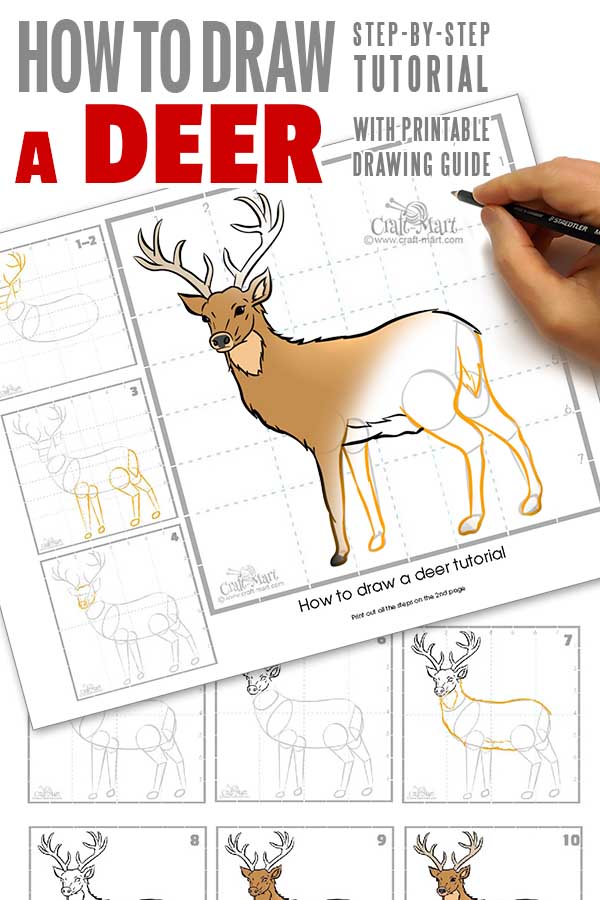
Drawing a deer can be intimidating especially if you are following super detailed tutorials. To make things more simple, we provide an easy printable guide so you may practice drawing a deer using a grid system.
As with all other activities, repeating things multiple times creates a muscular and mental memory. You didn’t learn to ride a bike the very first time you tried it, right?
Are you learning to draw or teaching kids how to draw? We have a collection of easy drawing tutorials with free printable guides to make your practice a breeze.
Other drawing tutorials:
The purpose of this deer drawing tutorial is to get familiar with the basic proportions of the deer’s body. Even if you would learn the names of all the bones and internal organs of this animal, you couldn’t draw a perfect deer. Simplifying things, in the beginning, will make the learning process more effective.
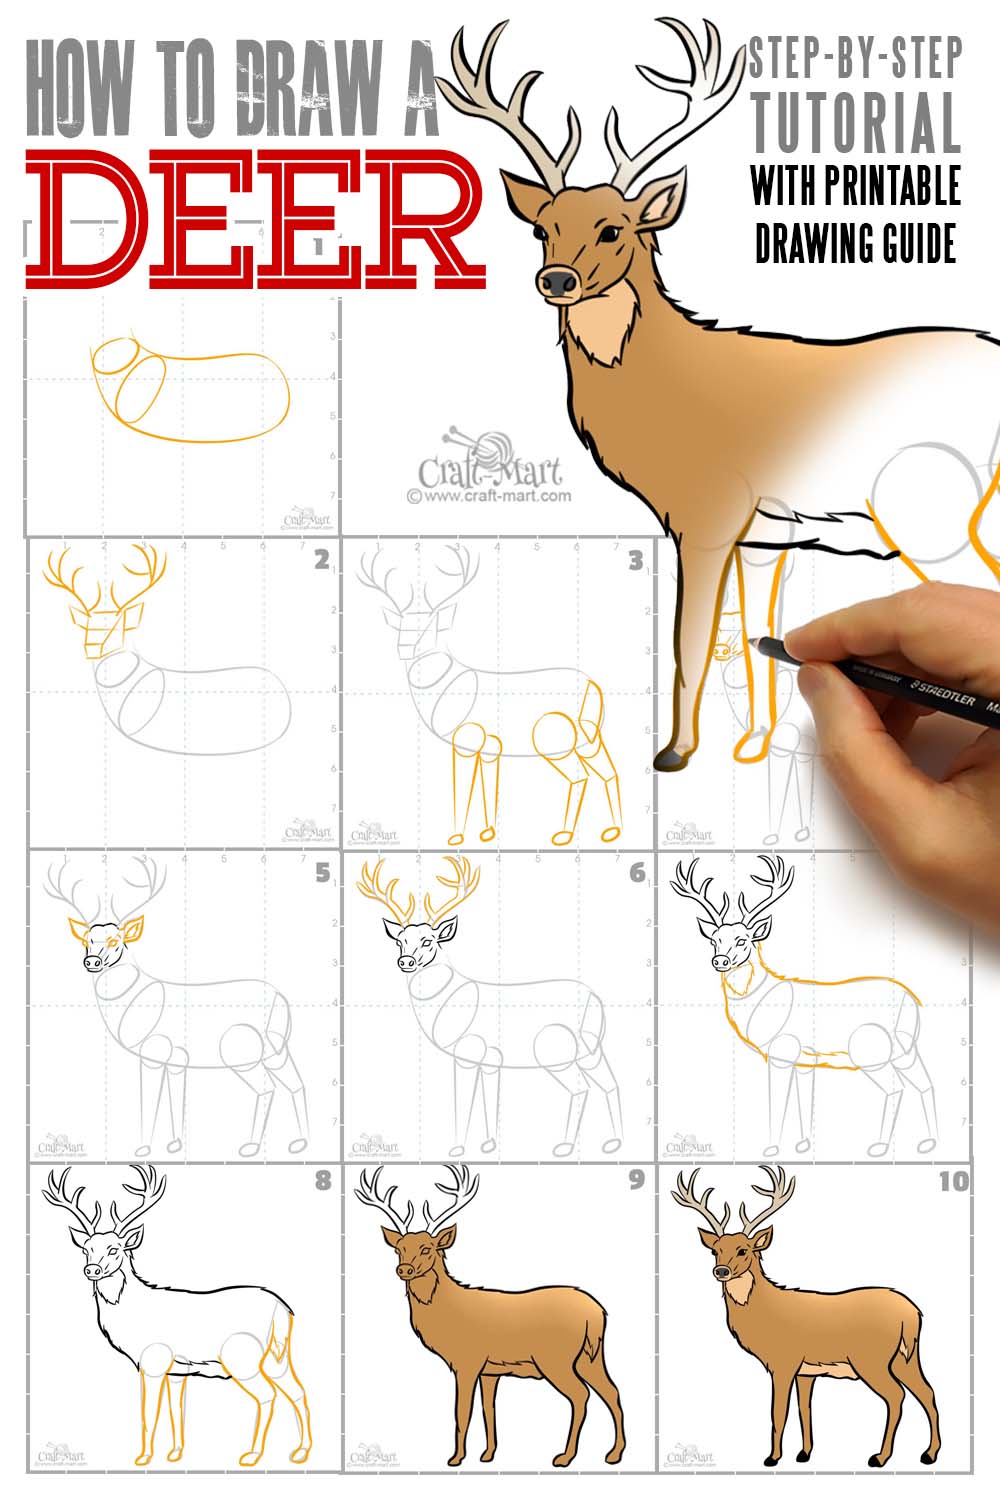

How to draw a deer using simple shapes – drawing a deer made simple
We created a printable “Drawing a deer” guide for you to practice (download it here)
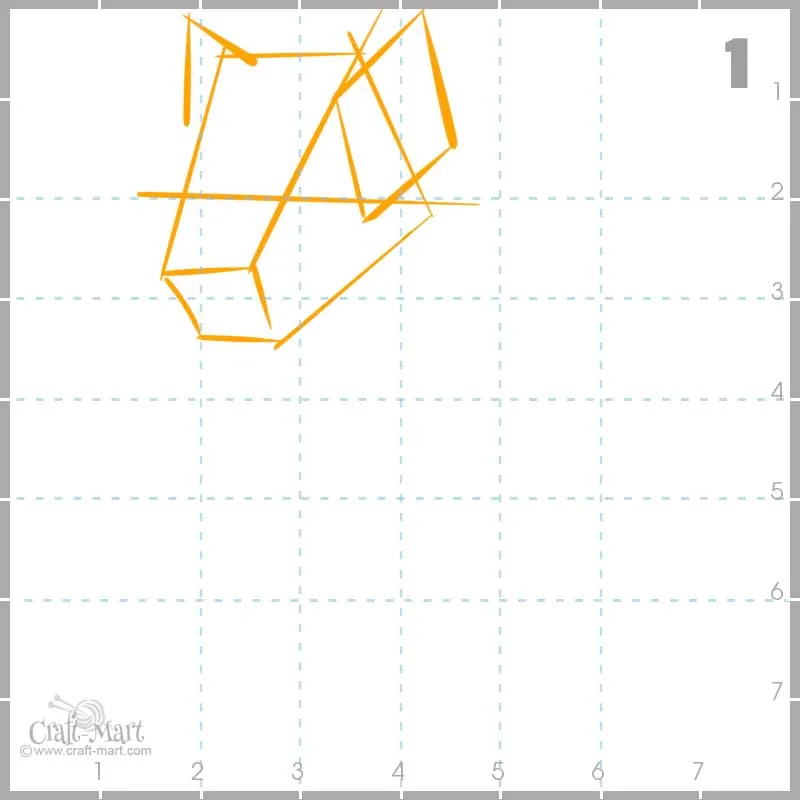
Step 1
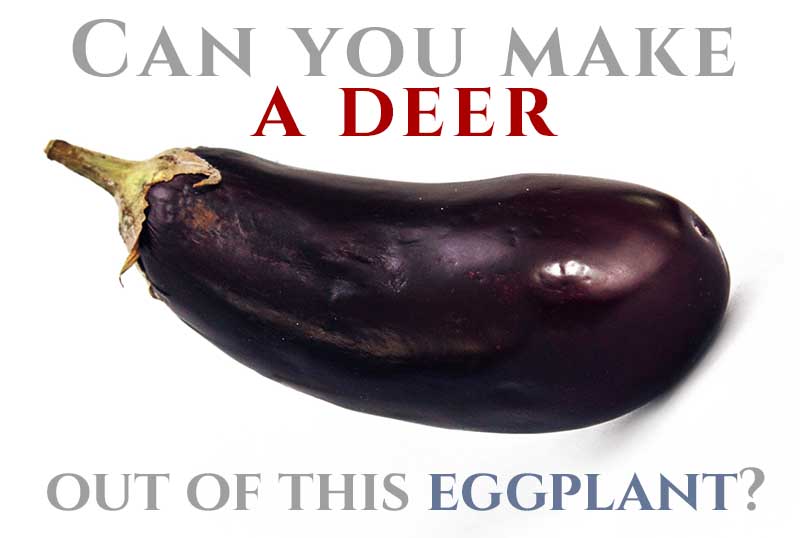
Well, some things look complicated and some look extremely simple, just like this eggplant. Let’s imagine that this eggplant is our deer’s torso.

Now, try to outline the eggplant placing it in our drawing grid using our dashed lines as guides. The base of the neck should not be above the horizontal line #3. The deer’s belly should be between lines #5 and #6.
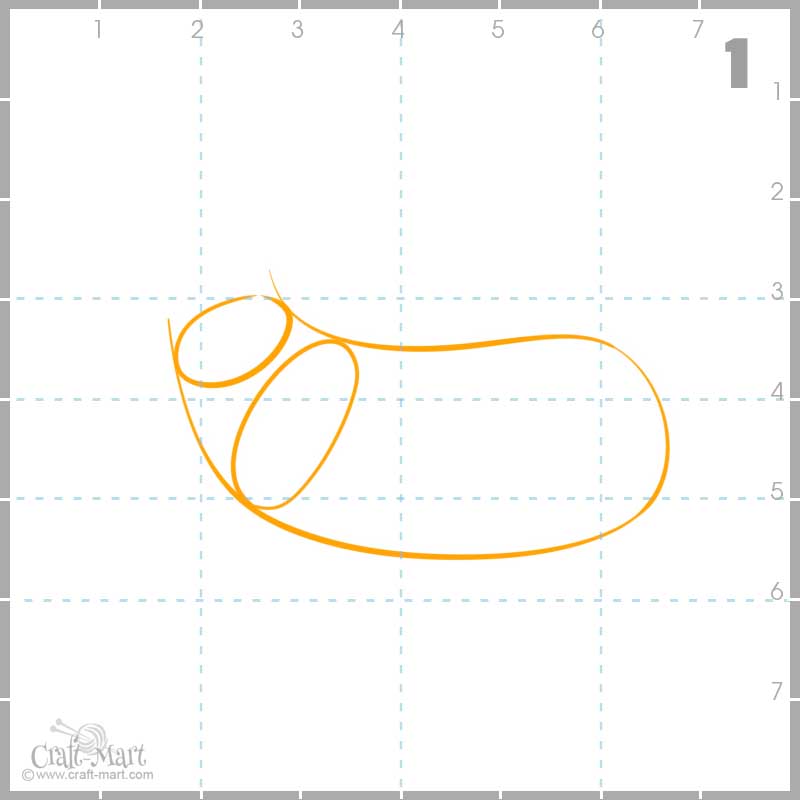
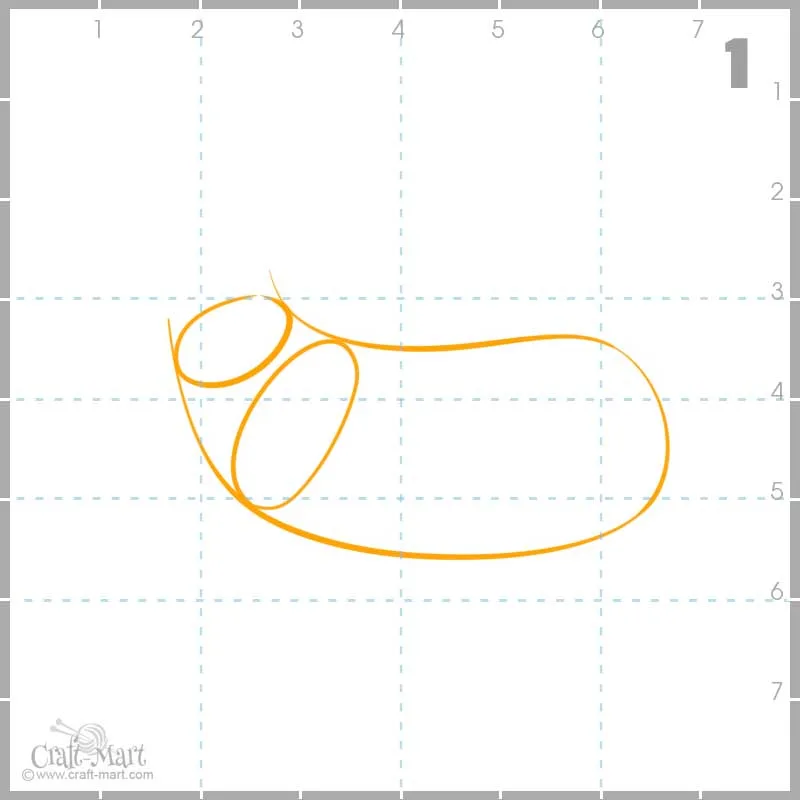
Draw 2 ovals for the base of the deer’s neck and its shoulders.
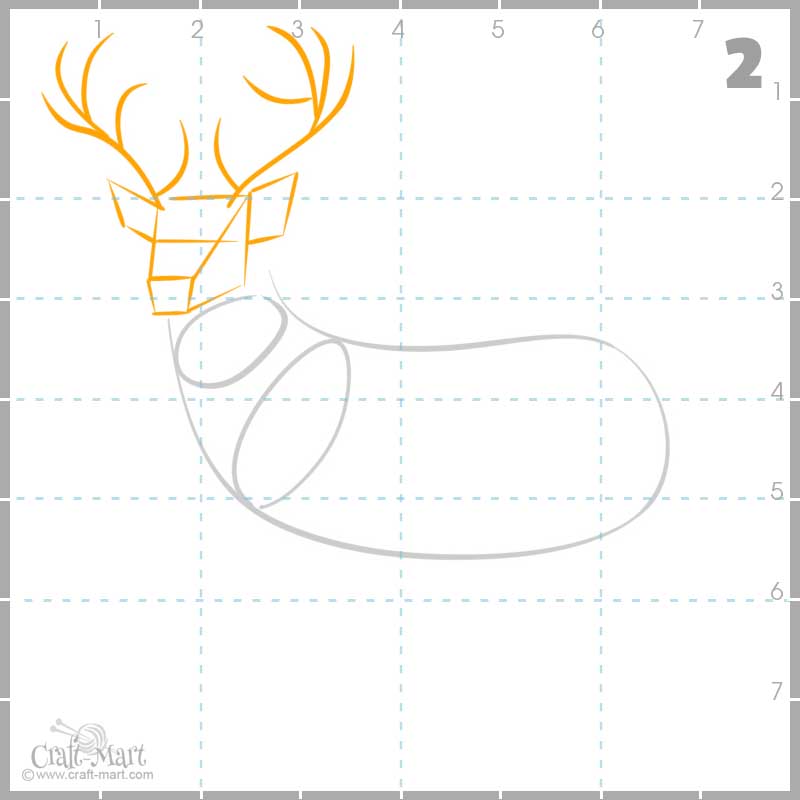
Step 2
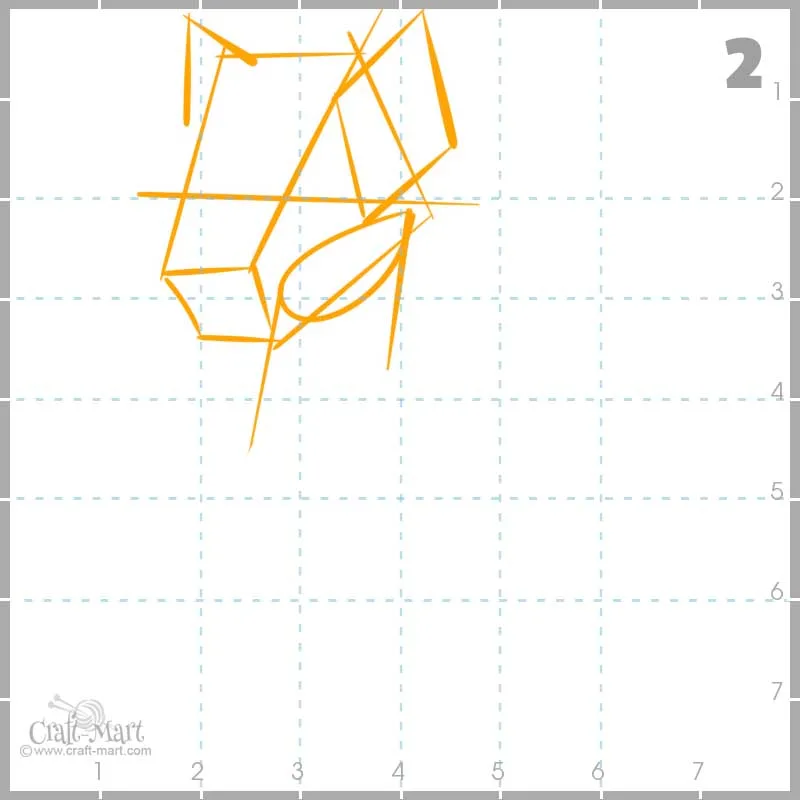
Do you see the horizontal line #2? Thar’s where the top of our deer’s head should be. Make a horizontal mark. Now, vertical line #2 is representing the central axis between deer’s antlers and years. Our deer’s head is turned a bit to the left. Draw the head’s online using the basic shapes as shown in the picture below. Next, draw the antlers with just one line.

Step 3
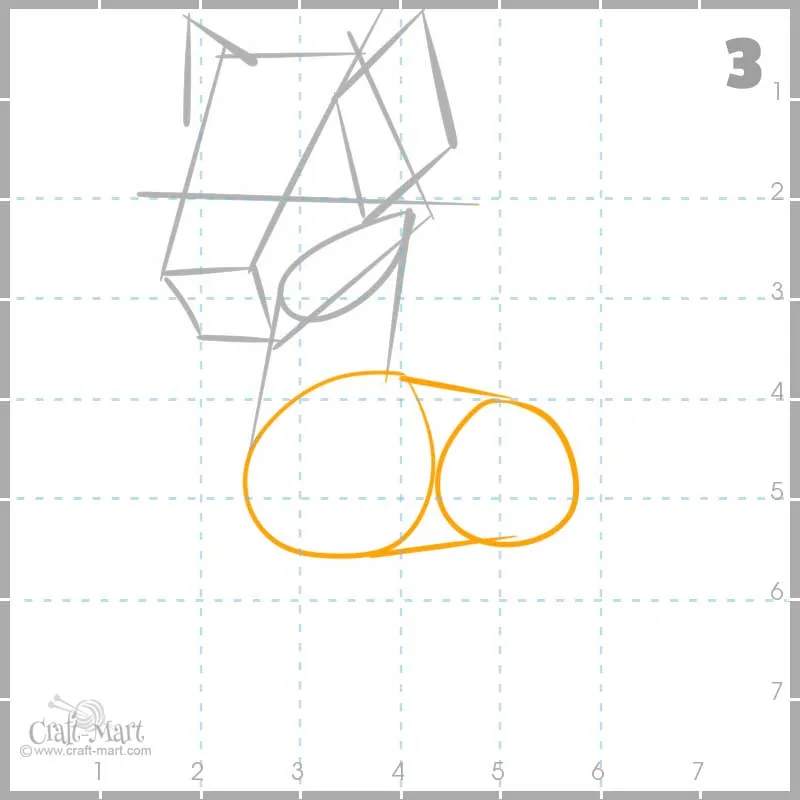
After we positioned the head, it’s time for the legs. We start by drawing four circles that represent places where legs are visually attached to the body. Two front legs are attached around and below a horizontal line #5 and the two hind legs just a bit higher and also around line #5.

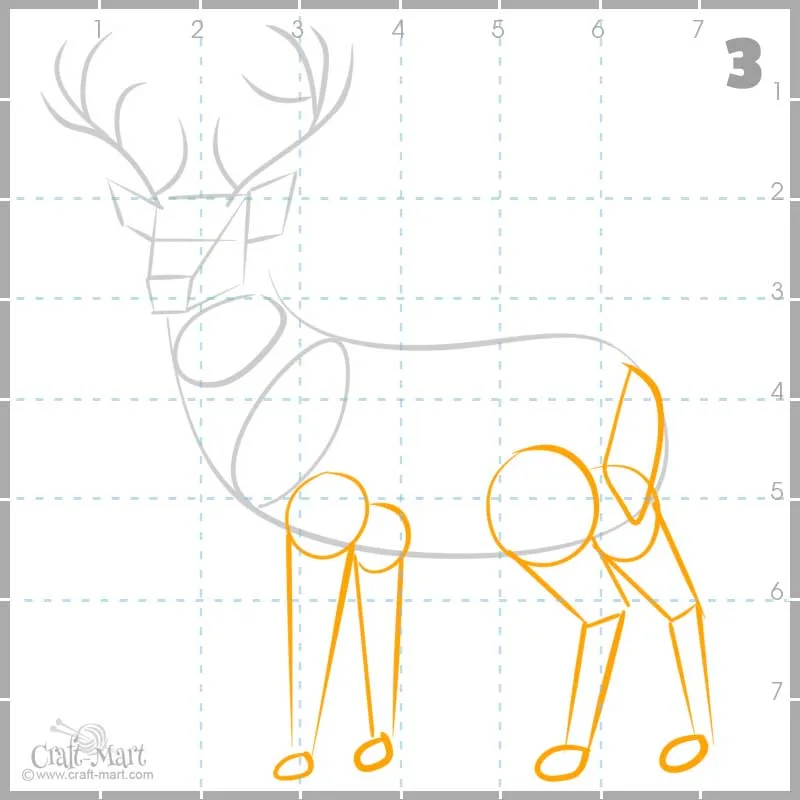
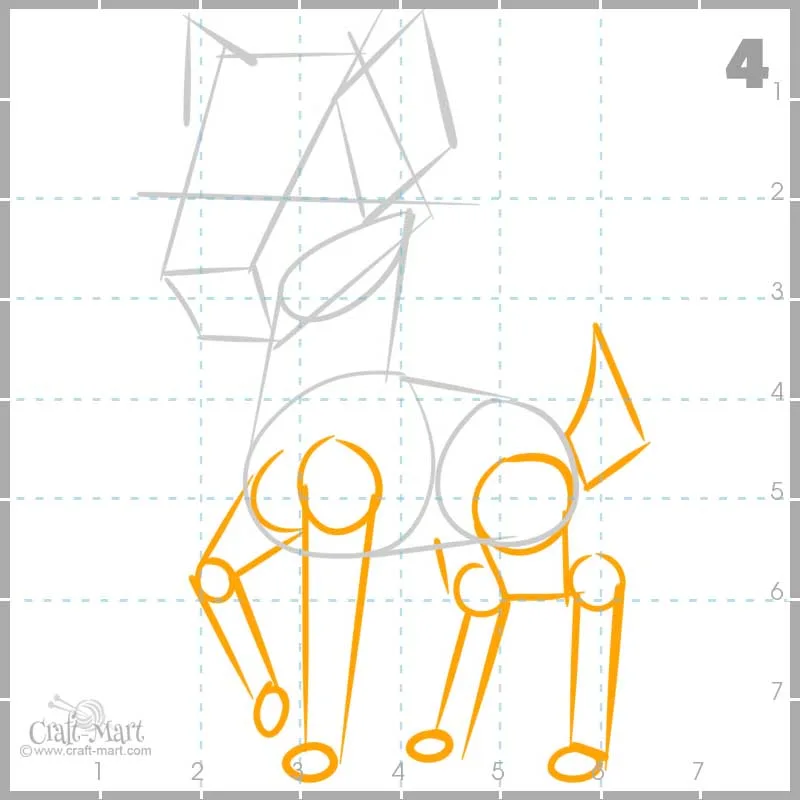
After the circles are done, let’s draw basic shapes of the legs! The frontal leg, which is closer to us, goes super close to vertical line #3 and the leg behind it goes along the vertical line #4 – this is easy. Don’t forget that the legs that are closer to us look larger, so make sure to draw them a bit larger as well. The hind legs are a bit more tricky but we have our helpful intersection of lines #6. This is where the hind leg that is closer to us has the ankle.
Try to draw the deer’s legs using straight lines at this stage.
Step 4
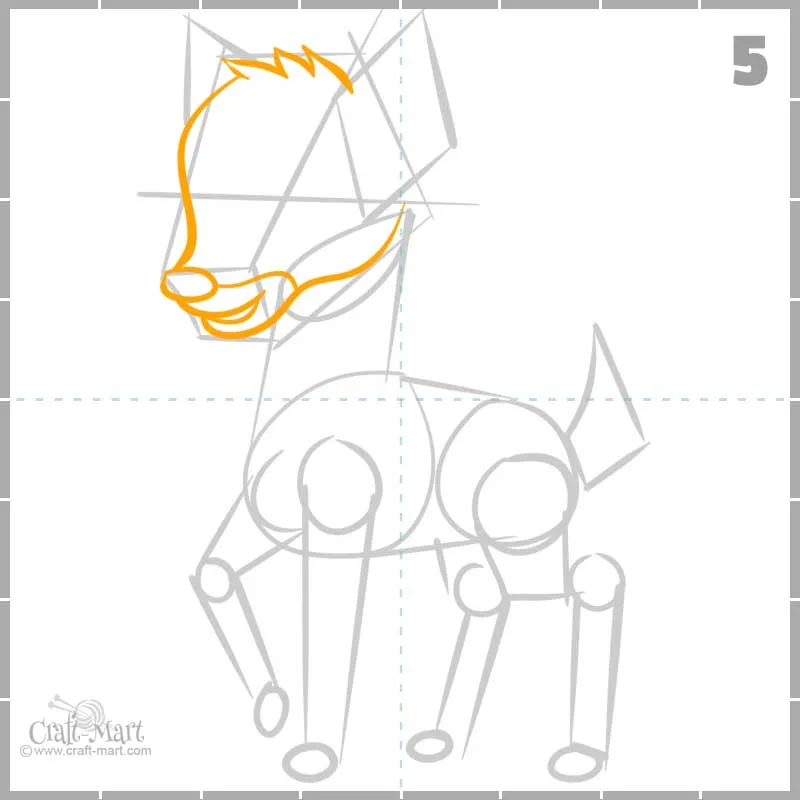
Time to draw the deer’s face! Using the previously made straight lines of the deer head as guides start drawing the top of the head, the jaw, and the nose.

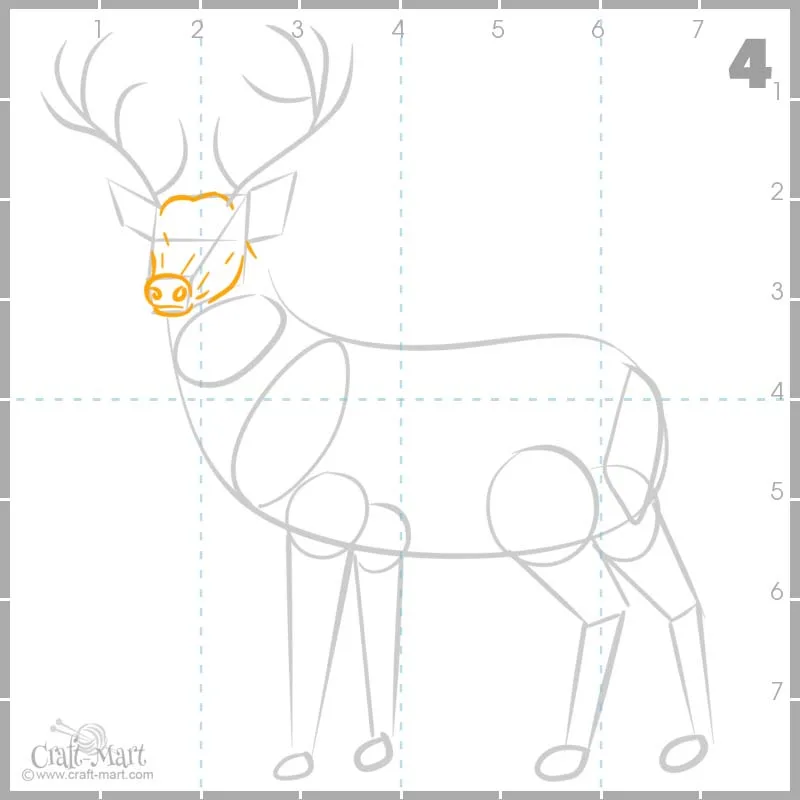
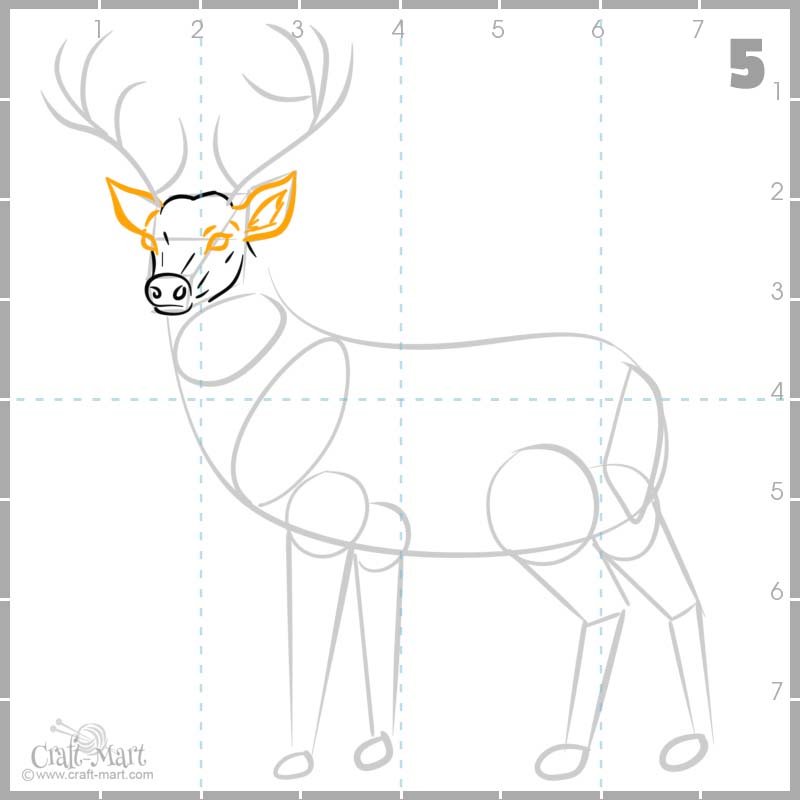
Step 5
Now it’s time to make real ears out of those diamond shapes that we draw in step #2. The eyes are somewhat tricky to place because they are actually located on the left and the right sides of the head – not on the front as on the human skull. So, the left eye should be almost on the straight edge between the frontal and the left part of the head. The right eye is on the right side, just below the edge as well.

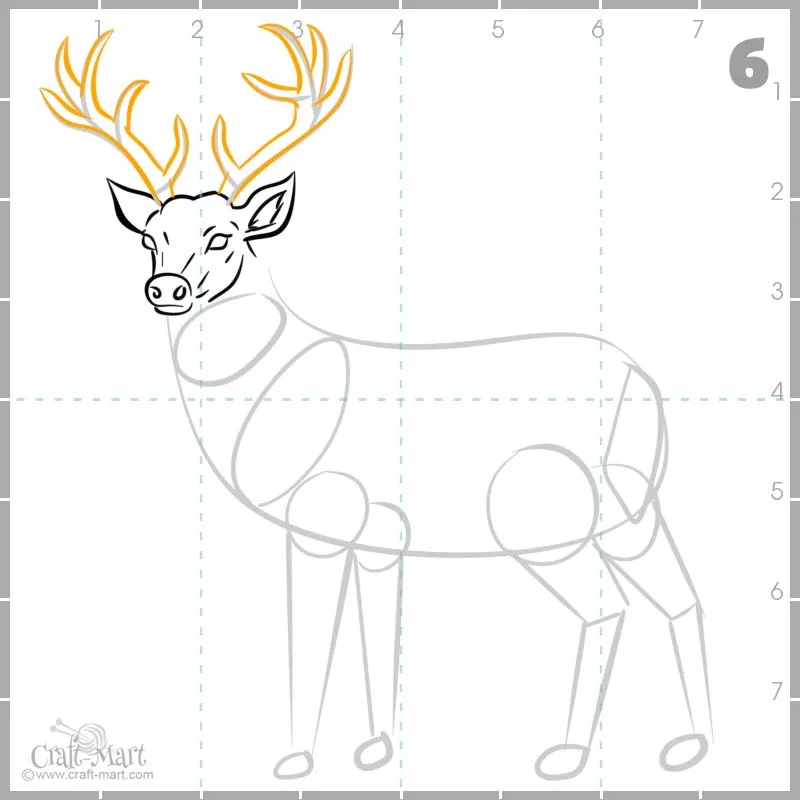
Step 6
The antlers are almost symmetrical and fun to draw – no special rules here.

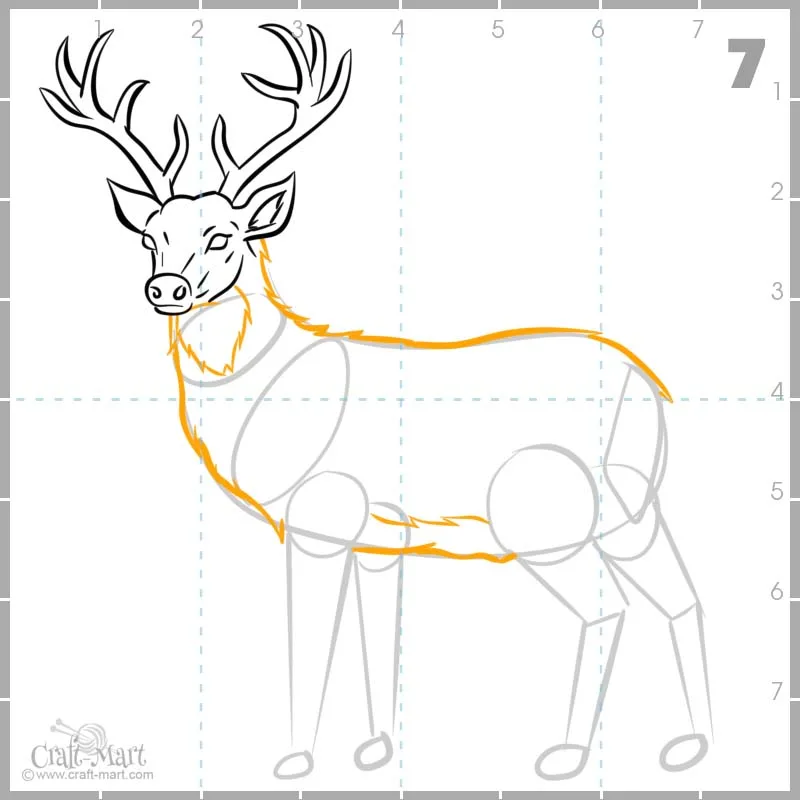
Step 7
Detailing the torso of the deer. Our initial eggplant shape needs some roughing up with some hair and more precise lines.

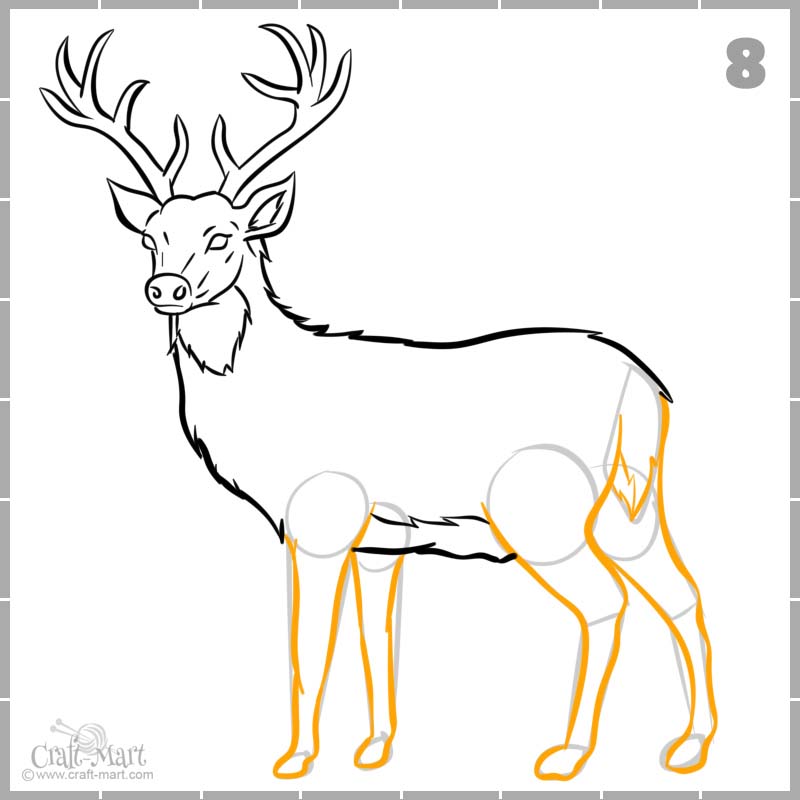
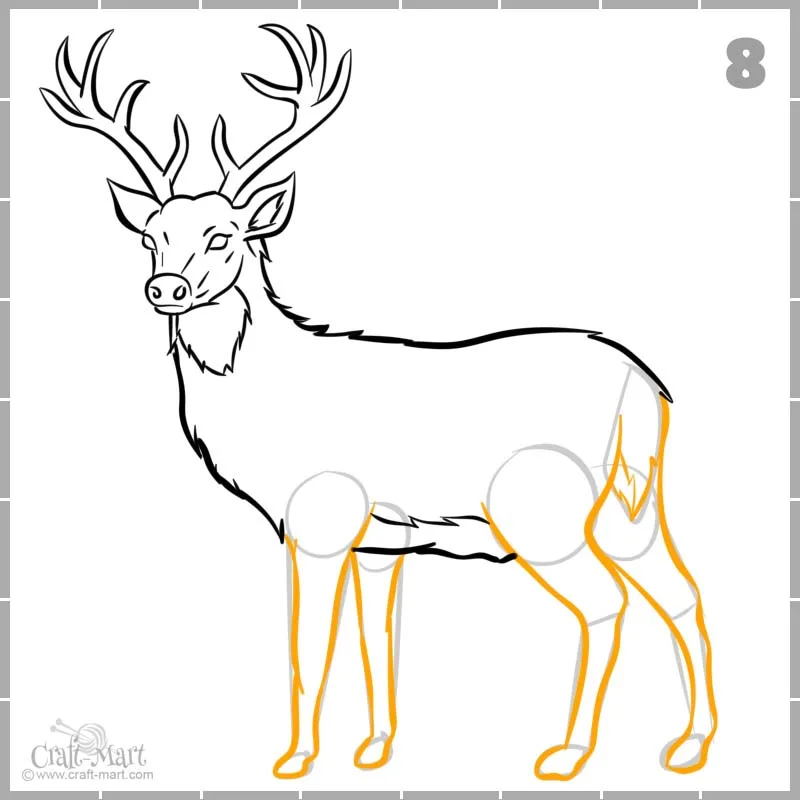
Step 8
Drawing the deer’s legs. Our initial straight lines will serve us as guides at this stage. Draw detailed lines between these guides making the legs just a notch thinner. No straight lines at this stage. Make them curvy and don’t forget about the tail.
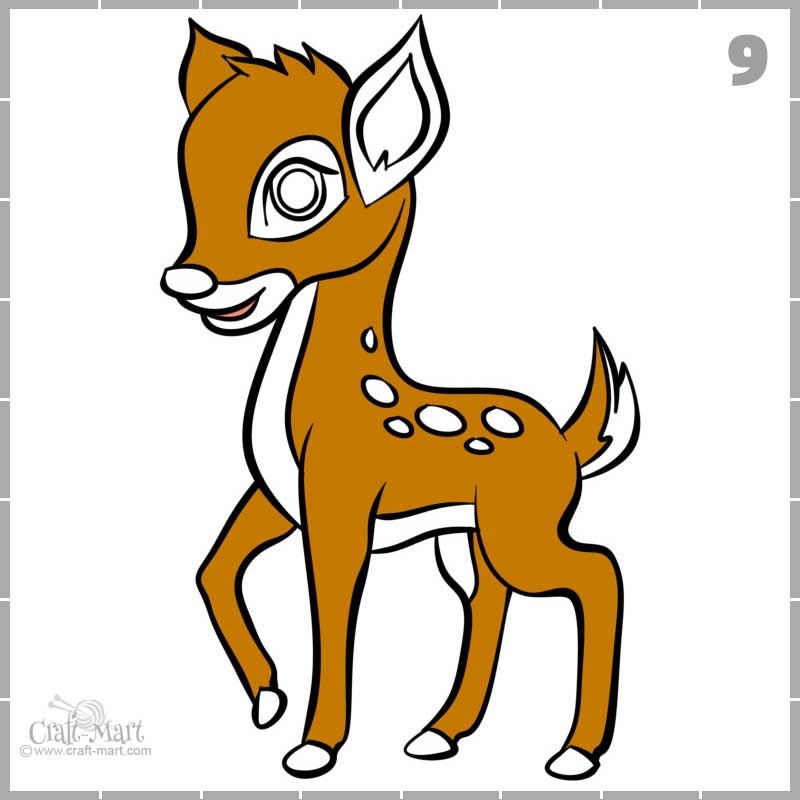
Step 9
Our deer needs some color. Any shades from light gray to beige will work fine. If you’d like, you can make a little shading showing the top of the deer’s back lighter or simply color the whole body flat.

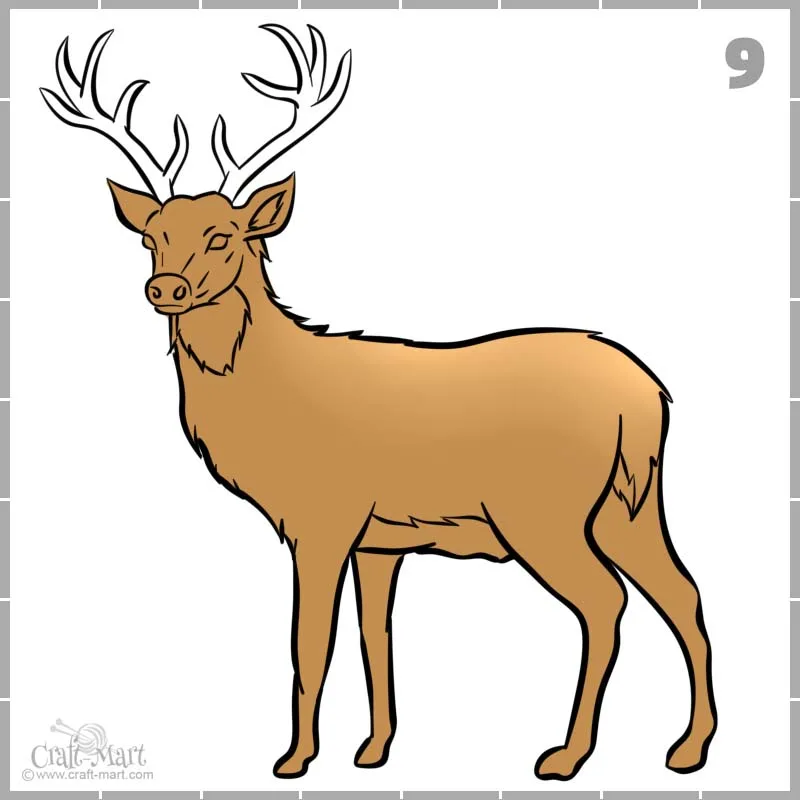
Step 10
Some of the deer body parts can be a bit lighter. The antlers usually have less color and are more on a grayish side. Finish your drawing with darkening the eyes, the hooves, and the nose. We are done!


Yes, we know that we probably did a lot of mistakes in the deer’s anatomy but for a first try this deer is not so bad! And it will be even better if you’ll practice this drawing a few more times. By the end, you may not need any vertical and horizontal guidelines the same way you got rid of your training wheels when learning how to ride your bike.
Download printable drawing guide “How to draw a deer” here

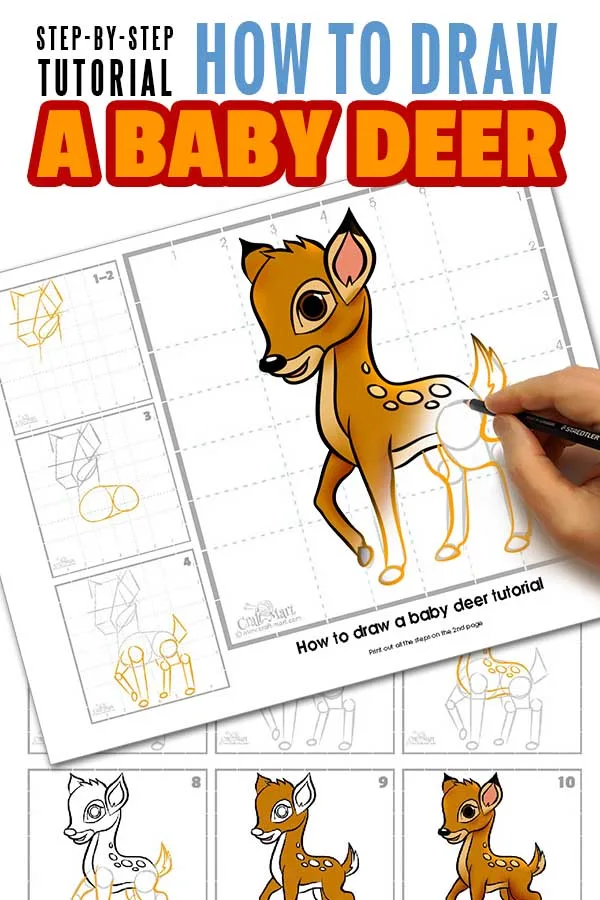
How to draw a baby deer in a cartoonish style
The baby deer drawing process is just a bit different.
Step 1
We start our drawing from the largest body part – the head! Draw a box for the deer’s head, diamond-shaped ears, and the horizontal guide for the eyes around line #2.

Step 2
Our baby deer needs a neck – easy to do just with a couple of lines.

Step 3
The baby deer’s torso is sort of like our reversed eggplant – the back is smaller than the front. Make sure to keep it small.

Step 4
Start drawing deer’s legs from its torso. Just above the horizontal line #6 – this is where all leg joints should be…

Step 5
Giving our tiny deer a hairstyle, making its forehead large and its nose cute.

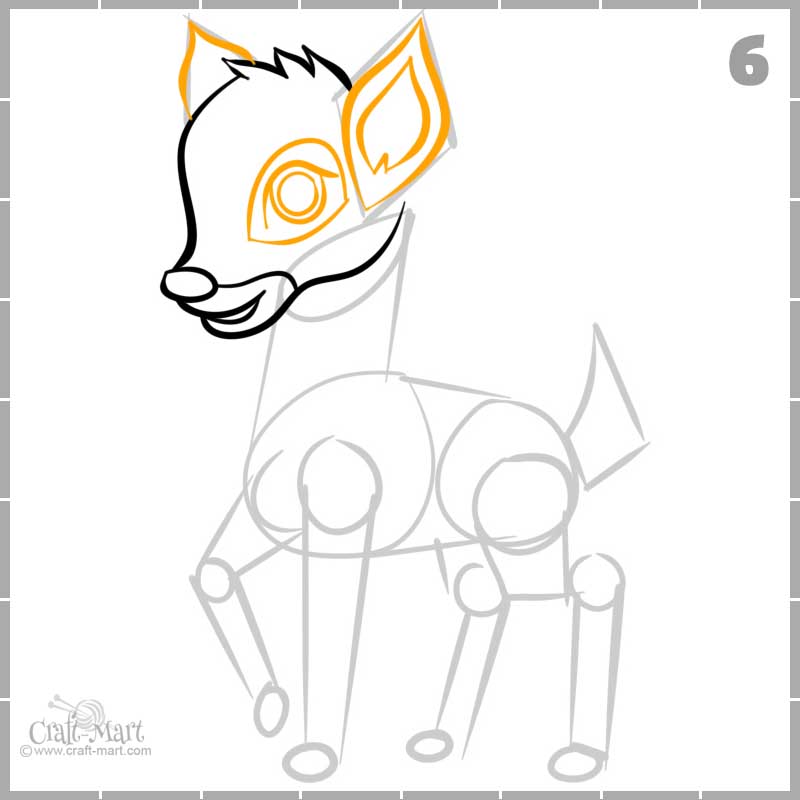
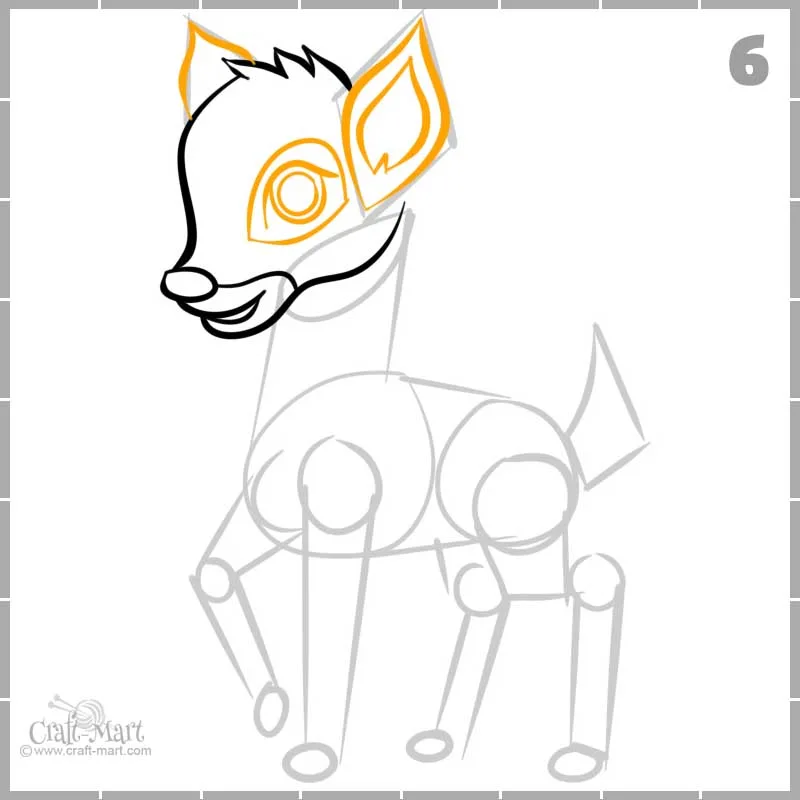
Step 6
The eyes of a baby deer should be seriously large and the ears are even larger! This is where a big chunk of the cuteness comes from.
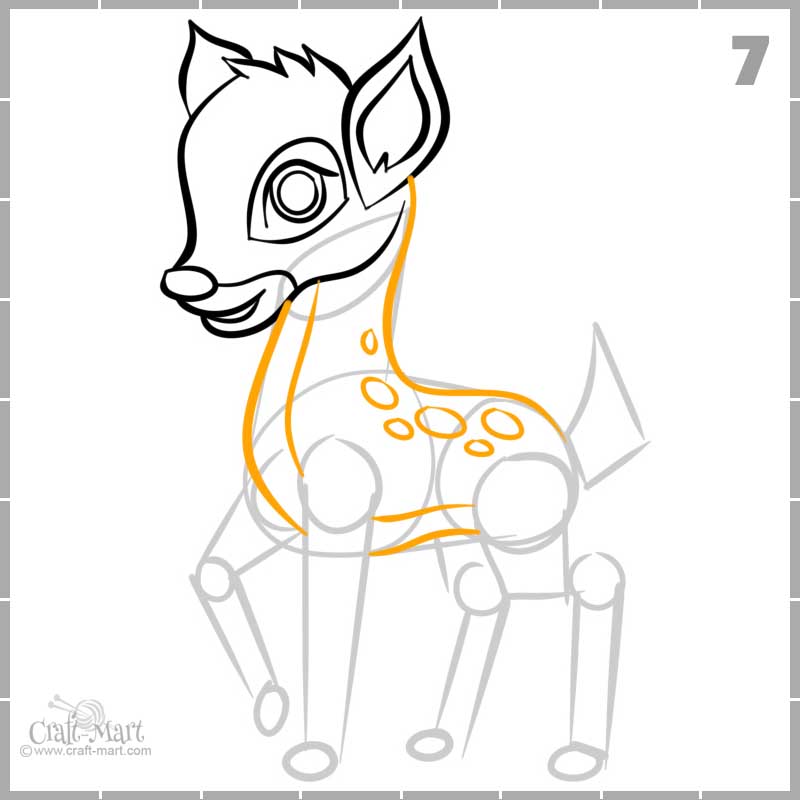
Step 7
A thin neck goes smoothly into the baby deer’s body – no sharp angles here!

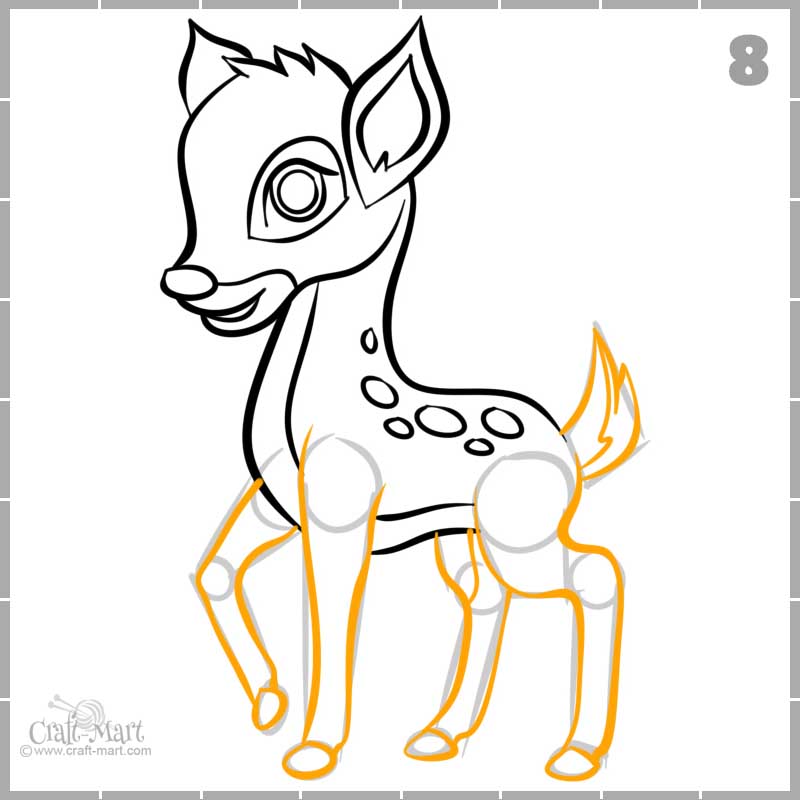
Step 8
Now we smoothing out the legs and the tail.

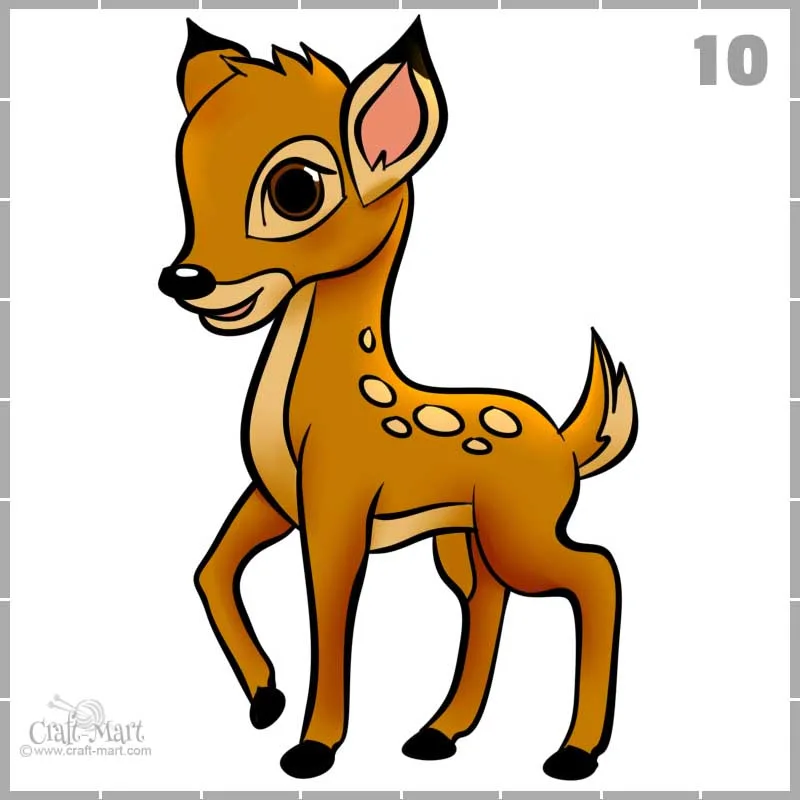
Step 9
Baby deer also needs some color – any earthy color scheme will work fine but don’t make it too dark.

Step 10
Finishing the deer’s drawing is the most fun part. Don’t forget to make highlights on the baby’s nose and the eye! Huge eyes and large rosy ears – what can be cuter?

To follow all the deer-drawing steps download our printable guide “How to draw a baby deer”