Creating your first drawing of a tiger doesn’t have to be confusing. It’s nice to suggest studying anatomy and sketching these beautiful animals at the zoo … but who has time for such a serious approach? So, if you’re simply planning on learning how to draw a tiger for your bullet journal or for fun, you’re in the right place!
You can learn how to draw a tiger and then teach your kids – it is so easy.
Let’s learn how to draw a tiger the easy way! Plus, we are going to show how to draw a tiger cub as well!

For practicing your tiger drawing we created step-by-step printable guides for the adult tiger and the cub. Needless to say, there is no real easy way of learning to draw animals like a tiger in just one try. As with anything else, your success depends on your patience and practice.
How to Start a Drawing of a Tiger?
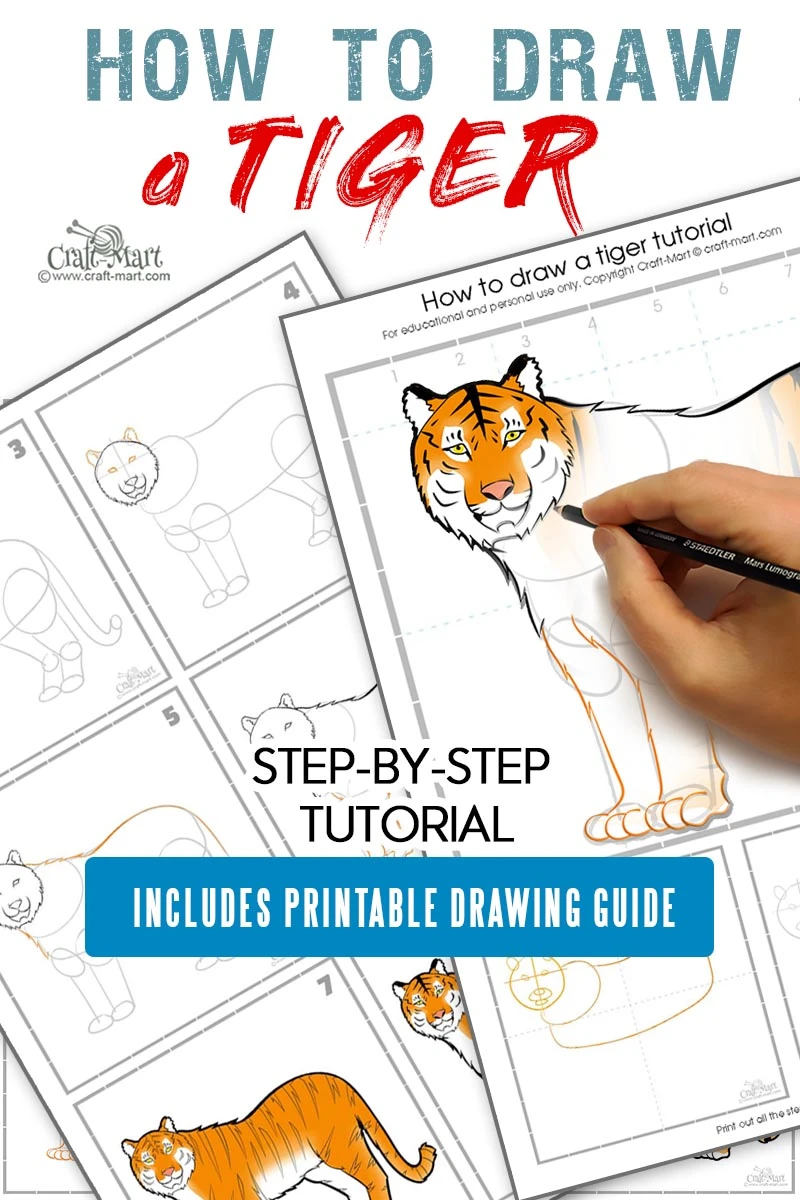
Step 1
Nine out of ten students would want to start drawing a tiger face first. Big mistake! Don’t do it!
Do you see two crossed dotted lines? We start our drawing of a tiger from outlining its torso first, then we outline the tiger’s neck base with shoulder plates, and only after that, we outline its head.
Now you may do some work on a tiger’s face:
- add the central vertical line;
- add the horizontal line for the tiger’s eyes;
- mark places for two ears using the central line as your symmetrical guide;
- draw tiger eyes;
- draw outlines for the nose and a mouth;
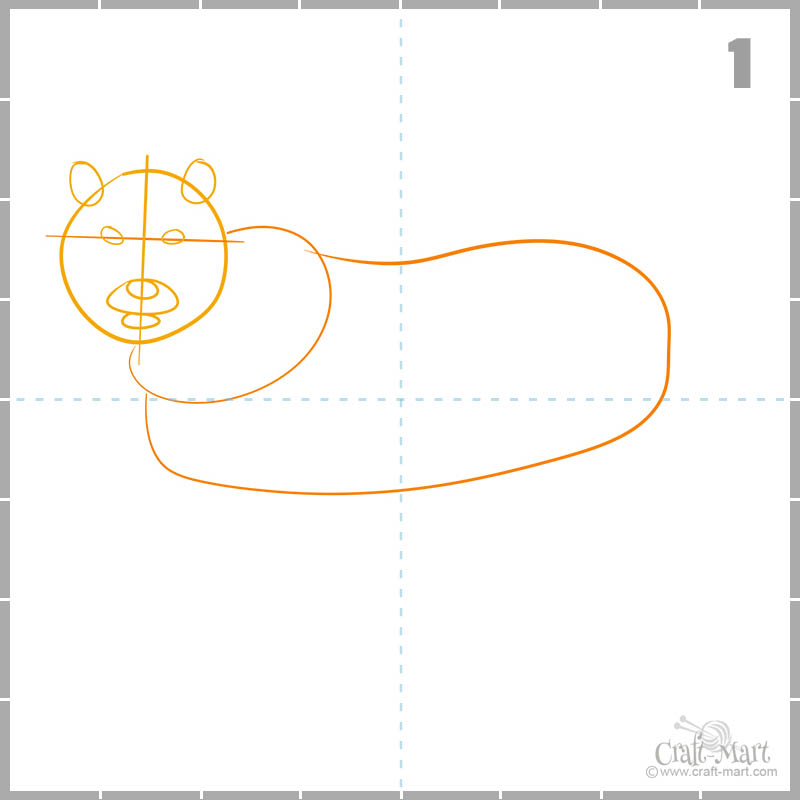
Remember, at this stage, we are not pressing hard on a pencil since all our outlines are not final. If you are not happy with any of them, make sure to make corrections.
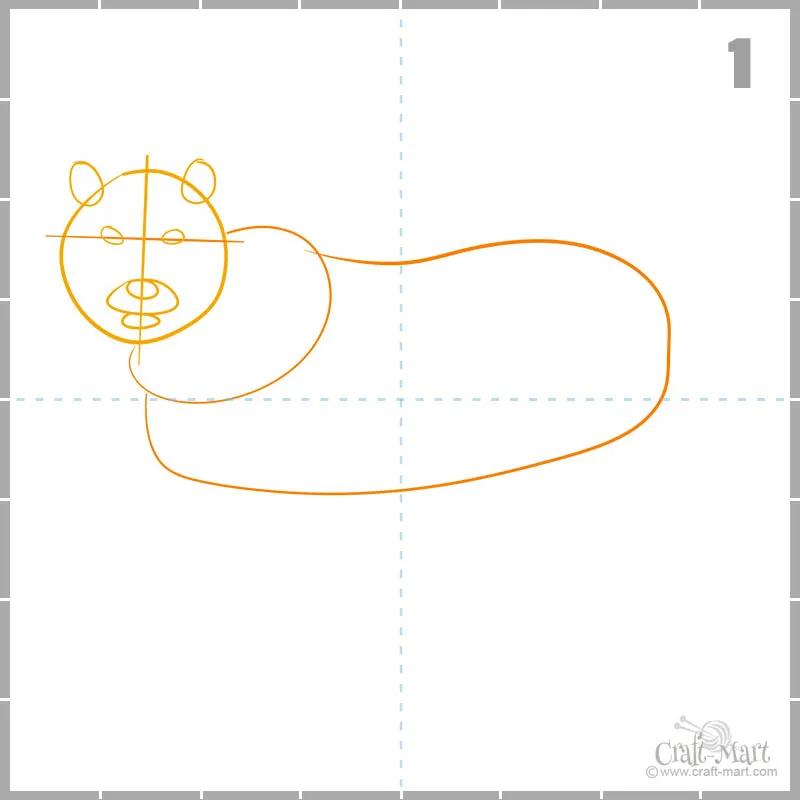
Step 2
Now it’s time for drawing outlines of the tiger’s legs and the tail. We start by marking the areas where legs are visibly attached to the tiger’s torso. Two circles or ovals (the exact shape doesn’t matter) will mark areas around two front elbows and a larger one on the back a femur area (the bone that humans have from a hip to a knee).
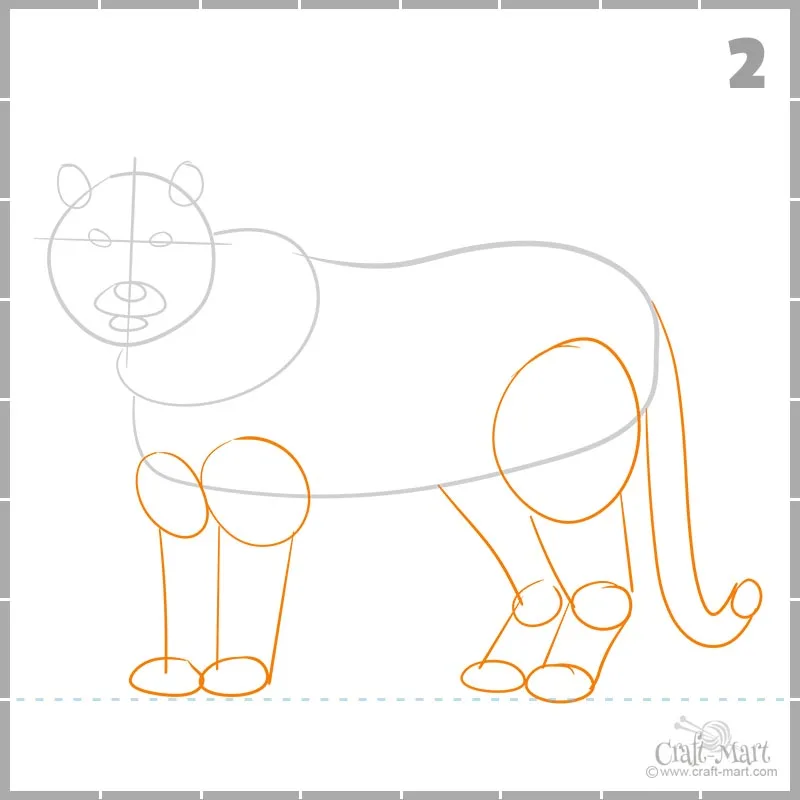
Continue with drawing a tail and the rest of four legs. Draw all paws on the same level – you can make a horizontal line to make sure your tiger is ‘well-grounded’.
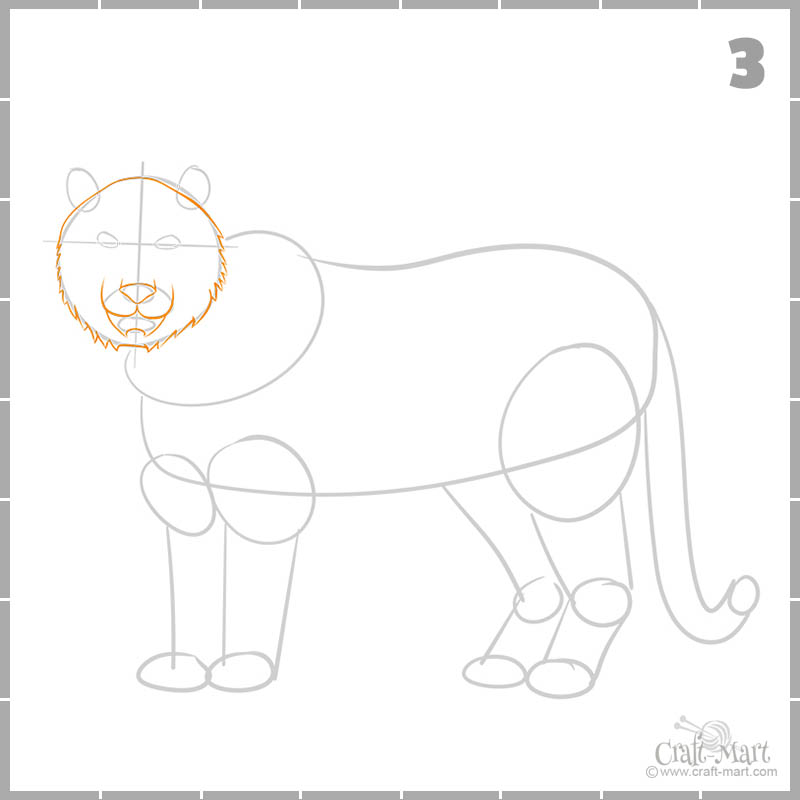
Step 3
Now we can start working on putting more details on the drawing of a tiger’s face.

Step 4
Again, as with everything else, we don’t want to finalize absolutely each and every part of the face. We are simply drawing more precise shapes leaving the final strokes for the last steps.

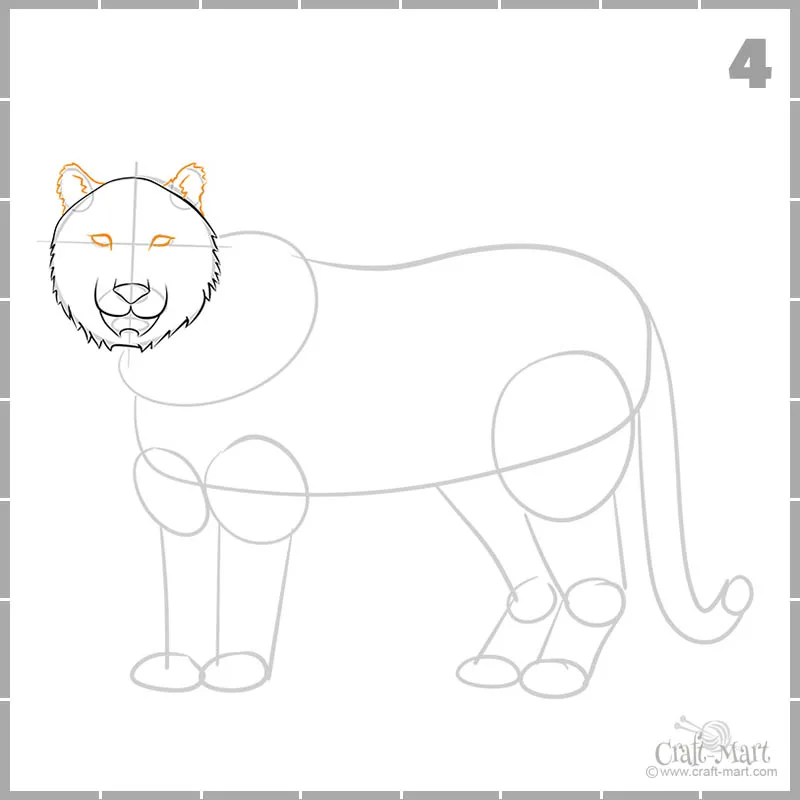
After the tiger’s eyes and ears are defined, we want to do the same with the rest of the body parts.
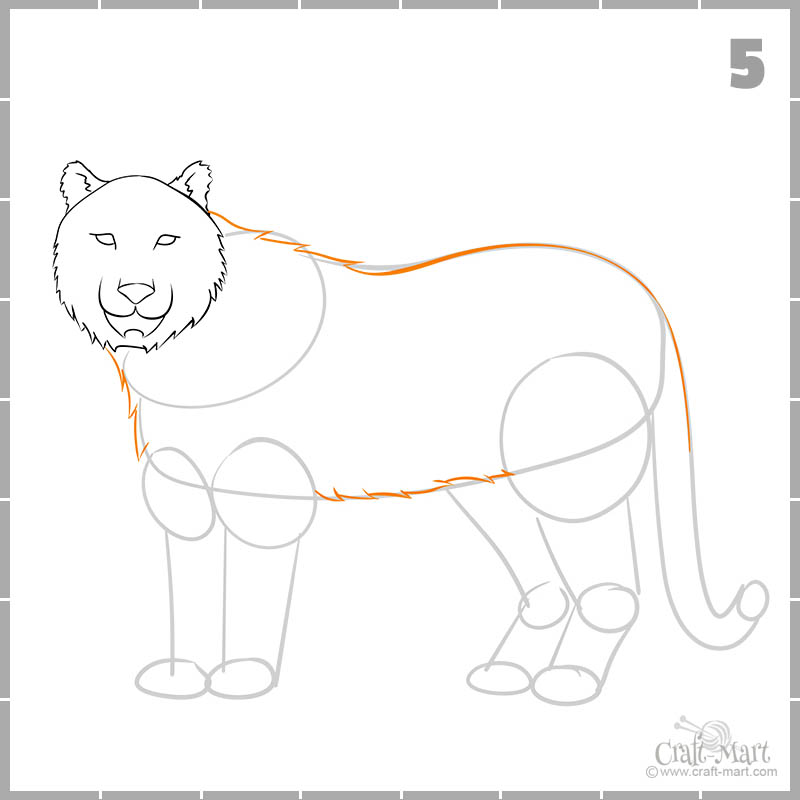
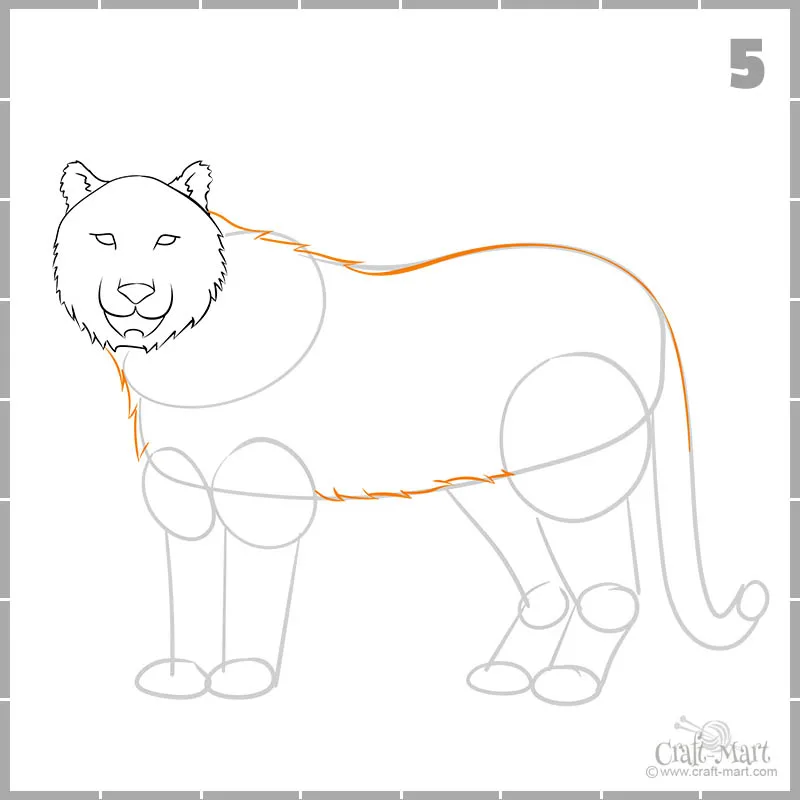
Step 5
Continue drawing a tiger’s fur making it more rough on the front and the belly while leaving it smoother on the back.
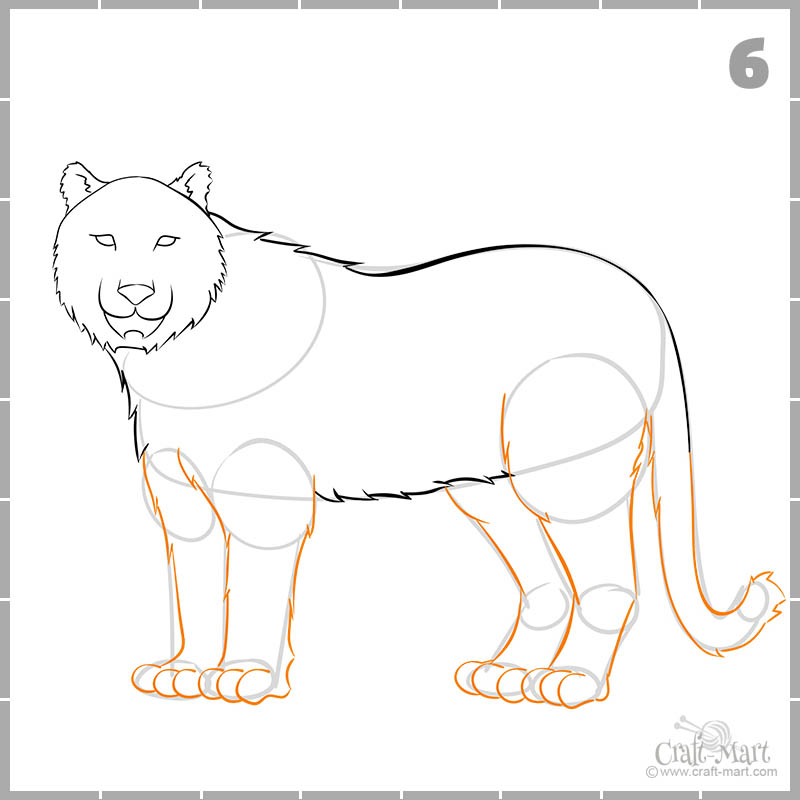
Step 6
Finish the fur making final lines darker and thicker. Note that you don’t have to follow the outlines from steps 1 and 2 to the point. We all make mistakes and if you see that your first lines were off, now is the time to correct them!

Step 7
It looks like the majority of our linework is done and we can have some fun with coloring our beautiful tiger! Follow the coloring pattern leaving the belly, the front, and the jaw white. It’s better to use watercolors or color pencils since acrylic paint is rather opaque and may cover the lines.
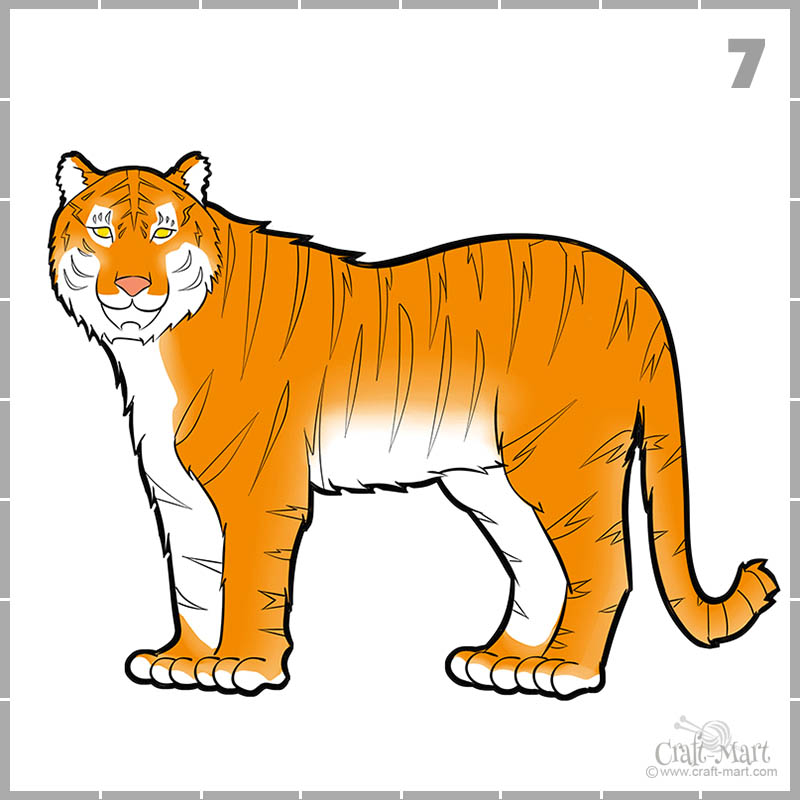

Your drawing of a tiger is almost done but without a stripy pattern, it will look strange. After your paint is dry, sketch the pattern and draw a thicker outer outline around the whole tiger. Your drawing will jump out – the strong lines of the tiger’s silhouette make it more believable.
Step 8 – Finishing your drawing of a tiger
At this stage, we work on the small details finalizing our drawing of a tiger face. Pay attention to the eyes of the tiger – don’t make pupils too large. Work on its whiskers, nostrils, and a jaw (corners of the mouth). Fill the stripes on the fur pattern.


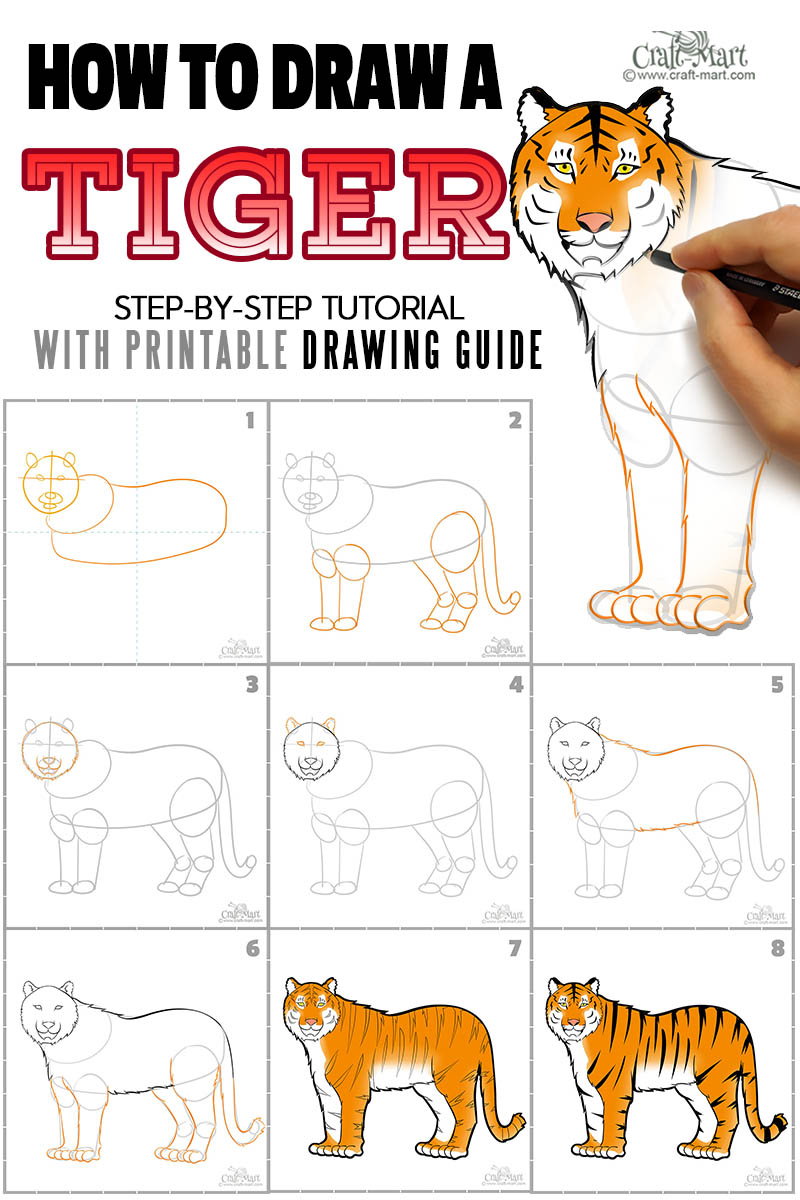
All done! And here is a summary of all our steps:

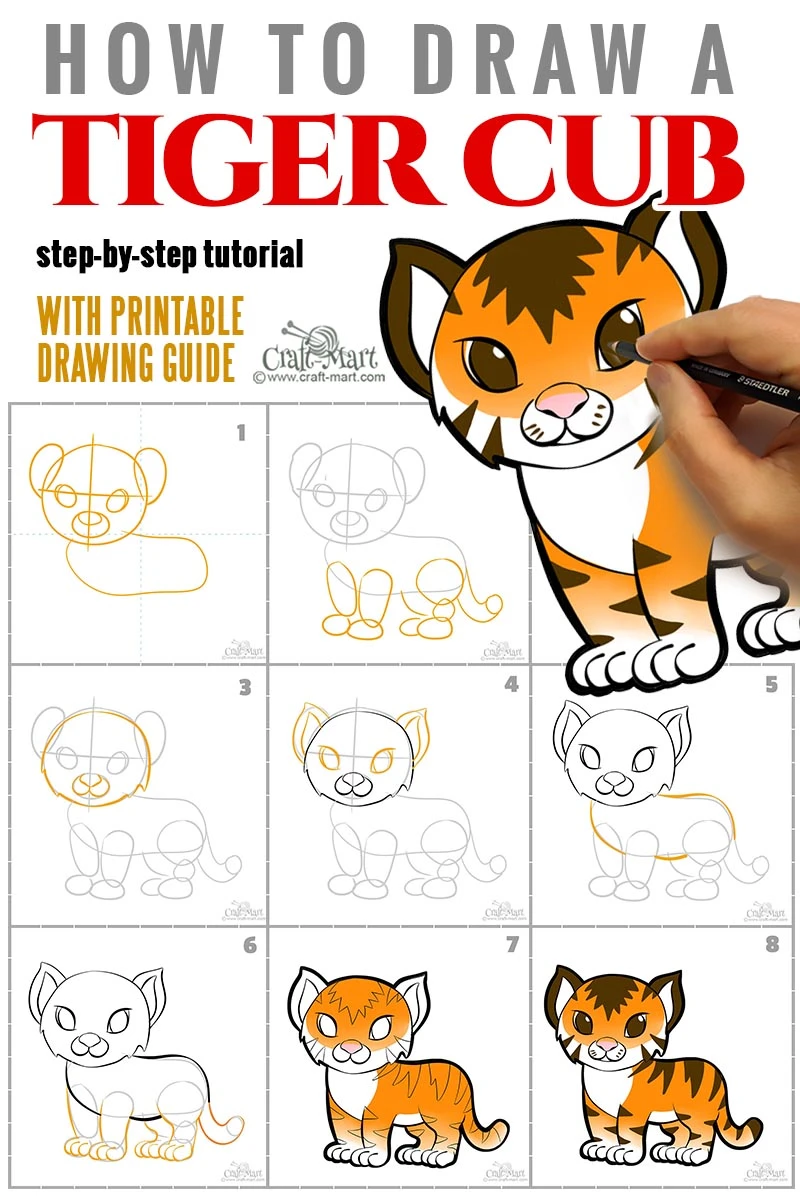
Now it’s time to learn how to draw a Tiger Cub

We wanted to make our tiger cub drawing a bit more cartoonish in case small kids would want to learn how to draw a cute tiger cub. As with the adult tiger, there is a free downloadable drawing guide for practicing all the steps.
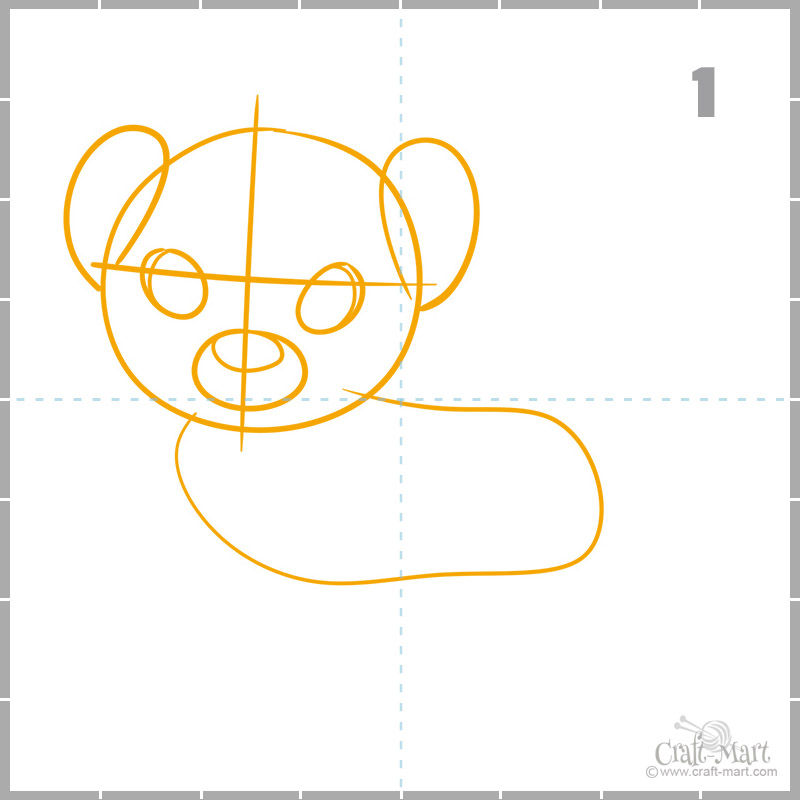
Step 1
Just like with the big tiger, we start our drawing of a tiger cub with a few general outlines of the torso (just below the horizontal central line) and the head in the upper left quarter of our canvas. Note that the head and all parts of the tiger cub’s face are much larger in proportion to the torso in comparison with the grown tiger.
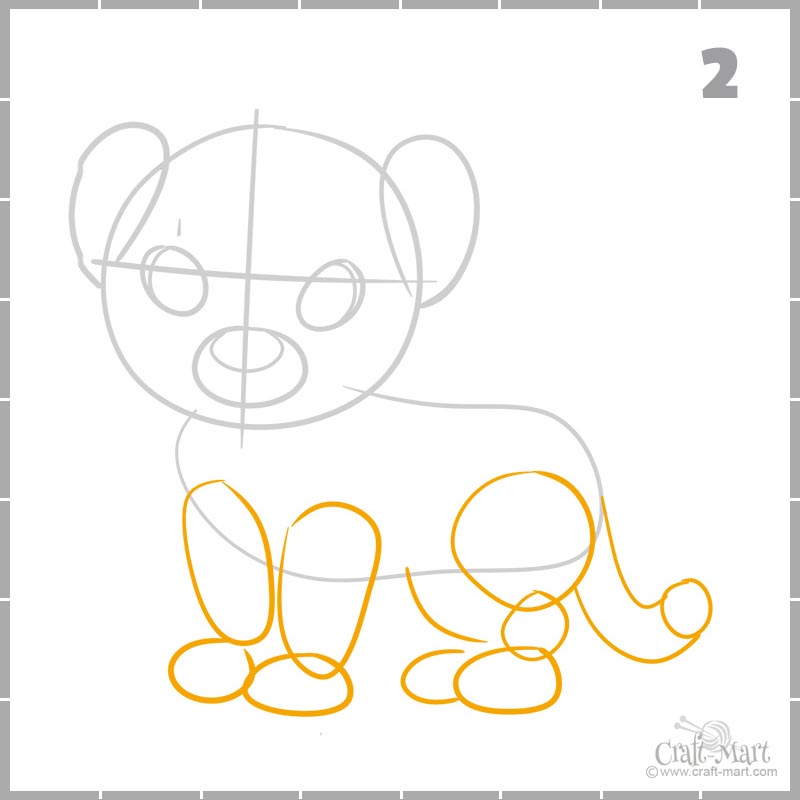
Step 2
Continue drawing outlines of the legs. The steps are basically the same as with the big tiger. Just watch out for proportions of the body parts!

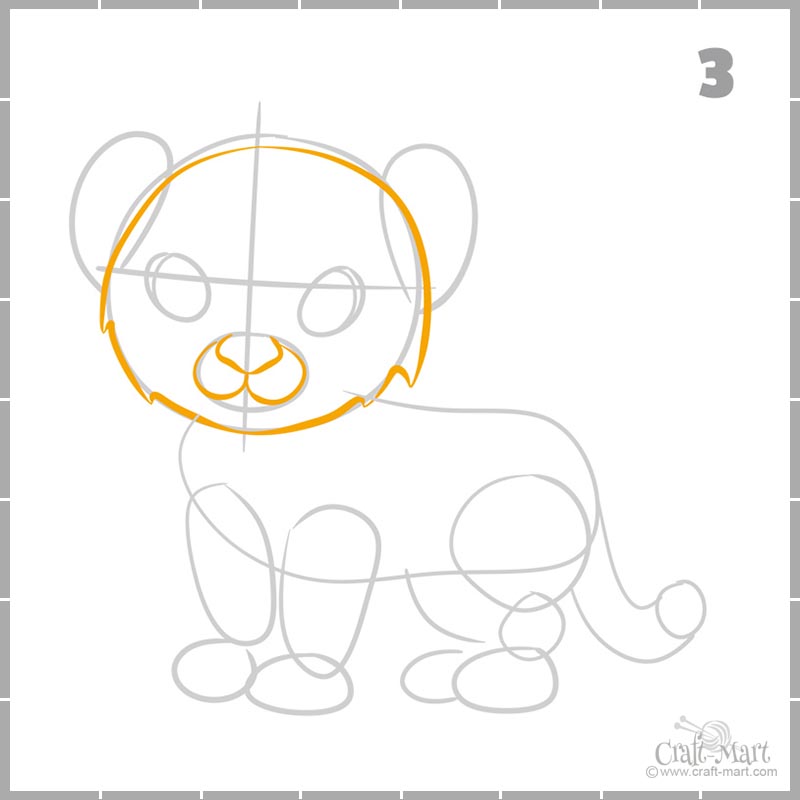
Step 3
Draw the facial outline and add the nose.

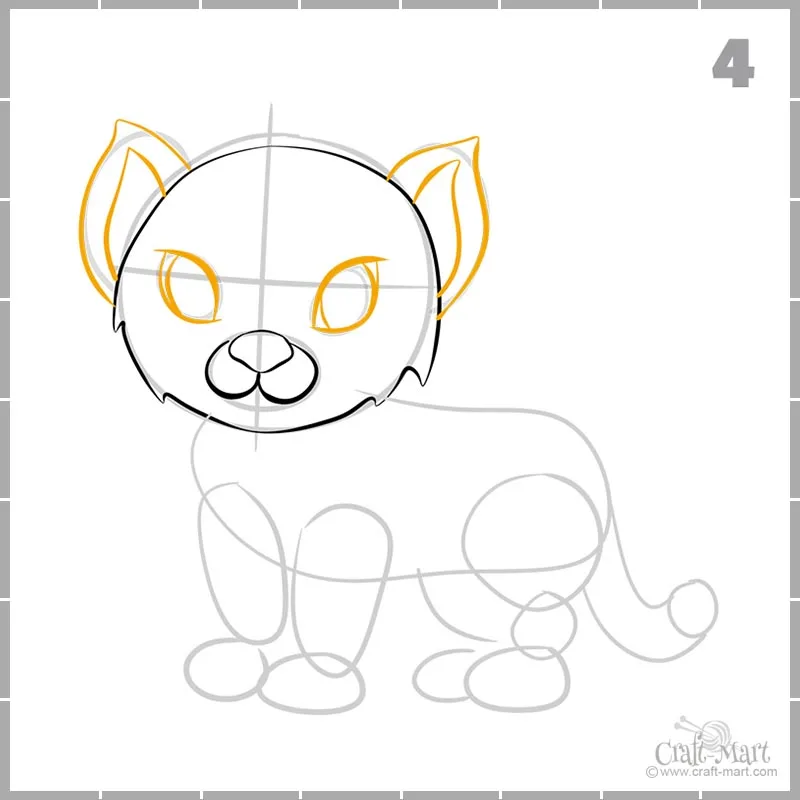
Step 4
Make sure that the ears and the eyes of your tiger cub are as big as on this example. The larger they are – the younger and more cute your baby-tiger will look.

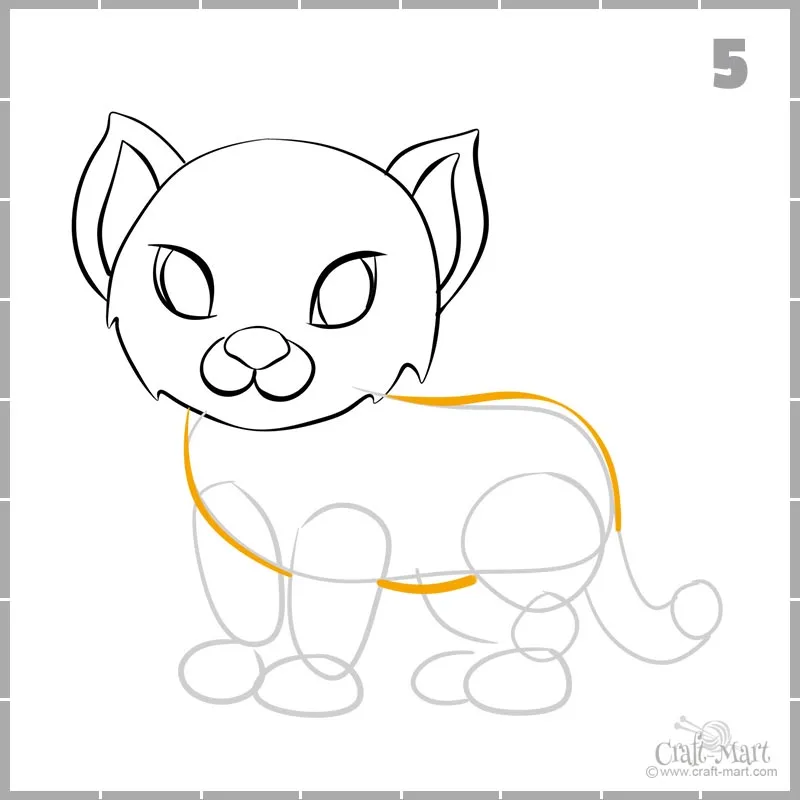
Step 5
Draw the cub’s torso without showing a lot of roughness – the fur of the cub is too short.

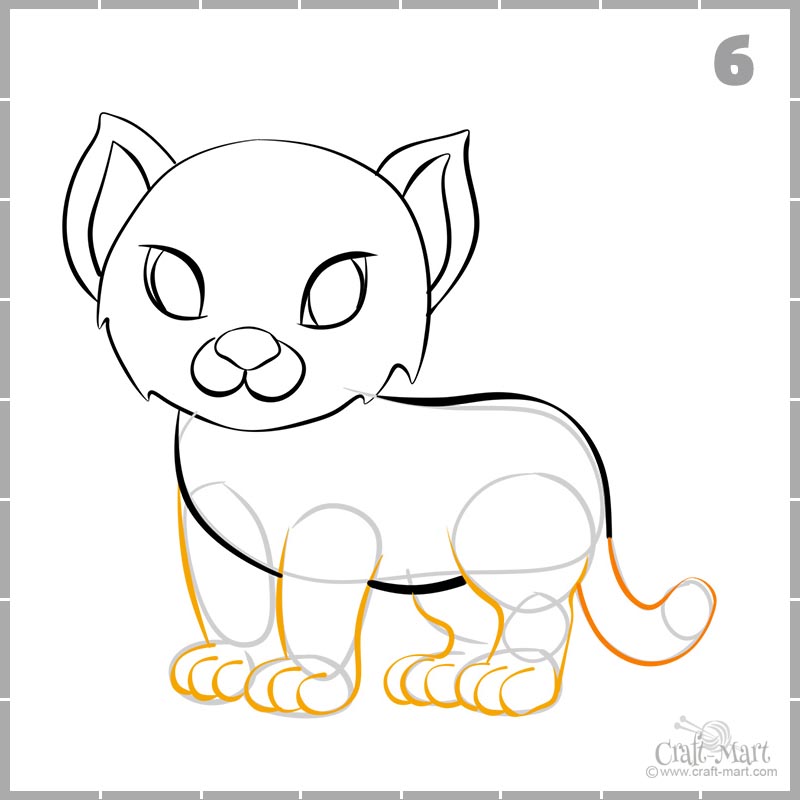
Step 6
Now let’s draw the legs, the paws, and the tail.
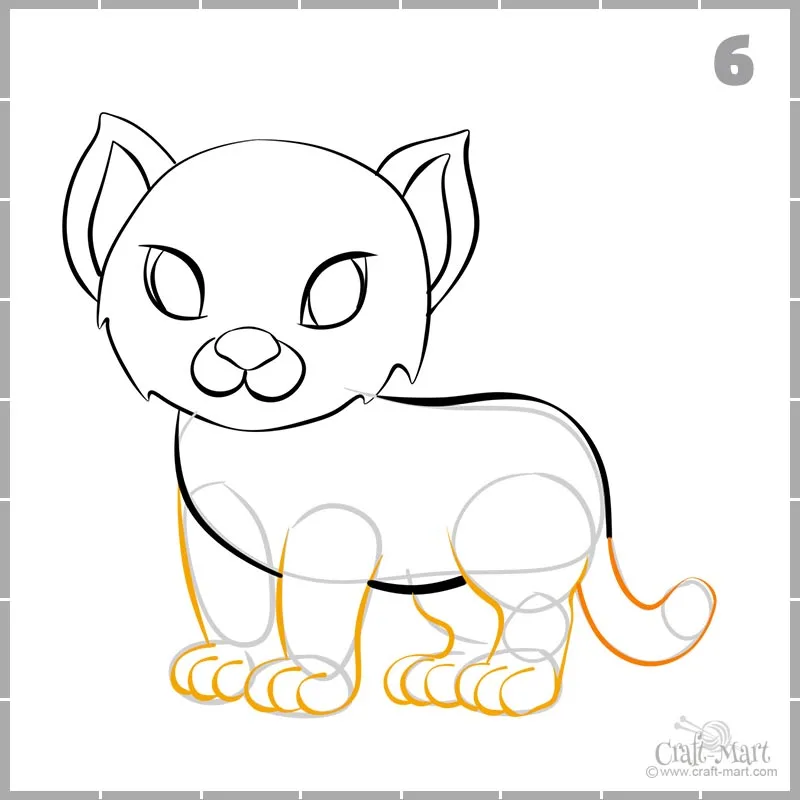
Step 7
Coloring can be done the same way as with the big tiger – watercolors (or watercolor markers) are the best if you use a special thick paper. For practicing on our free drawing printouts color pencils would work better than watercolors (they may warp your drawing after drying).
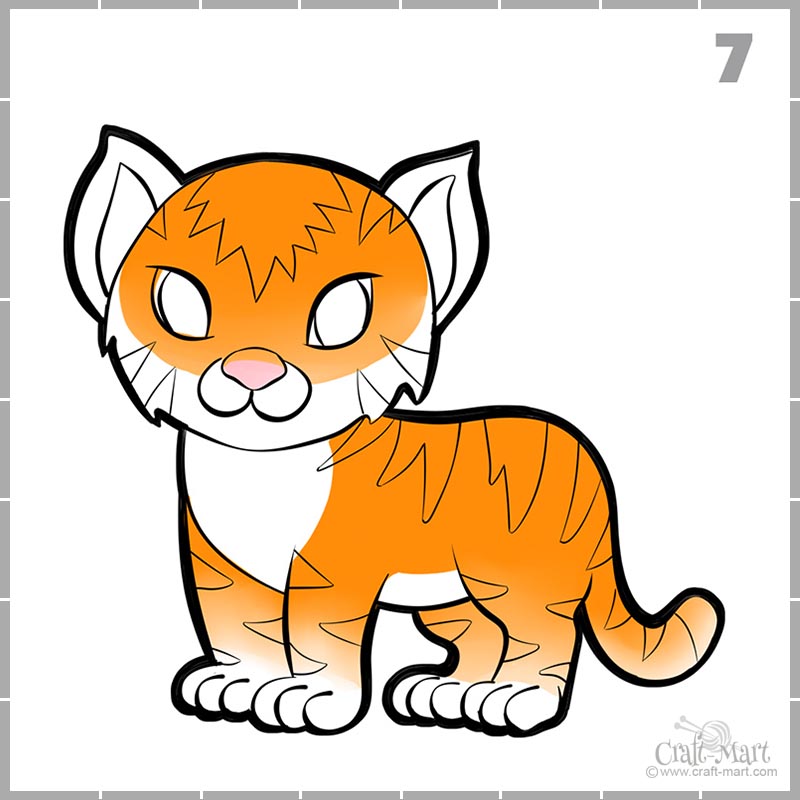

In any case, make your pattern sketch lines after the coloring is done and thicken the outer outline.
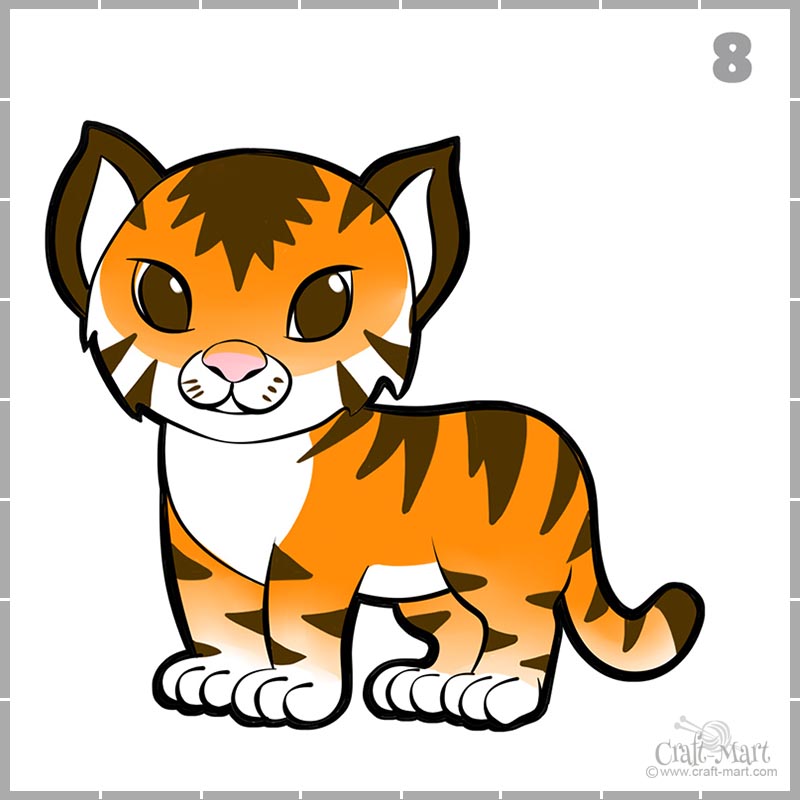
Step 8
Tiny tiger cubs are born blind the same way as kittens. Their pupils are wide-opened when they are very young. Draw them big. The colors on the pattern are also are not too dark. Very soon this tiger cub will grow big and powerful. But for now, draw tiny whiskers and a small cute mouth – they are just like kittens but not for long…

Here are our steps for a tiger cub drawing:

Downloadable drawing guides
Get your printable guide for drawing a tiger cub here
Get your free printable guide for drawing a grown-up tiger here