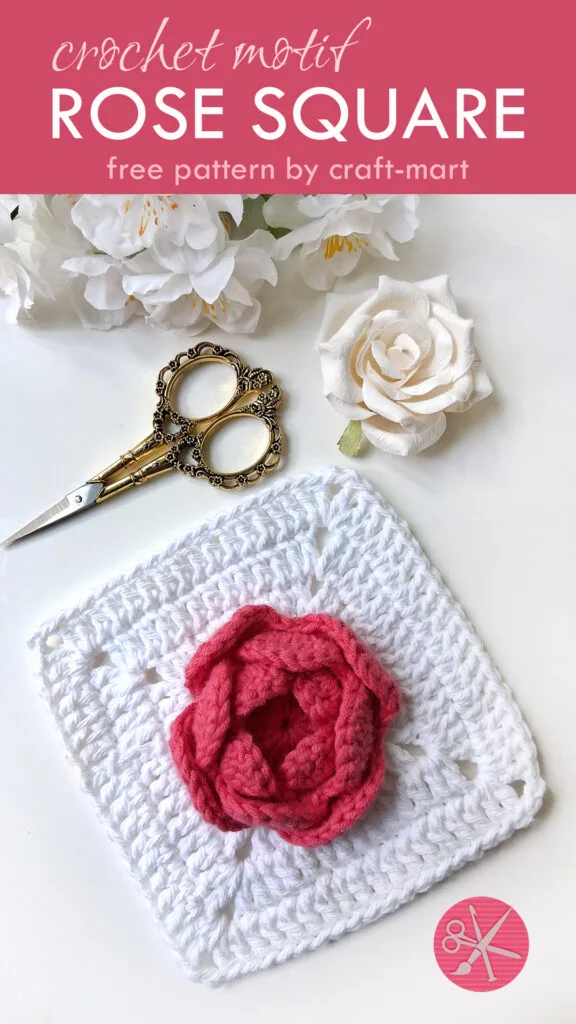
Rose granny square is a beautiful crochet motif that you can use in many projects:
- blankets
- throws
- bags
- tops
- sweaters
So, let’s dive into the pattern so you can master it quickly. We have a step-by-step tutorial to help you grasp the basics.
Materials
- Red Heart Super Saver Metallic Yarn (in red or any color)
- Red Heart Super Saver White
- Boye Aluminum Crochet Hook G/6 – 4.25
Of course, for practice, you can use any leftover yarn and a corresponding crochet hook. When you are done, you can measure your rose granny square and estimate how many squares you would need for a blanket of the desired size.
Abbreviations
- CH – chain
- SC – single crochet
- HDC – half double crochet
- CH-SP – chain space
- SL ST – slip stitch
- SP – space
- BP SC – back post single crochet
Rose Solid Square Pattern
If you love rose crafts, check out this crochet idea: Crochet Rose (FREE PATTERN). In that tutorial, you crochet a flat crochet motif and then form a 3D rose from it, securing it with yarn and a needle.
For this pattern, you’ll crochet a 3D rose, which will become the center of your square. For each row of petals, you’ll have a foundation row and an actual row of four petals. There is a special variation of the single crochet stitch in the foundation row that gives a rose its 3D effect.
For this pattern, you’ll crochet a 3D rose, which will become the center of your square. Let’s get started!

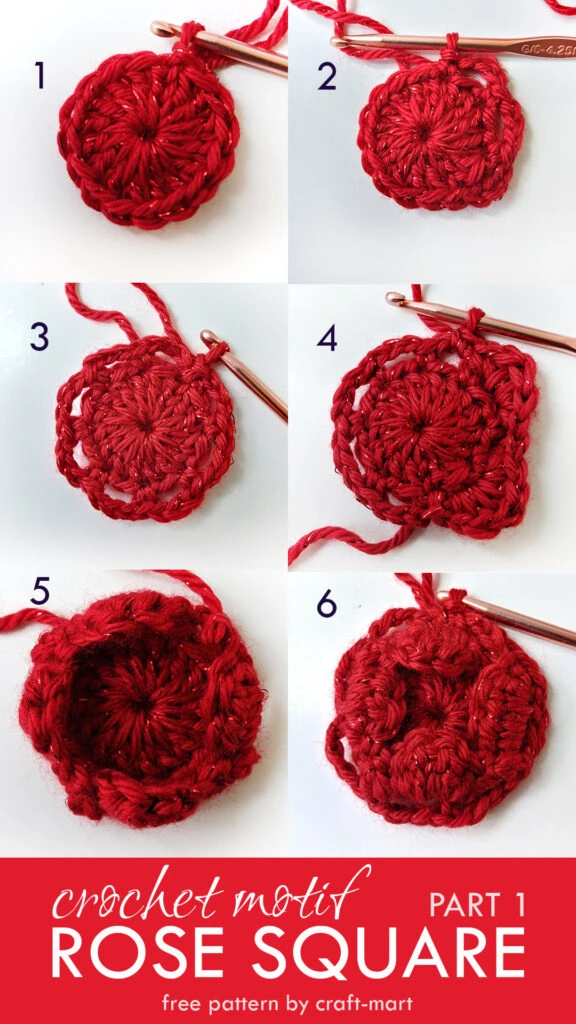
Step 1
Make a magic ring, CH3 (counts as DC), 15 DC into the magic ring, SL ST into the starting CH (16 DC).
Steps 2-3
*CH3, skip 1 stitch, SC into the next stitch*, repeat between * * 7 more times, finish with SL ST (8 CH3 spaces). This creates a foundation row for the first row of petals.
Steps 4-5
CH1, *SC into next CH3 SP, now we will crochet the first petal into the next CH3 SP: SC, HDC, DC, HDC, SC*. Repeat between * * 3 more times and finish with SL ST. (4 small petals).
Step 6
Now we’ll make another row of 8 CH3 spaces, but instead of SC, we will make BP SC (back post single crochet) around all SC ST of the previous row. As a result, your small crochet petals will ‘stand up’, creating a 3D effect for your crochet rose.
So, instead of inserting the hook into the top of the stitch, you’ll insert it from the back of the work, around the post, and then pull up a loop. Finish the BP SC as regular SC: yarn over, pull through both loops.
For this row, *BP SC, CH3, BP SC*, repeat between * * seven more times. You will have 8 CH3 spaces for the second row of bigger rose petals.

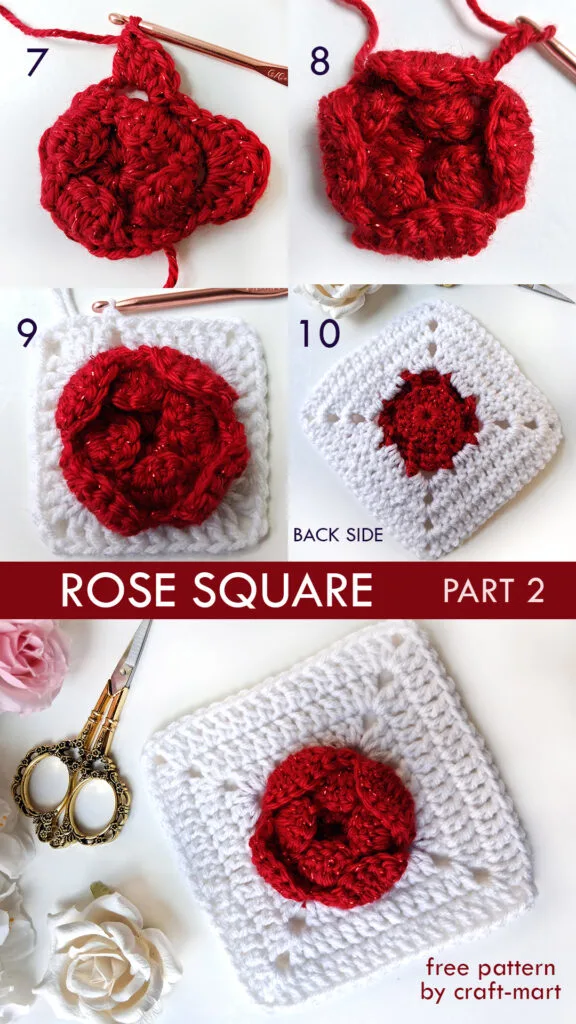
Steps 7-8
SC into the first CH3 SP. Next, we will crochet the first big petal into the next CH3 SP: SC, HDC, 4 DC, HDC, SC*. Repeat between * * 3 more times and finish with SL ST. (4 big petals).
Step 9
Now we’ll make another row of 8 CH3 spaces and BP SC stitches. This will be a foundation row for the rest of the square.
*BP SC, CH3, BP SC*, repeat between * * seven more times. You will have 8 CH3 spaces. Secure the loop, cut the red yarn.
Step 10
Make SL ST with white yarn, in a CH SP under a petal, CH3 (counts as first *DC), 2 DC, CH2, 3 DC. This forms the first corner of the square. Next, 3 DC into the next CH3 SP*. Repeat between * * 3 more times. SL ST into the top of the first CH.
This will be the first row of the square (in white). Lastly, we will crochet 2 more rows in white to finish our square.
Final Step
Crochet 1 more row in white: CH3 (counts as first DC), 2 DC into the next 2 stitches, *2DC+CH2+2DC into CH-SP. 9 DC into next 9 stitches*. Repeat for the next 3 corners. Finish with 6 DC, SL ST into the first CH.
So, each side of the square will have 9 DC, each corner will have 2DC+CH2+2DC into CH2 SP. Next, double-check your work to ensure that each side has 13 DC and CH2 SP in the corner.
Lastly, crochet the finishing row of the square in white: each side will have 17 DC and CH2 SP in the corner.
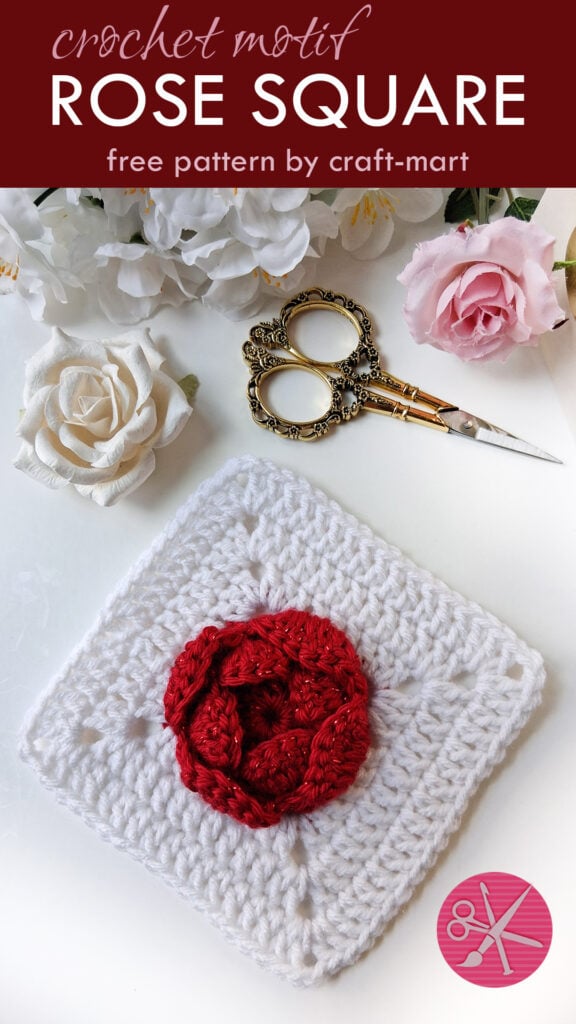
Back Side (Wrong Side) of the Rose Square

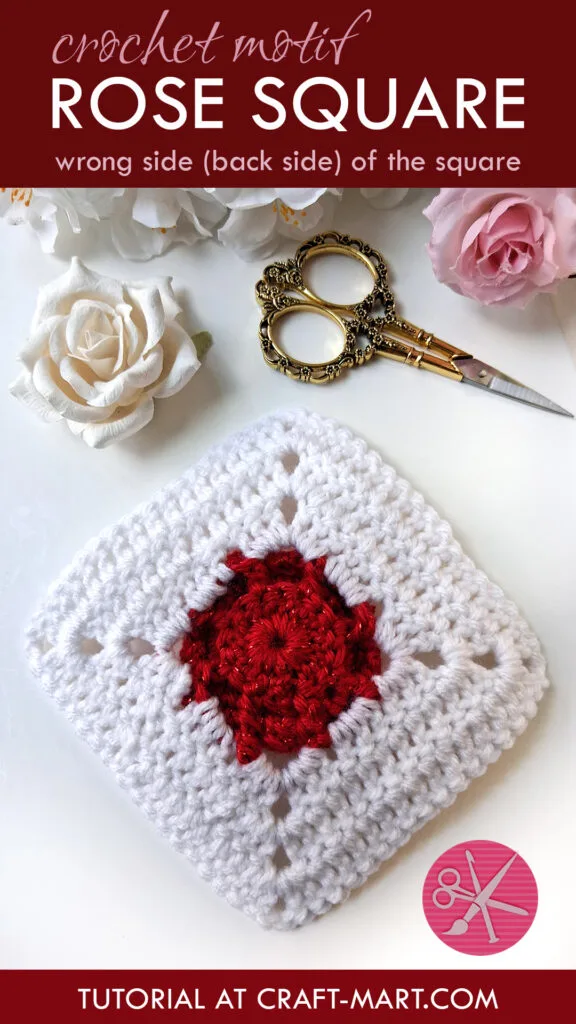
As a result, this is how the wrong (back) side of the Rose Square will look. Next, secure both tails of red yarn and weave them off.
Finishing Size of the Rose Square
The finishing size of this solid Rose Square with 3 rows of white is: 5″ x 5″ (12.5 cm x 12.5 cm).
Of course, you can continue with another row (or 2) of white yarn if you need to make it bigger.
Rose Granny Square

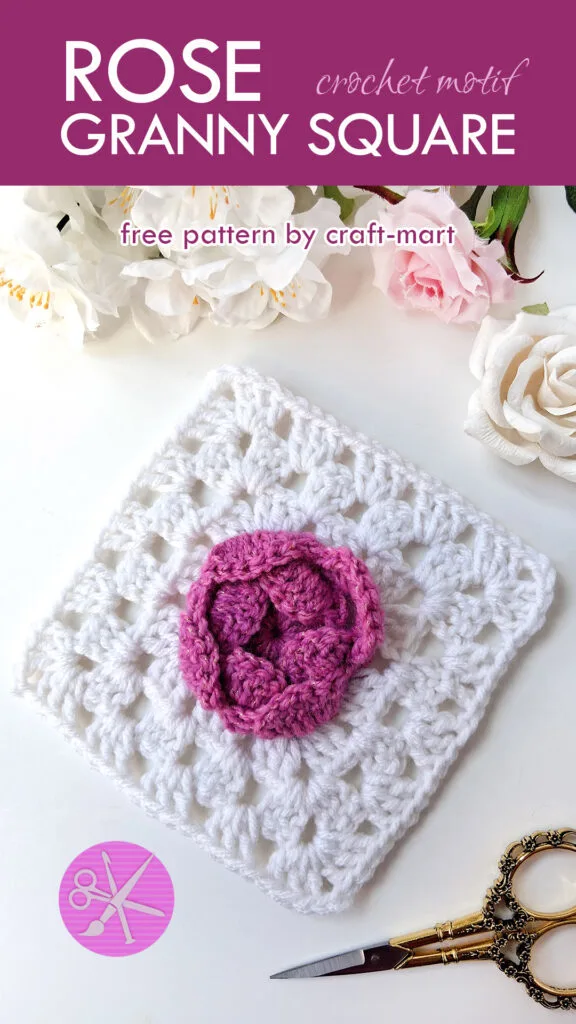
Of course, you can try all kinds of granny square variations after crocheting a center rose in any color. Moreover, you can use up some of your leftover yarn to clean up your craft room stash.
For example, this square has 3 classic granny stitch rows where 3DC are separated by CH1 and you are crocheting 3DC into CH-SP of the previous row. Finishing size is approximately the same: 5″ x 5″.
More Variation of Rose Granny Square


Notably, you can try other variations of this pattern. For example, you can add another row of petals, making the center flower bigger. Get creative and crochet your own unique rose square and share it on Pinterest in the comments. We would love to see your creations!
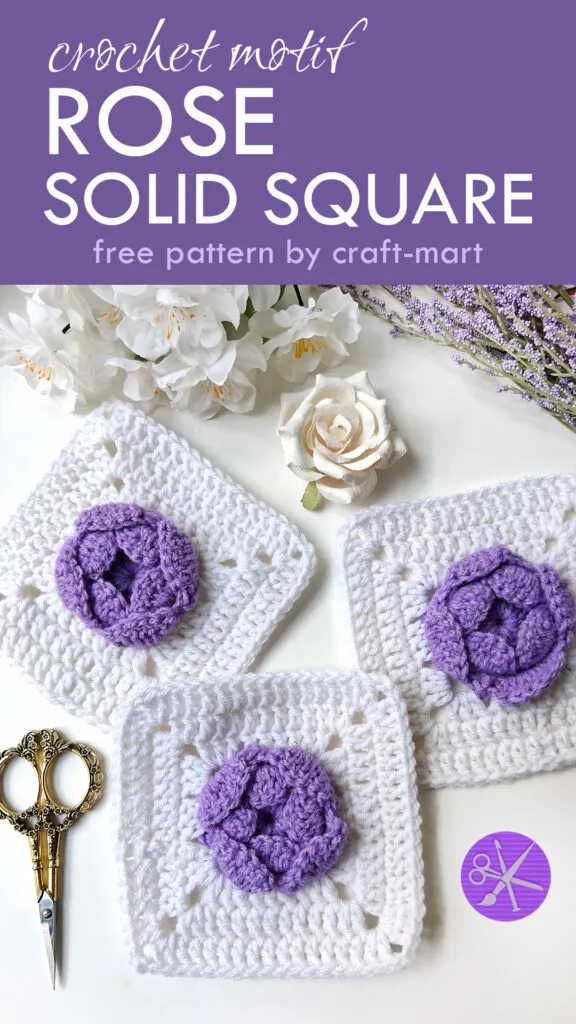
Color Variations for Rose Crochet Square
Also, it is fun to experiment with different colors for your rose. As a result, you can come up with a color variation that is so lovely that you would want to turn it into a blanket. Because you know the finishing size of your square, you can calculate how many squares you would need for a blanket or throw, using our handy blanket size chart.
For example, you would need 8 squares measuring 5″x5″ to make a 40″x40″ granny square throw.

Crochet Motif: Big Rose Crochet Square
Check out this variation of the same pattern! Here we used three rows of petals following the same pattern as featured above. For small petals, there are 6 ST (HDC+5DC+HDC), for medium: 9 ST (HDC+7DC+HDC), for big petals: 11 ST (HDC+9DC+HDC).
The first row of granny square: 10 DC (sides), 2 CH SP (corners). The second row: 14 DC, 2 CH SP. The third row: 18 DC (sides), 2 CH SP. The finished solid granny square measures 5.5″ x 5.5″.