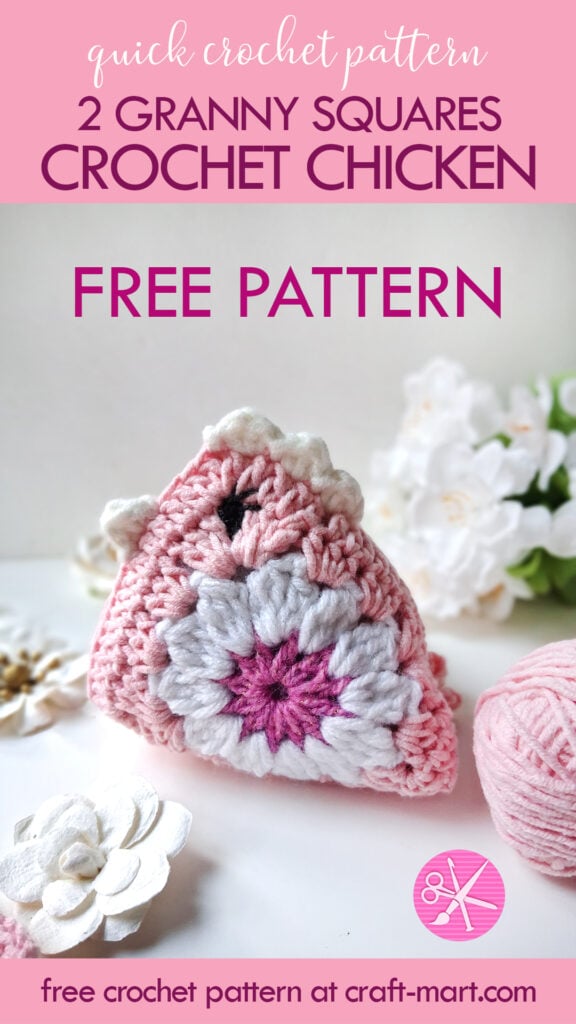
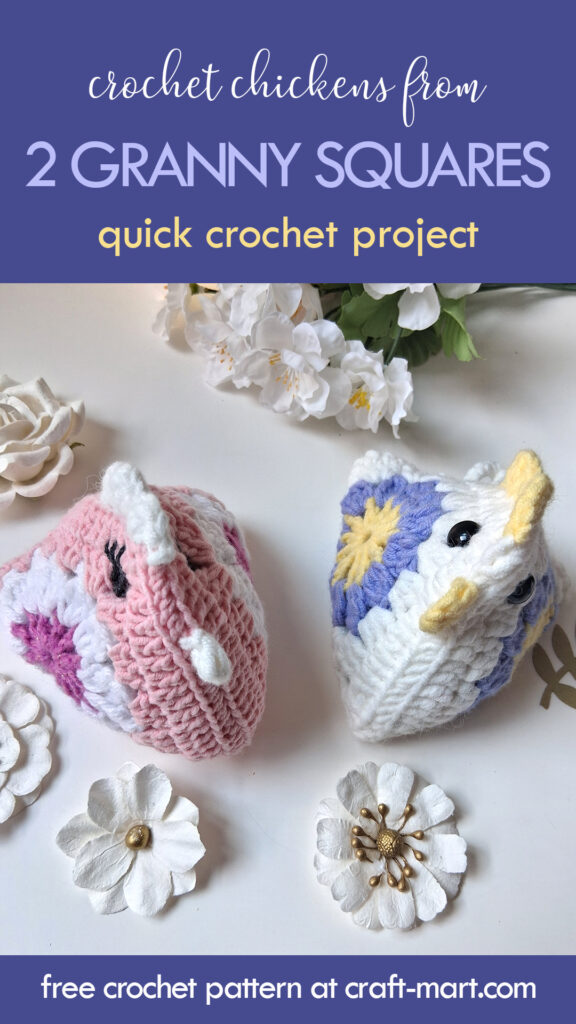
This crochet chicken is a quick, simple, and adorable pattern. In our tutorial, you’ll learn how to create a quick and adorable crochet chicken using just 2 small granny squares.
Whether you’re a seasoned crocheter looking for a fun project or a beginner trying small crochet projects, this guide will walk you through the steps to bring this whimsical spring creation to life. Also, after you master this granny square crochet pattern, you can use it to make blankets, tops, and crochet bags.
Materials
The beauty of small crochet patterns is that you can use your leftover yarn. Just pick three small balls from your stash, a crochet hook that matches the yarn weight, scissors for cutting, a tapestry needle for weaving in ends, and polyester fiber fill to stuff your chicken.
If you need more colors for your creative crochet project, a mini-skein set offers a wonderful solution. As a result, you’ll have a variety of colors for all your crochet spring chicks.
Abbreviations
- CH – chain
- DC – double crochet
- HDC – half double crochet
- EDC – extended double crochet
- TOG – together
- CH-SP – chain space
- CL – cluster (3EDC TOG)
Special Stitches for Crochet Chicken
Do you know how to make an Extended Double Crochet (EDC) stitch? If not, here is a quick tutorial. An extended double crochet is a modified double crochet that makes the standard double crochet slightly taller. We’ll use this stitch for clusters of the second row.
For an Extended Double Crochet (EDC):
- Yarn over, insert your hook into the chain space, yarn over, and pull up a loop (3 loops on the hook).
- Yarn over and pull through only the first loop on your hook. It created ‘an extension’ as an extra stitch for our extended double crochet (still 3 loops on the hook).
- Now we complete the double crochet part. Yarn over and pull through two loops (2 loops remain on the hook).
- Lastly, yarn over and pull through the remaining two loops.
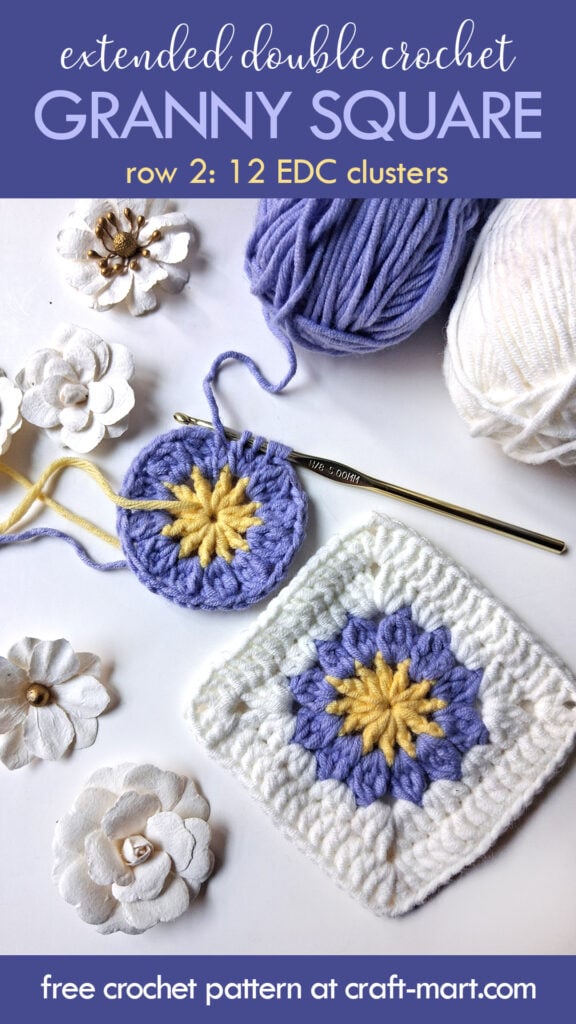
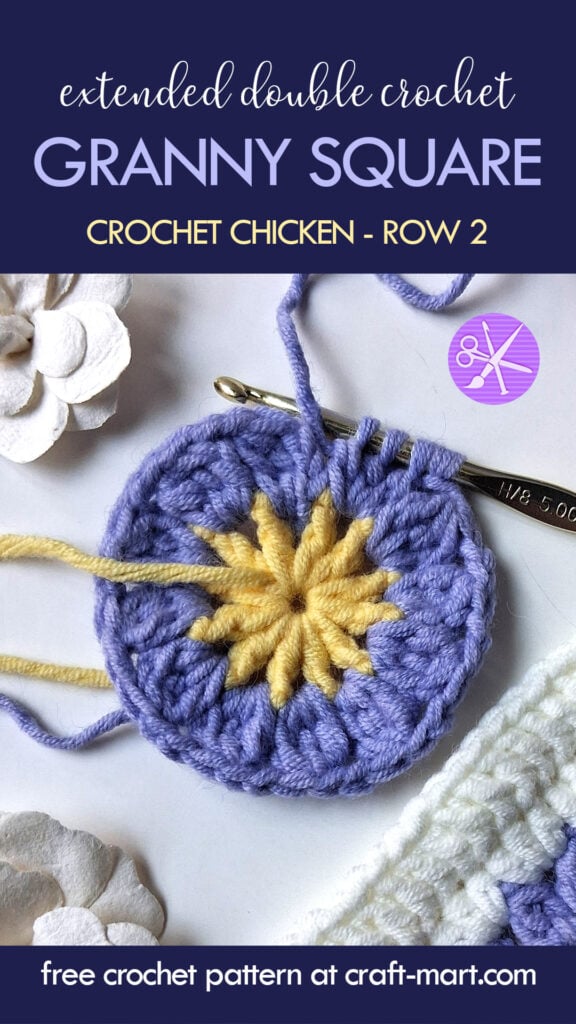
Special Crochet Stitch: Extended Double Crochet Cluster
For row 2 of this square, we’ll use this Cluster Stitch (CL): three extended double crochet stitches together (EDC TOG).
- Make three incomplete EDC by completing only 3 steps (from above) – 4 loops on the hook.
- Yarn over, pull through all 4 loops.
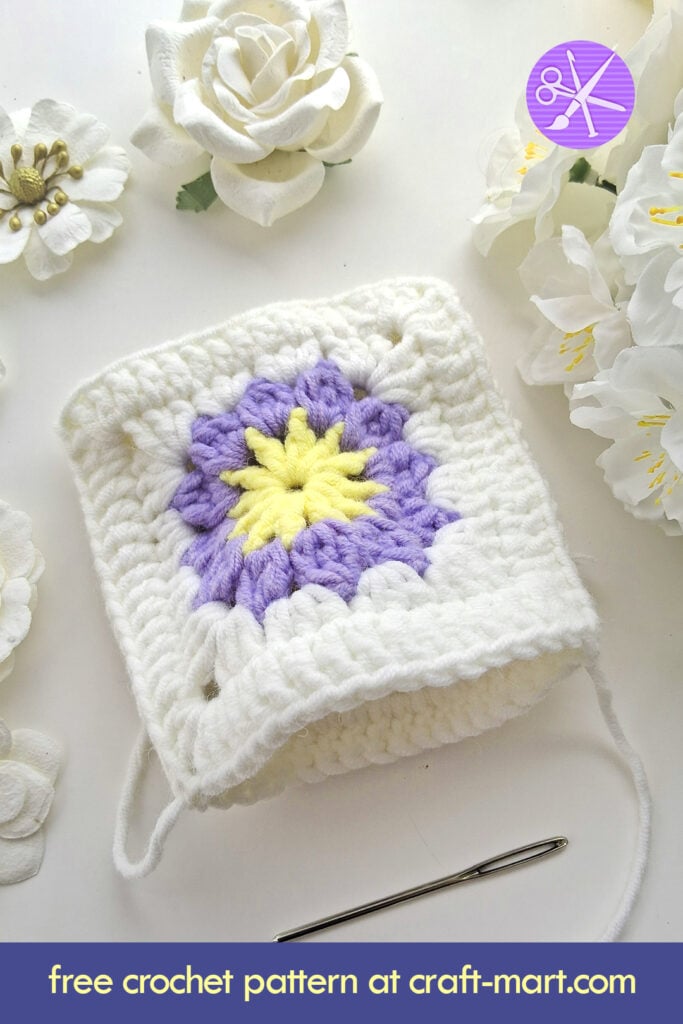
Free Pattern for Crochet Chicken
Firstly, you’ll need to make two granny squares in your three chosen yarn colors. These squares will form the body of your adorable chicken. Lastly, we’ll add some small details: tail, beak, and combs. Let’s crochet this small granny square – it has only four easy rows.
Row 1
Firstly, with COLOR 1, make a magic ring, CH4 (represents DC+CH1), DC+CH eleven times (12 DC, 12 CH1). Fasten, cut off COLOR 1.
Row 2
This row consists of 12 clusters made into the CH-SP of the previous row. Each cluster has 3 extended double crochet stitches together (3EDC TOG) connected with CH2.
Secondly, with COLOR 2, make a first cluster into the first CH SP: CH2, 2EDC TOG, CH2. Crochet 11 more CL: 3EDC TOG, CH2. (12 CL, 12 CH2)
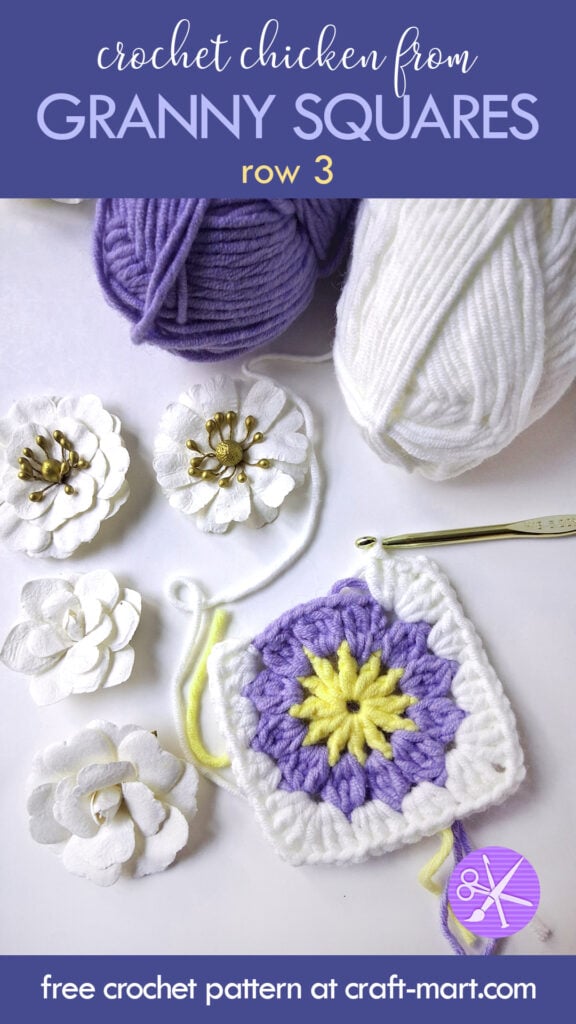
Row 3
With COLOR 3, CH3+2DC into the same space, skip the cluster, into the next CH2 SP, 3HDC, skip the next cluster, 3HDC. Now we have reached the corner of our granny square: *3DC + CH2 + 3DC into the next CH SP. Skip the next cluster, in the next CH2 SP, make 3HDC, skip the next cluster, make 3HDC into the CH-SP*. Repeat between ** three more times. Finish with 3DC+CH2 into the first corner. Lastly, SL ST into the first CH3 of the row.
Row 4 (the last row of the granny square)
Continue with the same color: CH3 (counts as the first DC), *11 DC into the next 11 stitches. Now we’ve reached the corner: into CH2-SP of the corner, make 2DC + CH2 + 2DC *. Repeat between ** 3 more times, around all sides of the square. Lastly, SL ST in the first CH3. Each side of the square has 16 stitches connected with CH2 in the corners.

Assembling Crochet Chicken
Now that we have both squares completed, it’s time to stitch them together and stuff our crochet chicken. Stuffed animals are kids’ favorite toys and make a nice small gift, basket filler, or spring decor item for the home.
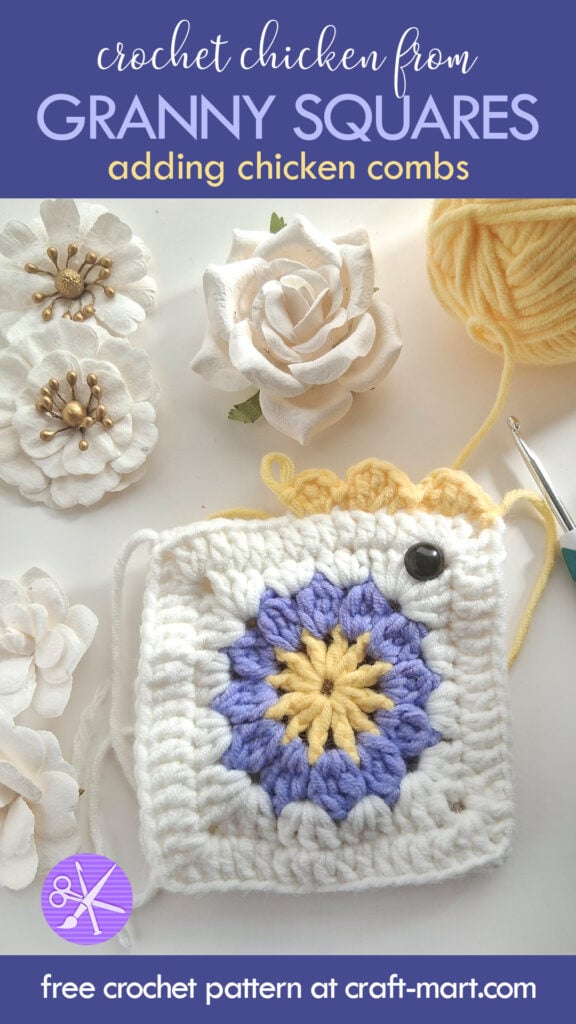
So, to put the finishing touches on our quick crochet project, we’ll add eyes, a tail, a beak, and combs on the top of the chicken’s head. You can add safety eyes or crochet them using a dark yarn.
Step 1
Firstly, place 2 squares together, making sure that the ‘wrong’ sides are inside. Take a tapestry needle with yarn of the same color as your last 2 rows and stitch together 3 sides, leaving the fourth side open.
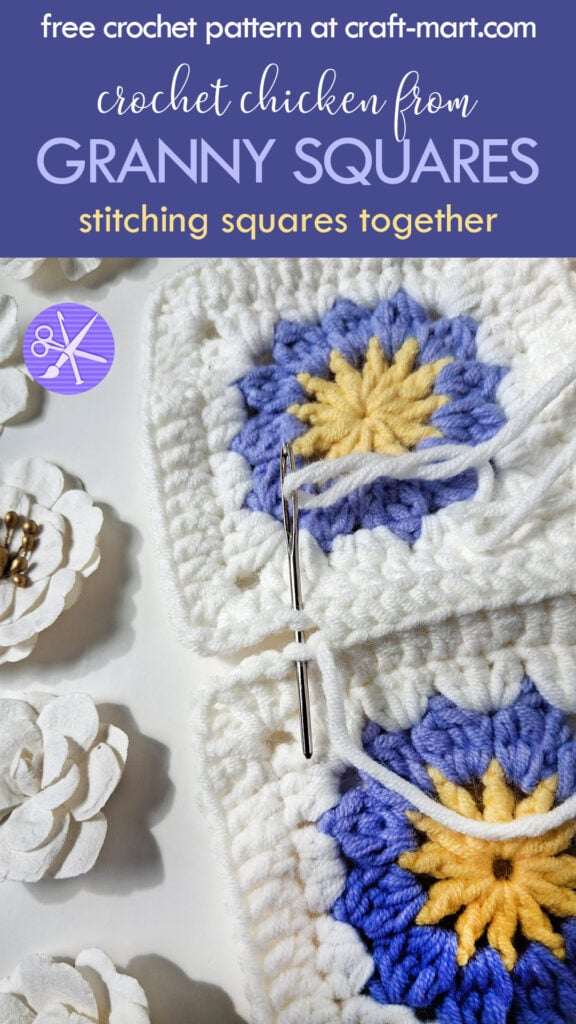
Measure the yarn that is twice the size of three sides of the square, insert the yarn in a tapestry needle, and start stitching by picking up one loop from each square.
Most importantly, leave one side open. Later, we’ll use it to stuff the chicken with polly fill, hide the tail ends, add the combs and the beak, and add safety eyes.
Step 3
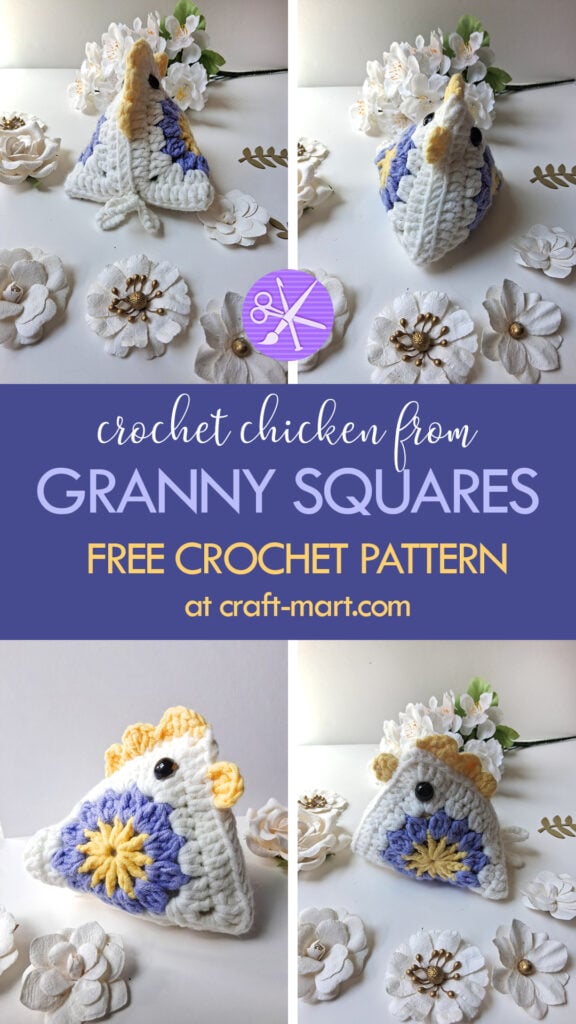
Next, we’ll crochet 3 combs. You can use either color 1 or 2 to have a contrasting effect.
Firstly, attach your yarn to the top of the head (the corner of your square). CH1, *SC into the next ST. In the next ST, HDC+2DC+HDC, SC into the next ST*. Repeat between ** 2 more times to crochet 3 combs total. Hide the yarn tails.
Step 4
Lastly, we’ll crochet a beak
Skip 3 stitches from the top of the head on the other side and attach your yarn. SC, into next ST, DC+CH1+DC, SC into the next ST. Hide tails.
Step 5
Insert safety eyes or crochet small circles with black yarn and sew them into the corners of both granny squares. If you are planning to gift your crochet chicken as a toy, we recommend embroidered eyes for safety, as kids can accidentally swallow these tiny accessories.
Step 6
Now, it is time to fill your chicken with polyfill. Approximately, you’d need a handful of stuffing. Make sure to fill the corners and make your stuffed bird as plump as you wish.
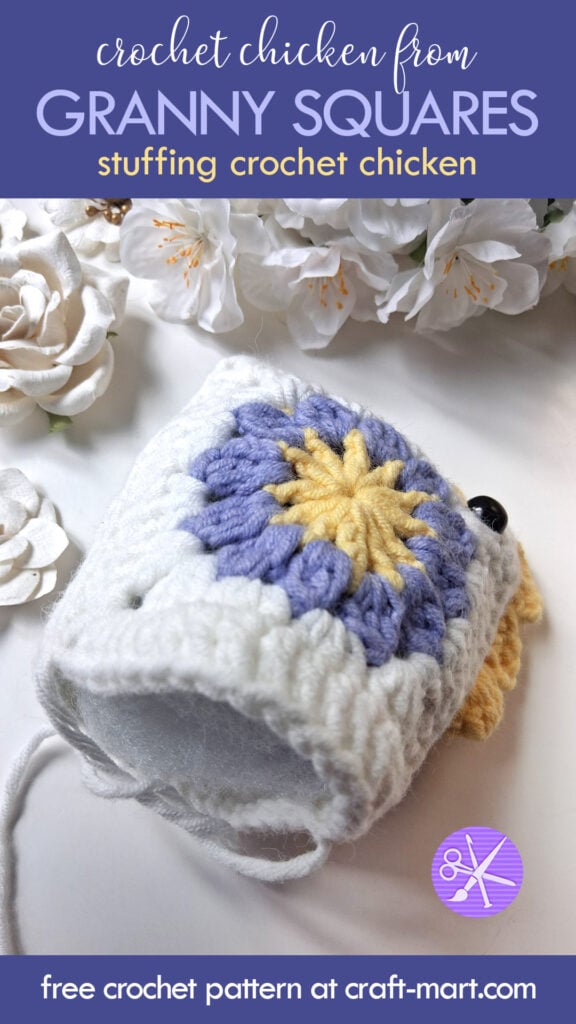
Step 7
We are on the final steps of our crochet chicken assembly! Now, we’ll close the fourth side by bringing the two corners together to form a pyramid. To make sewing easier, tie a knot with 2 tails and close the gap with the same stitch. If necessary, you can add a little bit more stuffing to the corners.
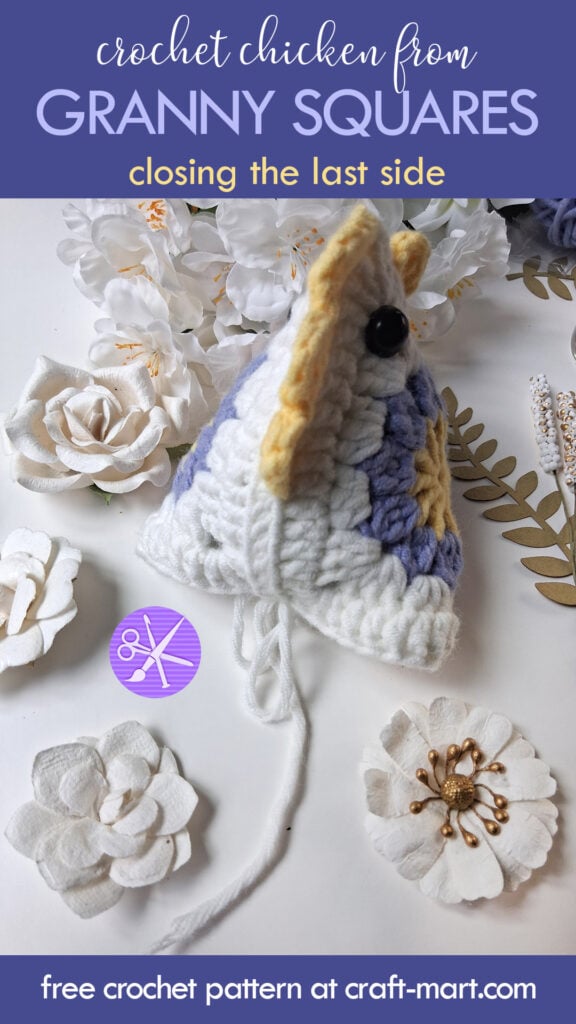
Step 8
Next, we’ll add a tail. Make a slip knot, CH15, SL ST in the first CH to form the first loop of the tail. *CH14, SL ST in the same ST as for the first loop*, repeat between ** to form the third loop of the tail. Lastly, sew it in the middle of the chicken’s back side. Hide all tails inside.
Enjoy, as your spring crochet chicken is finished! With just two granny squares, poly fill, and a few details, you have an adorable chicken to celebrate the season.
The only problem with this pattern is that it is dangerously quick and addictive. Once you pick up your crochet hook and start stitching away, it’s almost impossible to put it down. Before you know it, you’ll have a cute and colorful chicken in your hand, ready to join your collection.
But then, something strange happens – you find yourself rummaging through your craft room, searching for more yarn to make another one. And another one. And soon, you have a whole flock of chickens, each one unique in its own way.
But why is this pattern so addictive? Is it the simplicity of the design or the satisfaction of completing a project in record time? Perhaps it’s the joy of seeing a fluffy little friend come to life through your own hands. Whatever the reason may be, one thing is for sure – this chicken pattern is a creative way to use leftover yarn and organize your craft room in the process.
More Quick Crochet Projects
In Conclusion
In summary, by mastering the art of creating a crochet chicken using just 2 granny squares, you’ve unlocked a world of whimsical possibilities. Next, let your creativity soar by experimenting with different colors and sizes to make each chicken uniquely yours.
Also, share your creations with the crochet community, inspire others to embark on their own quirky projects, and spread the joy of handmade whimsy. As you continue to crochet your way through new adventures, remember: every stitch tells your own story.