

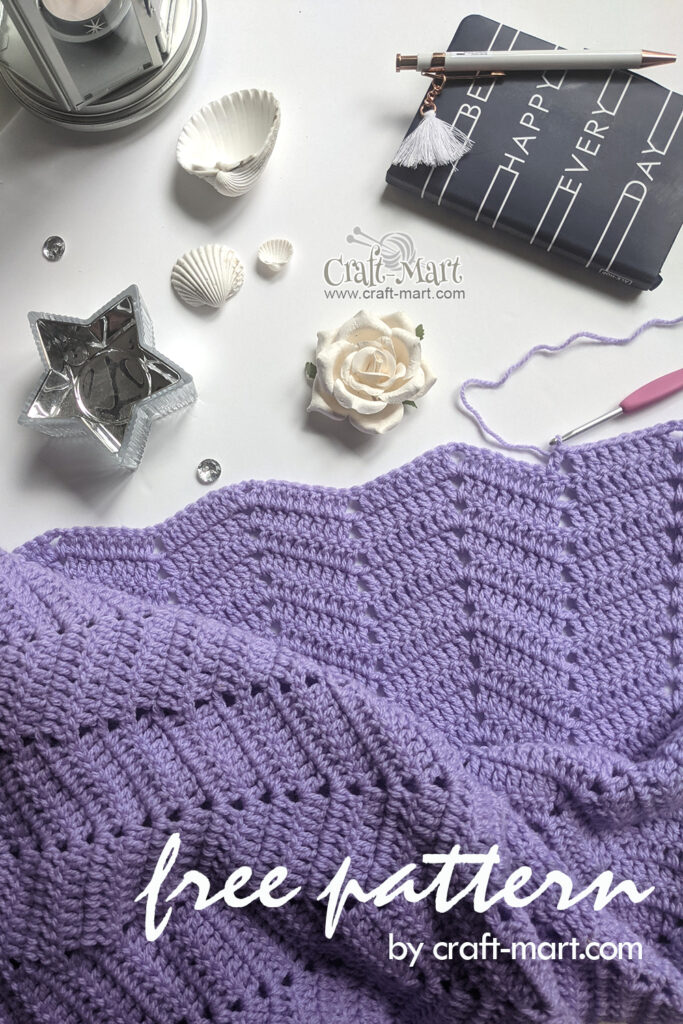
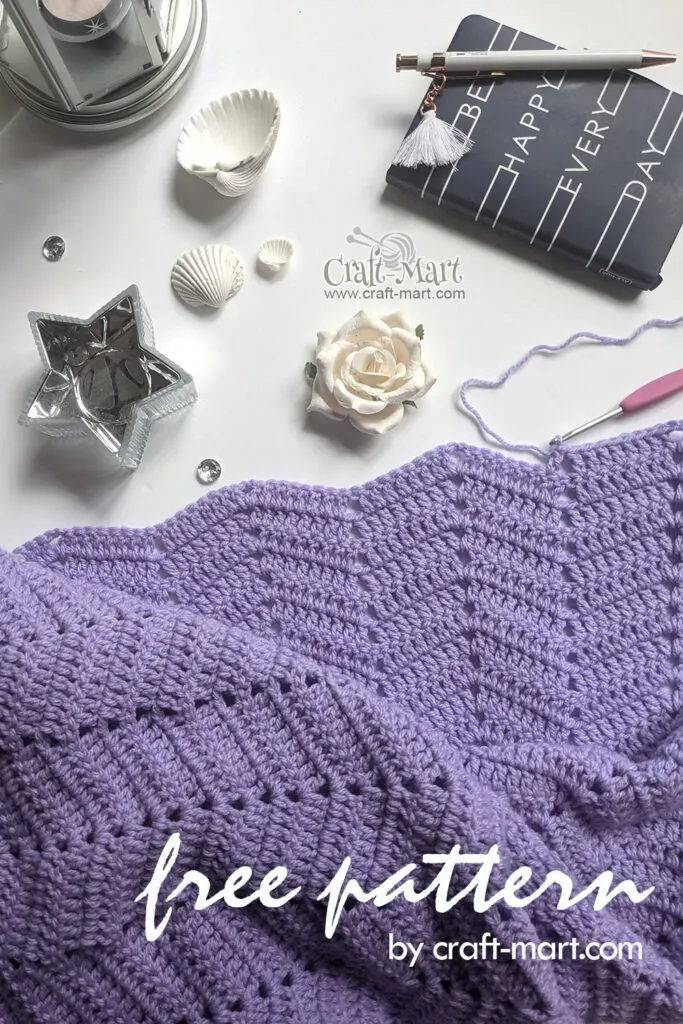
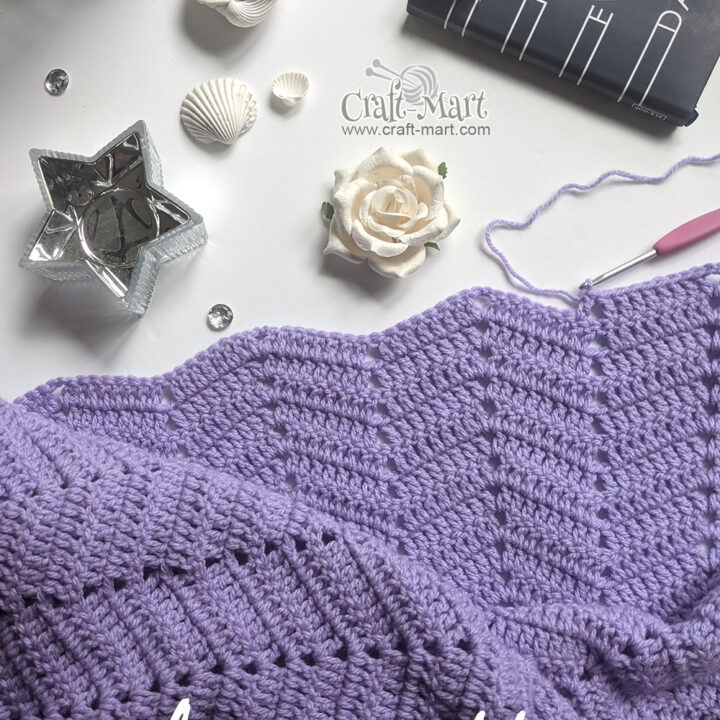
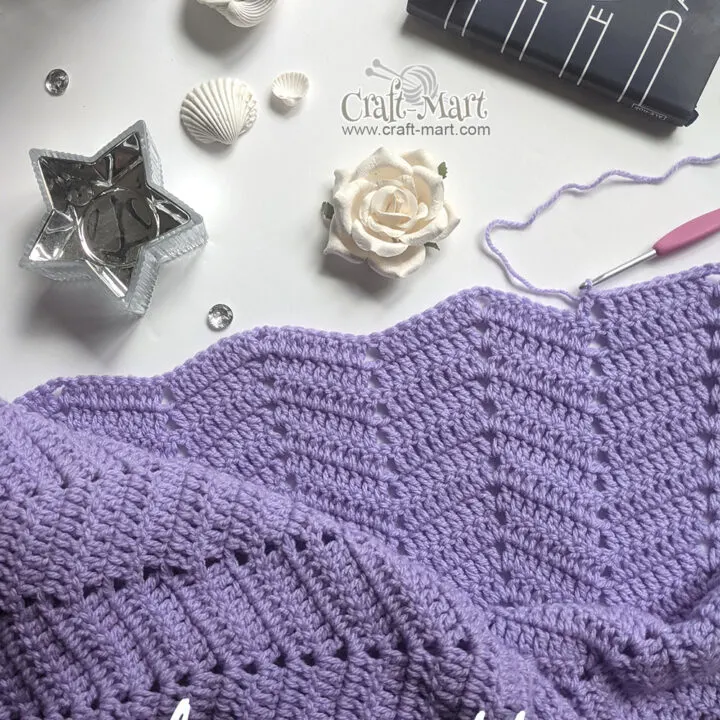
This ripple crochet baby blanket pattern is easy to understand and implement. In essence, it consists of peaks and valleys (tops and bottoms).
On the positive side, after a set-up row, which is slightly different in this easy ripple crochet pattern, you’ll be repeating the same row to the end of the project.
How do you start a ripple afgan or baby blanket?
After you understand the structure of this stitch, it is impossible to get lost in creating this wavy ripple crochet pattern. Equally important, each straight side has exactly 8 double crochet stitches (dc).
Furthermore, to create a wavy pattern, you would be working 2 double crochet stitches into chain space on the top of each peak. Consequently, you would be skipping 2 stitches on the bottom.
How do you know how many stitches you would need for the foundation chain?
First of all, you can copy this pattern exactly and use the same number of foundation chains. Second, you can use our easy formula to adjust the size of your crochet blanket if you need to make it bigger (or smaller).
Point mostly overlooked, it is almost impossible to have the same gauge (number of stitches and rows in 10” x 10” square) as another crafter, just start with a practice swatch to measure your own gauge. Based on that, you can adjust your foundation chain if you need a bigger or smaller blanket.
How many chains does it take to start a ripple crochet blanket?
Recently, I had a life-changing experience after trying a half-double crochet foundation chain. To emphasize, it turned out so neatly that from now on it would be the only way I would start all my crochet baby blanket patterns.
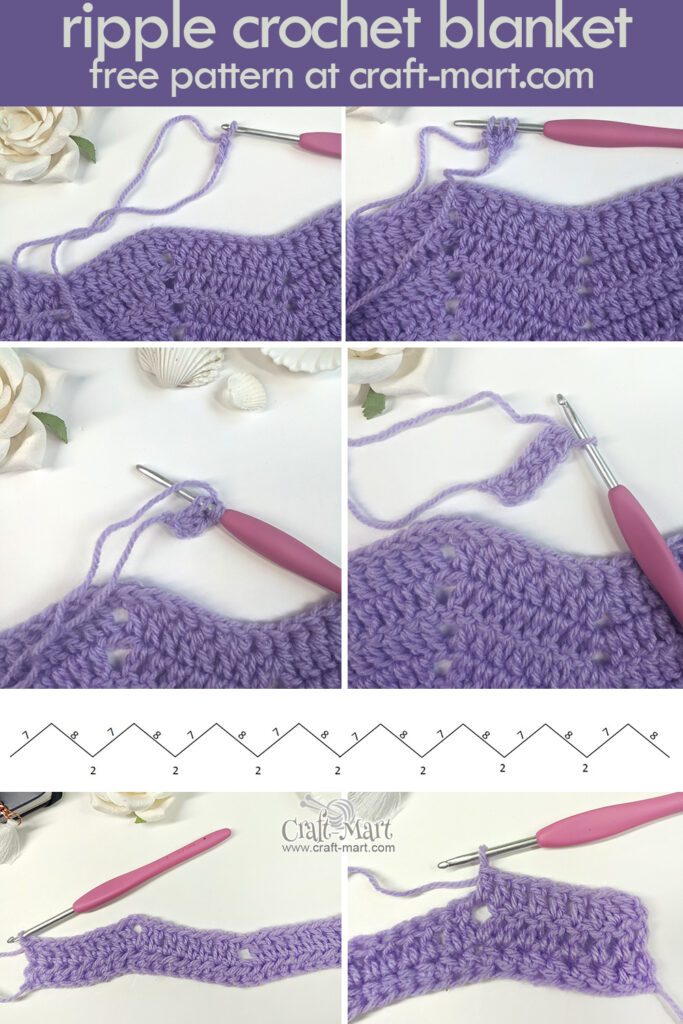
As you can see from the illustration below, it is easy to calculate your blanket’s foundation chain. If you are wondering why the slopes have different numbers (8 & 7), it is easy to explain.
To point out, just for the first set-up row, you would be making 2 double crochet in the same stitch on the top of each peak. Thus, you would need one less foundation stitch for the ‘downhill slope’ than for the uphill slope.
Consequently, for this blanket, there are 8 peaks, 16 slopes, and seven valleys where you skip 2 stitches.
7+8 = 15; 15 x 8 = 120
2 x 7 = 14
120 + 14 = 132 foundation stitches.

Sample Swatch to Practice Ripple Crochet Pattern
To illustrate, we’ll start with a sample swatch to practice the ripple crochet pattern.
Firstly, for a sample swatch, create a foundation chain of 32. You’ll have 2 peaks, 4 slopes total, and 1 valley.
15 x 2 = 30; 30+2= 32 foundation chains.
Abbreviations
fhdc – foundation half double crochet
ch – chain
dc – double crochet
hdc – half double crochet
sk – skip
ch sp – chain space
dc2tog – double crochet two together
Double crochet 2 together (dc2tog) – [yo, insert hook in next st, yo, pull up a loop, yo, pull through 2 loops] 2 times, yo, pull through all 3 loops.
First of all, create a foundation half double crochet chain (fhdc) 32.
Watch a video tutorial to learn this stitch:
Row 1 (set up row)
First of all, for this row (which is different from the rest of the project), ch 3 (counts as a first double crochet stitch); dc into next 7 stitches – 8 dc total. You’ve completed the first uphill slope.
As a result, now you are at the peak of the ripple pattern. ch2, dc into the same stitch; dc into next 7 stitches – 8 dc total. You’ve completed the first downhill slope.
To continue, skip 2 stitches. In effect, that indicates the bottom of the valley. 8 dc into next 8 stitches. To sum up, you’ve completed the second uphill slope.
Now you are at the second peak: ch2, dc into the same stitch, dc into next 7 stitches – 8 dc total. As a result, you’ve completed the second downhill slope.
In summary, your set-up row is complete. From now on, you would need to pay attention only at the beginning and the end of the row.
As a result, all middle uphill and downhill slopes would have exactly 8 double crochet stitches. In general, you would always make dc, ch 2, dc into chain spaces of the previous row at the top of each peak. You would always skip 2 stitches (sk 2) at the bottom.
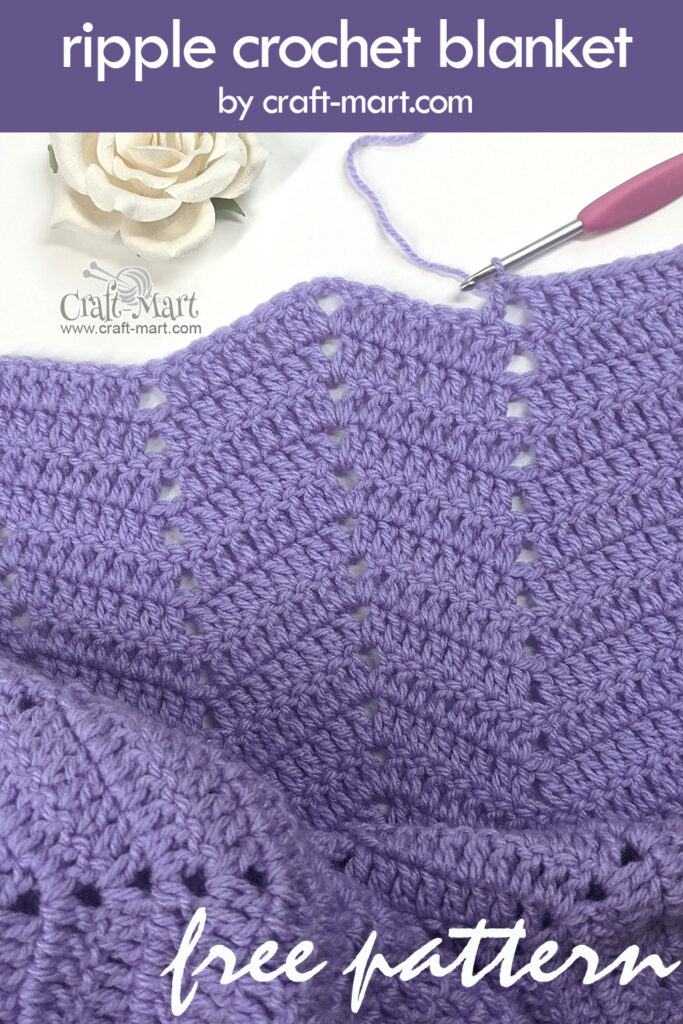
Consequently, you’ll start seeing this distinctive ripple pattern. Sometimes, it is called a chevron crochet pattern.
Keep in mind, at the beginning and the end of each row you would need to make double crochet two together (dc2tog). With this in mind, you will keep the edges straight. Otherwise, your first and last slopes will have an extra stitch.
Row 2 (and all the rows)
Ch 3, dc2tog, 6 dc (the last dc is done into the ch sp) – 8 dc stitches total as dc2tog counts as one stitch. Ch 2, dc into the same ch sp, 7 dc into next 7 stitches – 8 dc total.
Sk 2 stitches, 8 dc (the last DC is done into the ch sp) – 8 dc stitches total. Ch 2.
To continue, dc into the same ch sp from the previous row; 6 dc, dc2tog into the last 2 stitches (8 dc stitches total).
Furthermore, repeat this row until you feel that you completely understand the pattern. Consequently, get comfortable crocheting 2 double crochet stitches together (dc2tog) at the beginning and the end of each row.
Meanwhile, practice this stitch making sure all your stitches have the same height and tension. All things considered, this will make your finished blanket look nice and neat.
In addition, you can also print out a FREE PDF of this ripple crochet pattern for your reference! In fact, just click the PRINT button at the end of this post.
Now you have mastered this chevron crochet stitch and you are ready to start your Ripple Crochet Baby Blanket!
Below is a ripple crochet baby blanket pattern (free) for you that uses 1 skein of popular baby blanket yarn. Certainly. you’ll enjoy this relaxing wavy stitch while creating an adorable baby blanket.

Hope Ripple Crochet Baby Blanket Pattern
Finished Size: 32″ x 36″
Gauge: 4″ x 4″ (10 cm x 10 cm) 16 stitches, 8 rows
Materials and Tools
- Bernat Baby Sport Yarn (#3) 350g / 12.3 oz, 1148 meters / 1256 yards in Lavender
- 4 mm (U.S. G/6) crochet hook (recommended for this yarn) – I’ve used 3.75 mm crochet hook for this blanket
- Scissors
- Tapestry needle
To start, fhdc 132.
Row 1 (set up row)
Ch 3 (or do a foundation turning chain) counts as the first dc; watch this short video to learn how to do it). *7 dc into next 7 stitches; ch2, dc into the same stitch. 7 dc into the next 7 stitches; skip 2 stitches. * Repeat steps between * * 7 times until you get to the end of the foundation chain (don’t skip 2 for the last repeat as you’ll be at the end of the row.
Row 2 (same row repeat)
Turn, ch 3 (or foundation turning chain) counts as the first dc; dc2tog into next 2 stitches; 5 dc into next 5 stitches; dc, ch2, dc into ch sp of the previous row; 7 dc into the next 7 stitches; skip 2 stitches.
*7 dc into the next 7 stitches; dc, ch2, dc into ch sp of the previous row; 7 dc into the next 7 stitches, sk 2.* Repeat between * * 4 times. 7 dc into the next 7 stitches; dc, ch2, dc into ch sp of the previous row; 5 dc into next 5 stitches; dc2tog into next 2 stitches.
Row 3 and all other rows
From now on, repeat row 2 (64 rows total).
Row 65 (edging border)
Turn, ch2, hdc into every stitch, 2 hdc into each ch sp.
Lastly, cut the yarn and weave in the ends.
In conclusion, this FREE CROCHET PATTERN comes with a printable version so you can print, save, and crochet it on your own later.
Ripple Crochet Pattern
It is a 1 skein, 1 row repeat ripple crochet baby blanket pattern that is easy to understand and implement. You would need to know a few basic crochet stitches in order to create this baby blanket.
Materials
- Bernat Baby Sport (#3) 350g / 12.3 oz, 1148 meters / 1256 yards in Lavender
Tools
- 4 mm (U.S. G/6) crochet hook (recommended for this yarn) - I’ve used a 3.75 mm crochet hook for this blanket.
- Scissors
- Tapestry needle
Instructions
- Chain 132 (I recommend foundation half double crochet).
- Row 1 (set up row): Ch 3; *7 dc into next 7 stitches; ch2, dc into the same stitch. 7 dc into the next 7 stitches; skip 2 stitches.* Repeat steps between * * 7 times until you get to the end of the foundation chain (don’t skip 2 for the last repeat as you’ll be at the end of the row.
- Row 2 (same row repeat): Turn, ch 3 (or foundation turning chain) counts as the first dc; dc2tog into next 2 stitches; 5 dc into next 5 stitches; dc, ch2, dc into ch sp of the previous row; 7 dc into the next 7 stitches; skip 2 stitches. *7 dc into the next 7 stitches; dc, ch2, dc into ch sp of the previous row; 7 dc into the next 7 stitches, sk 2.* Repeat between * * 4 times. 7 dc into the next 7 stitches; dc, ch2, dc into ch sp of the previous row; 5 dc into next 5 stitches; dc2tog into next 2 stitches.
- Row 3 and all other rows - repeat row 2 (64 rows total).
- Row 65 (edging border): Turn, ch2, hdc into every stitch, 2 hdc into each ch sp.
- Secure the last stitch with a loop, cut the yarn, weave in 2 tail ends in the beginning and the end of the project.
Notes
Finished size: 32" x 36"
This ripple crochet baby blanket pattern is easy to understand and implement. As any ripple pattern, it consists of peaks and valleys (tops and bottoms).
After a set-up row, which is slightly different in this ripple crochet pattern, you’ll be repeating the same row to the end of the project.
After you understand the structure of this stitch, it is impossible to get lost in creating this wavy ripple crochet pattern. Each straight side has exactly 8 double crochet stitches (DC).
To create a wavy pattern, you would be working 2 double crochet stitches into chain space on the top of each peak. Consequently, you would be skipping 2 stitches on the bottom.