Out of a few ways to draw a lion, this one will let you achieve pretty impressive results without oversimplifying your drawing. With our easy step-by-step drawing guides, you’ll be able to check yourself at each stage using the provided grid lines.
Most importantly, after you master it yourself, you can teach your kids this simple lion drawing and how to draw a lion cub cartoon. Use our free printable guides and follow easy step-by-step instructions.
Making a simple drawing of a lion

How to draw a lion in a standing position
Many people are interested to learn how to draw a lion in motion or a roaring lion. Sure, it is more fun to make such pictures.
Yet for beginners, drawing a lion in a static pose is a lot more beneficial and rewarding as you’ll see great results right away. Once you have learned all the basic proportions of a lion’s body parts, it will be much easier to draw these beautiful animals in motion.
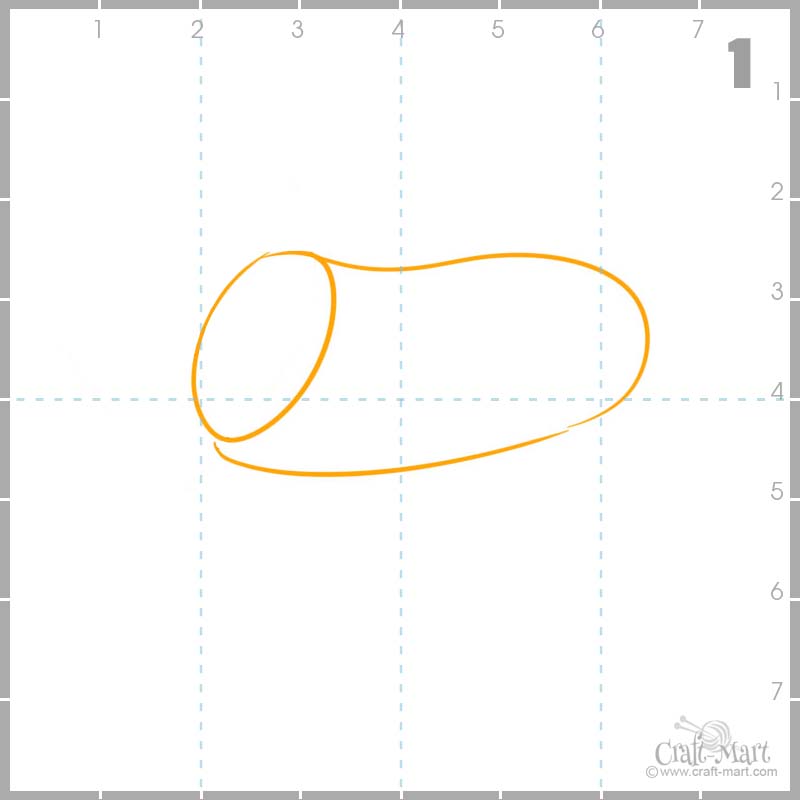
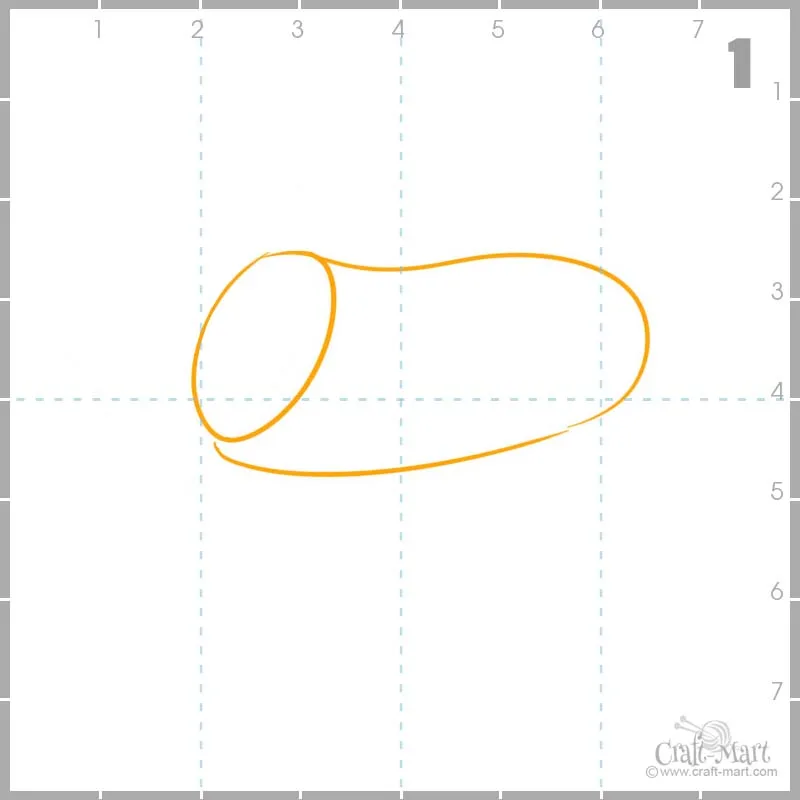
Step 1 – Simple outline drawing of a lion’s torso
It is very tempting to start drawing a lion by outlining the lion’s mane and the head but the correct positioning of the body is more important at this stage. Make sure that the torso doesn’t go too much to the left of vertical line #2.
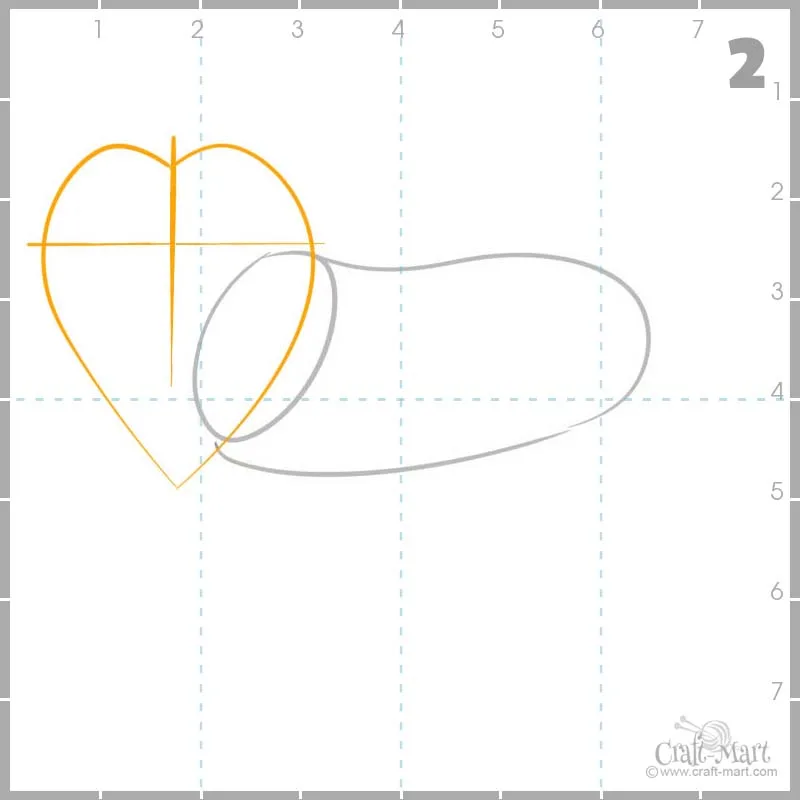
Step 2 – Draw a lion’s mane
Well, this simple outline drawing of a lion’s mane looks like a tree leaf that almost anyone is able to draw. Don’t worry – soon this tree leaf will turn into a lion’s head with the beautiful mane around it!
*Make sure that the horizontal line is a bit above the torso and check the overall proportions of the head and body.

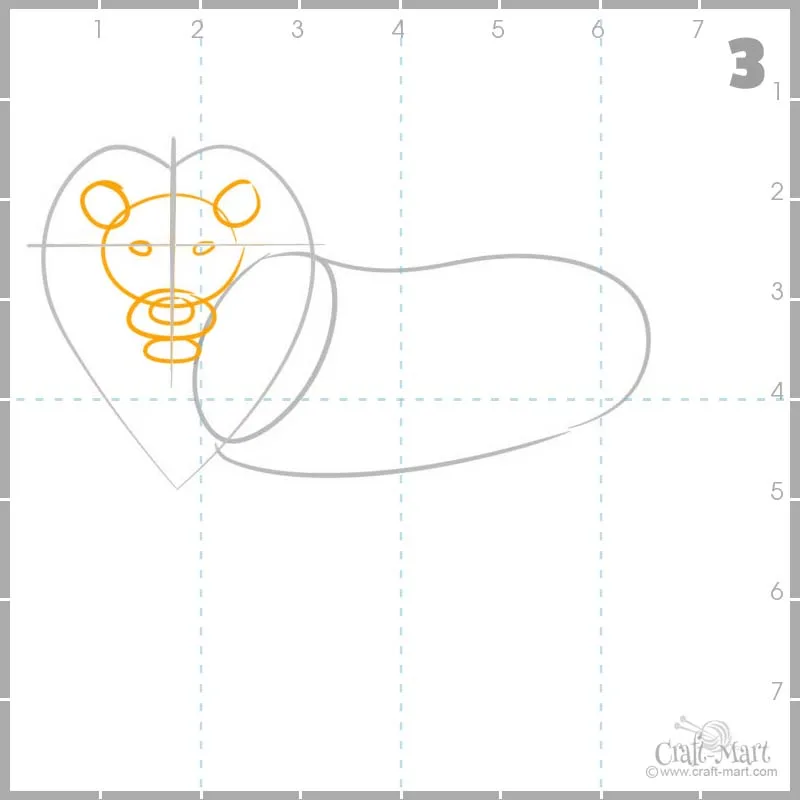
Step 3 – Sketching the main parts of a lion’s face
Placing three main head parts correctly is important! Start from the big oval around the intersection of 2 axes and add two smaller ones below for the upper and the lower jaws. COnsequently, add placeholders for eyes, nose, and ears. Done!

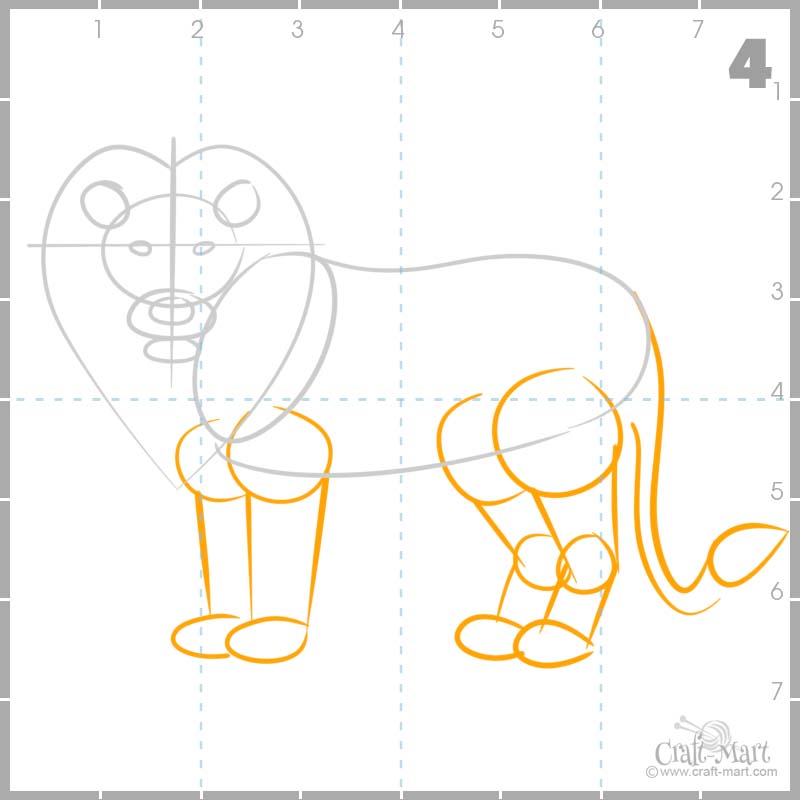
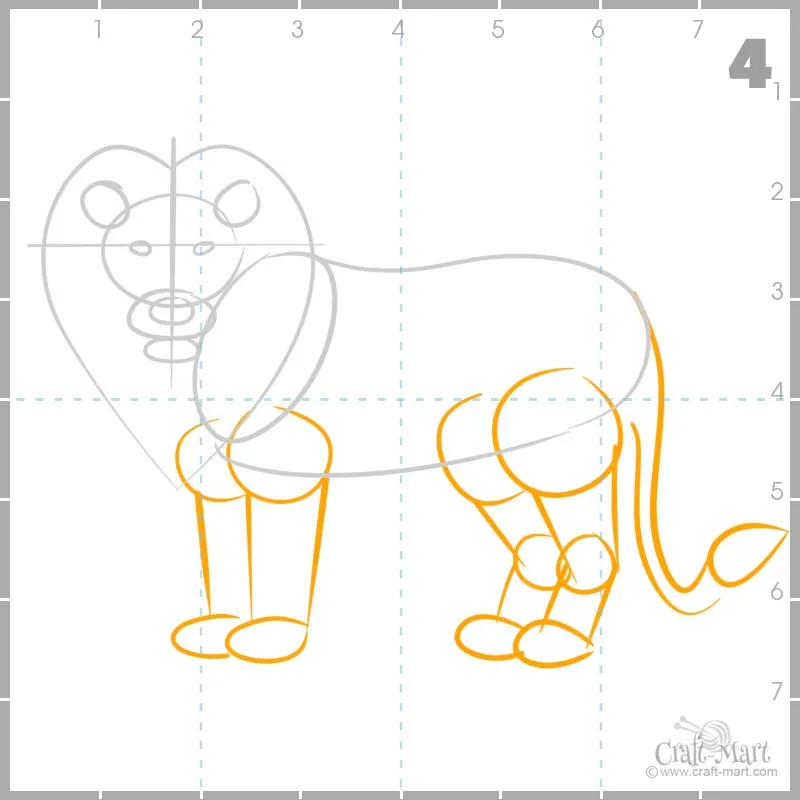
Step 4 – Outlining lion’s paws and tail
Don’t make the lion’s legs too long – the paws should be standing on the ground on the horizontal line between numbers 6 and 7.
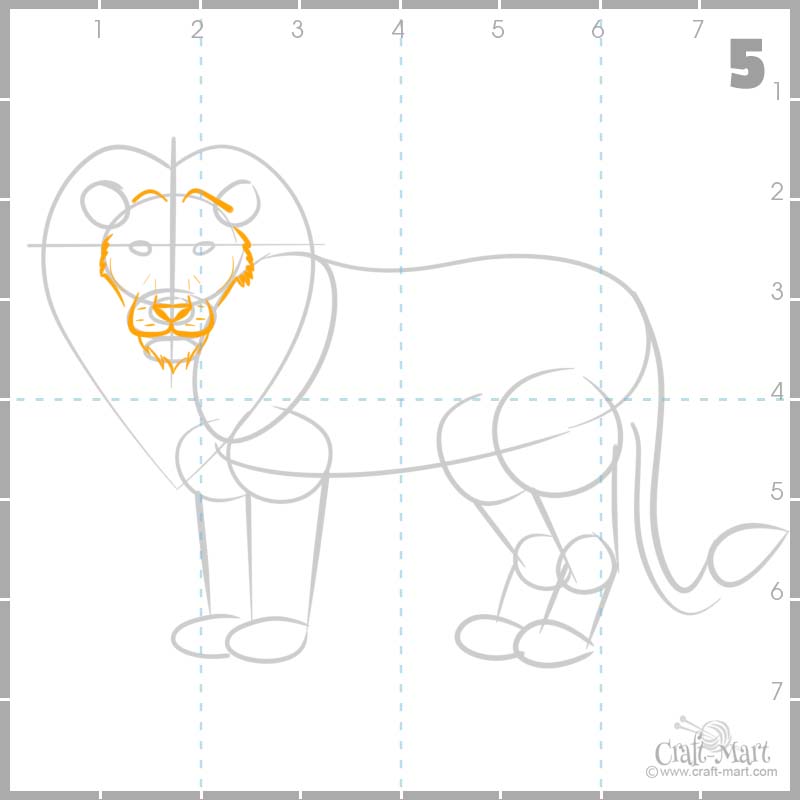
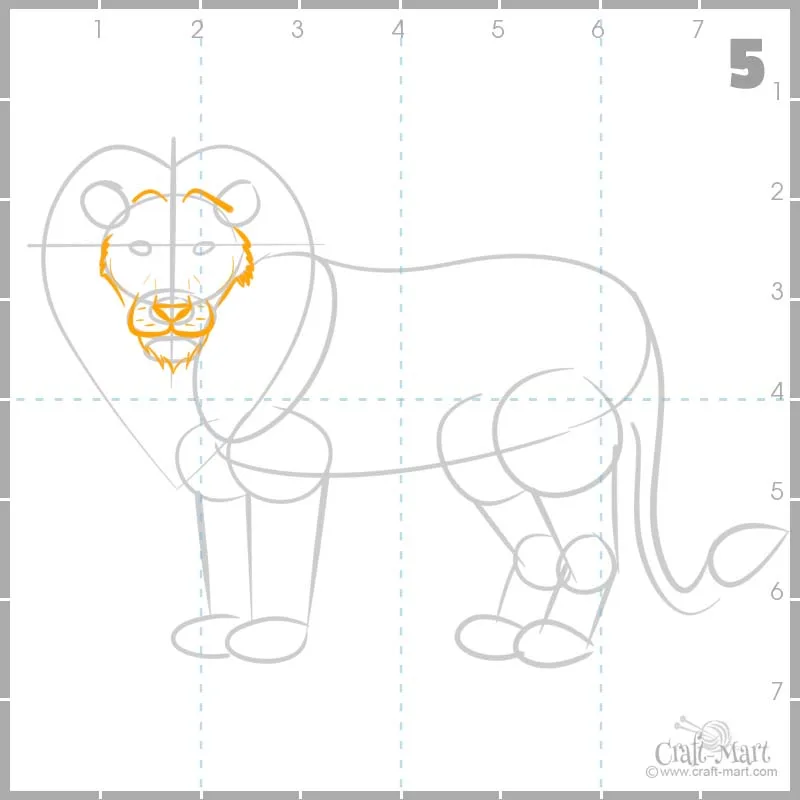
Step 5 – Detailing the lion’s face
Now it is time to bring more details to the upper jaw and the nose.
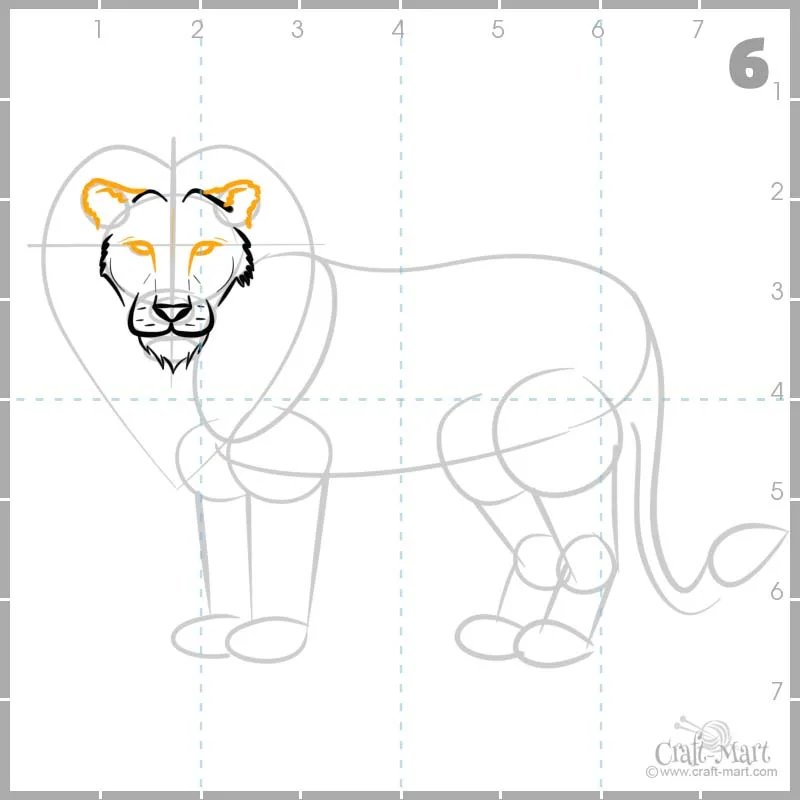
Step 6 – Eyes and ears
From the nose, we continue 2 vertical lines that smoothly bend around the eyes. Ears are not to be as smooth – use lightly jagged lines to add texture to your drawing.

Step 7 – Lion’s mane
Now it’s time to turn our ‘tree leaf’ into a real lion’s mane! Make it a bad hair day – your lion doesn’t have to look like it just went to a hair salon.


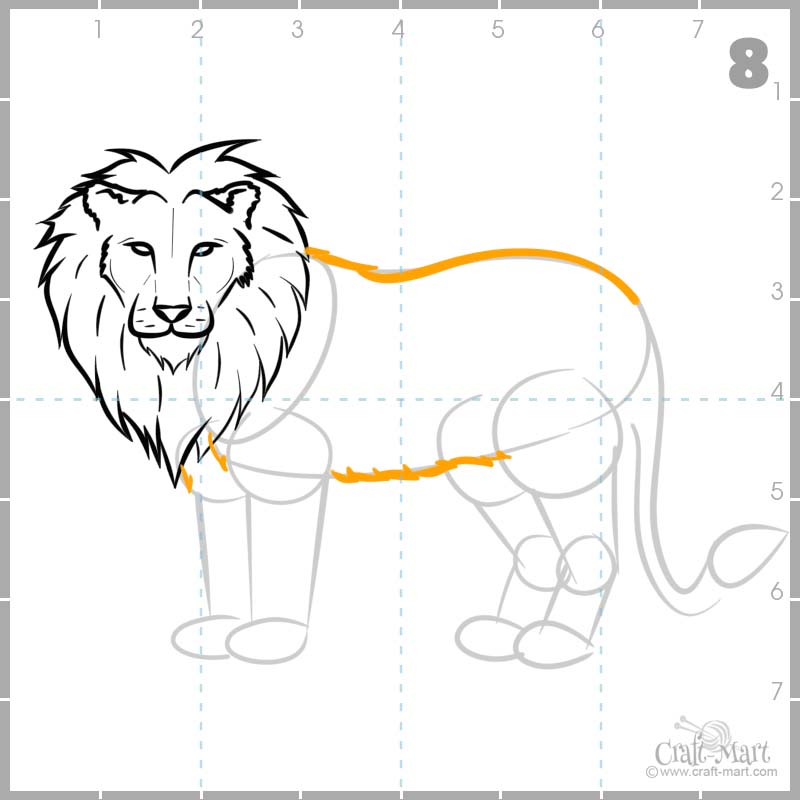
Step 8 – Fluffing lion’s torso
Add some hair to the shoulder area and the belly.

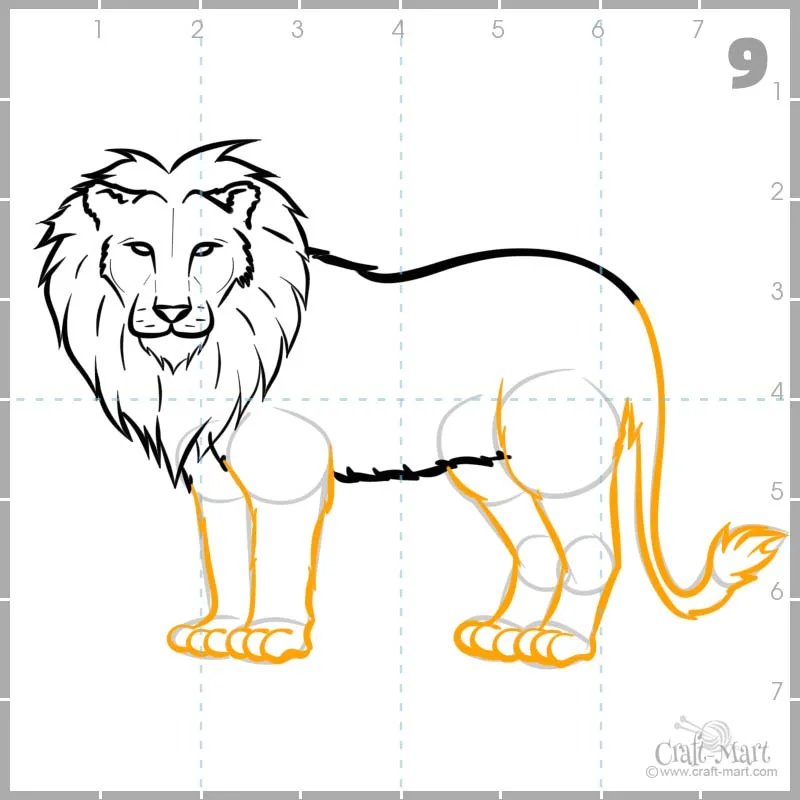
Step 9 – Adding hair to the tail and detailing the paws
Make sure you don’t add too much hair to the front of the lion’s paws.

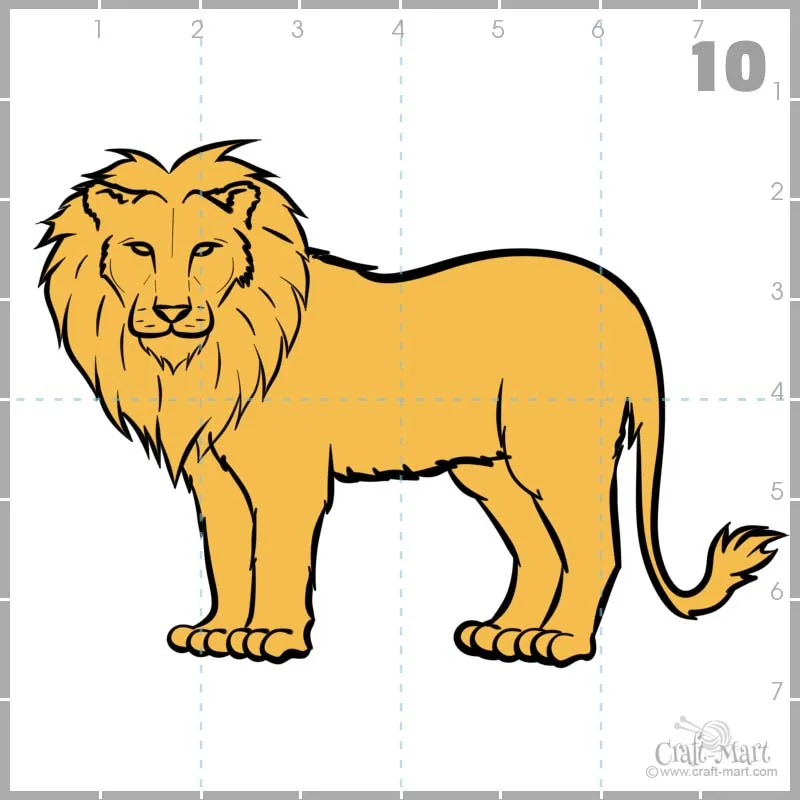
Step 10 – Time to color our lion
You may use whatever earth color you prefer.

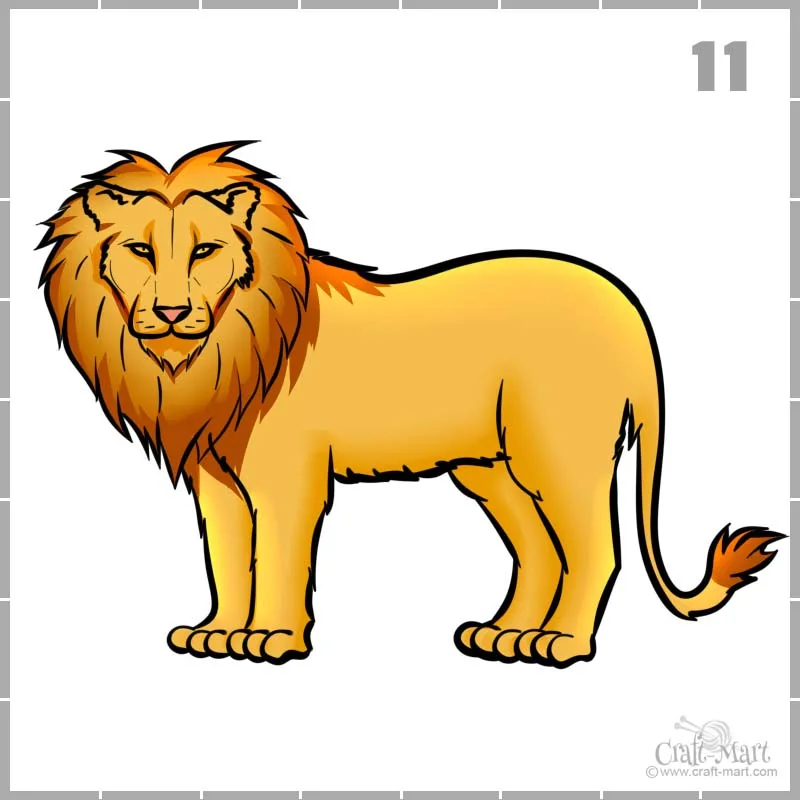
Step 11 – Finishing touches
Now it’s time to work on the lion’s mane and its face. The mane can be a bit darker than the body. Add some shadows and our lion is done!

Download our step-by-step easy printable guide for this simple drawing of a lion!