Do you admire intricate crochet roses on Pinterest, wishing you could create something just as beautiful? Well, it’s time to stop dreaming as we have an easy crochet rose pattern for you!
Surprisingly, a crochet rose is an easy pattern that is suitable even for beginners. You’ll see how easy it is to crochet a realistic rose that will leave everyone in awe.

First, let’s list the crochet stitches you’ll use to crochet a rose:
- chain – CH
- single crochet – SC
- half double crochet – HDC
- double crochet – DC
So, if you have already mastered these stitches, you can start crafting. Grab your leftover yarn (pink, red, or white) and the matching hook, and let’s go directly to the pattern.
Free Crochet Rose Pattern Step-by-Step

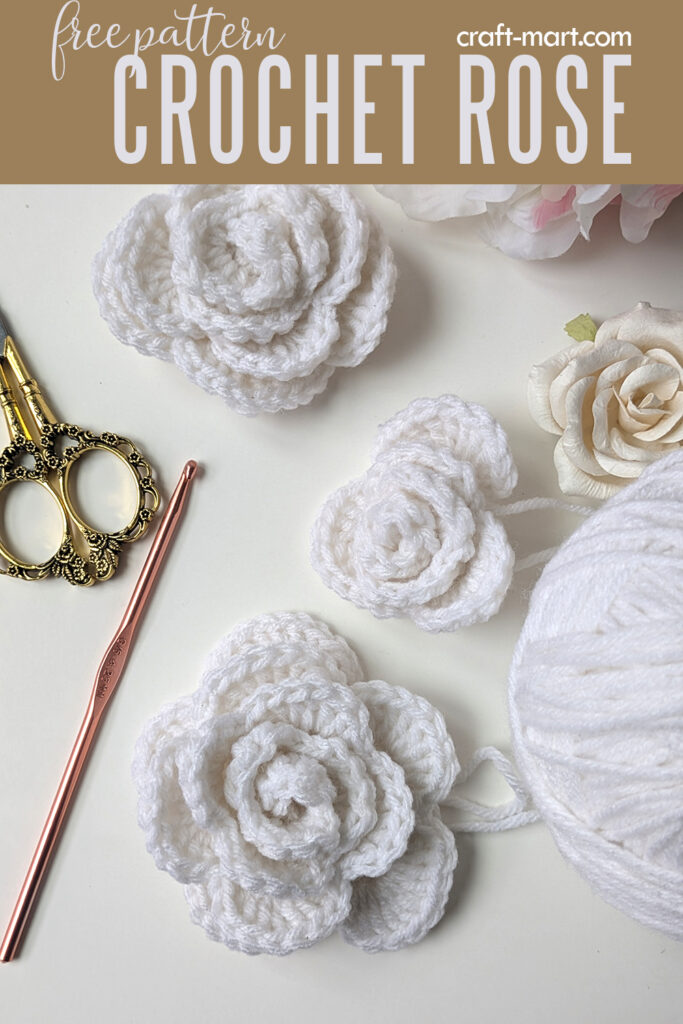
Firstly, let’s discuss the structure of our crochet rose. We will start with a foundation chain that is any multiple of 3+1. For example, for a small rose: 7×3+1 = 22 chains. For a middle rose: 33+1=34 chains.
Second, we will create a row of V-stitches which will serve as the foundation for the petals. Third, we will work on the crochet rose petals. Lastly, we will assemble and secure the rose.
Crochet Rose Pattern
Chian 22.
Row 1
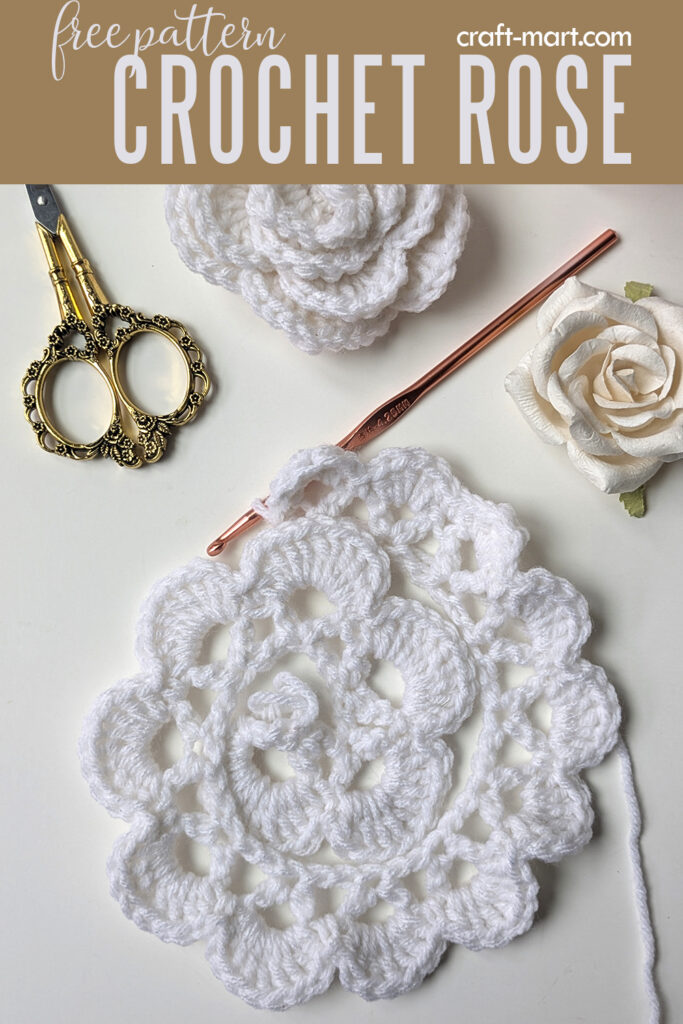
CH 4 (represents first DC and CH2), DC into 5th CH from the hook (first V-stitch made). [Skip 2 chains, DC, CH2, DC into next CH] x 7. You have created a foundation for 8 rose petals.
Row 2
CH 1, turn. Into CH space: HDC, 8 DC, HDC (10 stitches for the first petal), SC between V-stitches. Repeat the same sequence into the next CH-SP (chain space).
- HDC, 8 DC, HDC (2nd petal). SC between V-stitches.
- Into next CH-SP: HDC, 7 DC, HDC (3rd rose petal). SC between V-stitches.
- Into next CH-SP: HDC, 5 DC, HDC (4th rose petal). SC between V-stitches.
- Into next CH-SP: HDC, 5 DC, HDC (5th rose petal). SC between V-stitches.
- Into next CH-SP: HDC, 4 DC, HDC (6th rose petal). SC between V-stitches.
- Into next CH-SP: HDC, 3 DC, HDC (7th rose petal). SC between V-stitches.
- Into next CH-SP: HDC, 3 DC, HDC (8th rose petal).
Important to realize, that your DC stitches for the petals should fit tightly in the chain space. For this reason, move the stitches slightly with both fingers if you are running out of space.
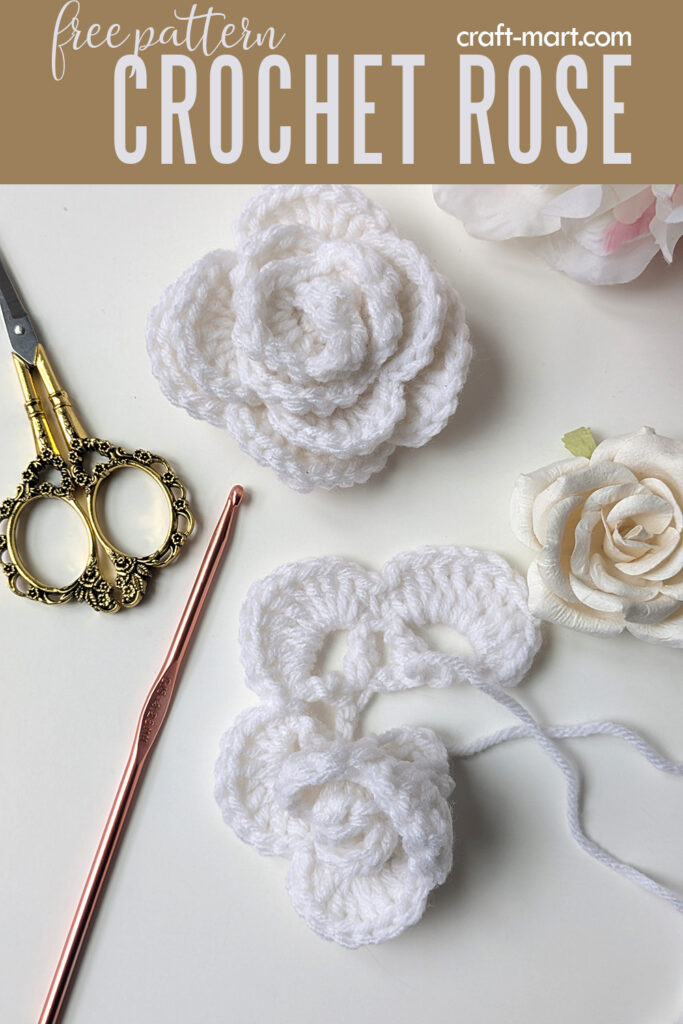
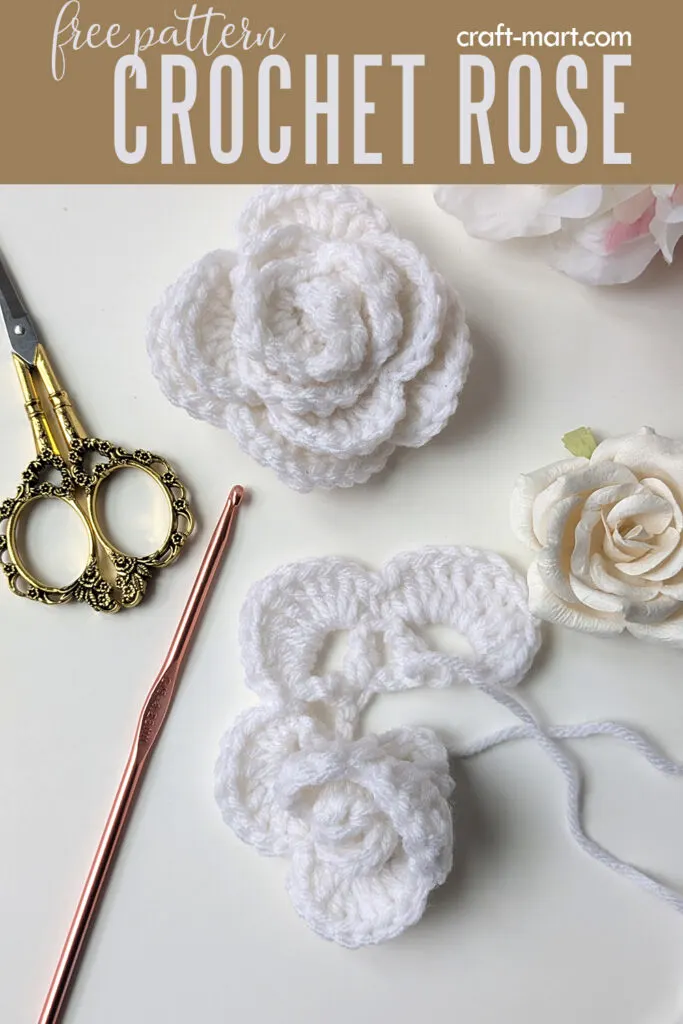
Fasten off leaving approximately 20 inches of yarn for sewing and securing the rose petals. Next, starting with the smallest 8th petal, start rolling your creation so it looks like a spiral on the bottom.

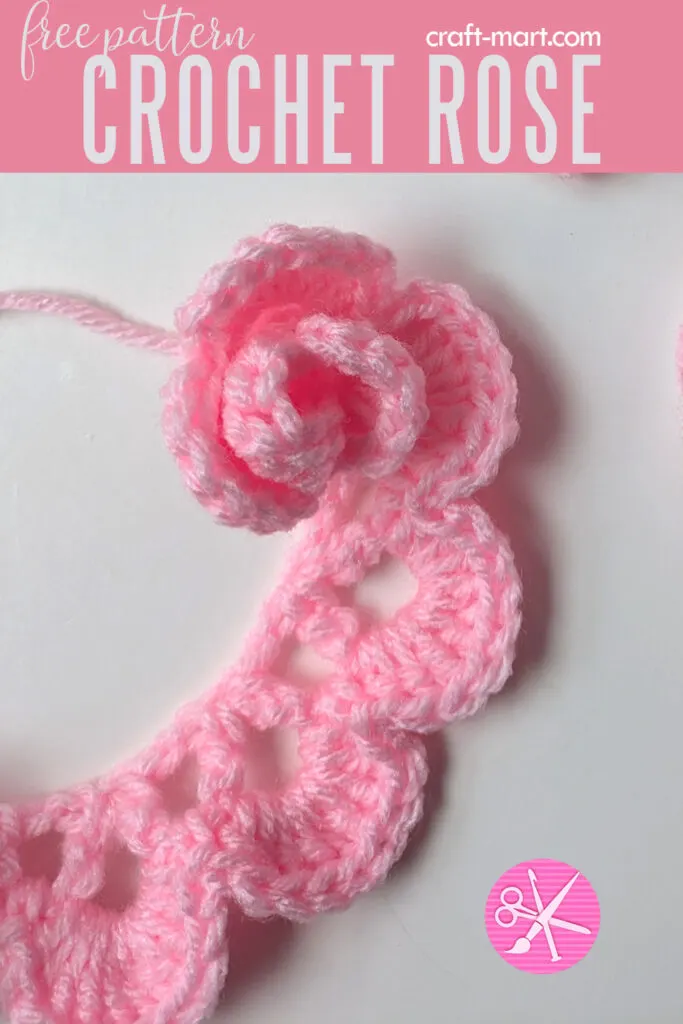
Lastly, using a tapestry needle secure your rose, hide the tail ends, and cut the access yarn. Make sure not to flatten the rose too much so that the petals curl naturally.
Crocheting a Rose is Easier Than You Think
As illustrated, it is a quick 2-row pattern that should not take more than 30 minutes maximum. Also, you will be able to crochet this delicate flower even faster as you gain experience and skills.
What Makes Crochet Rose Look Realistic
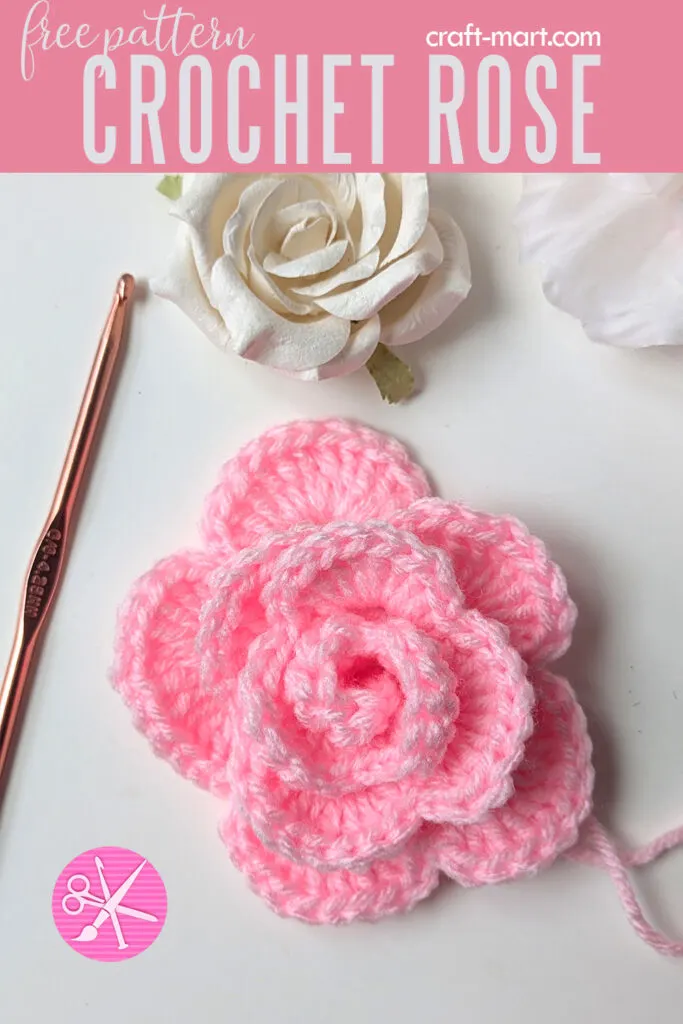
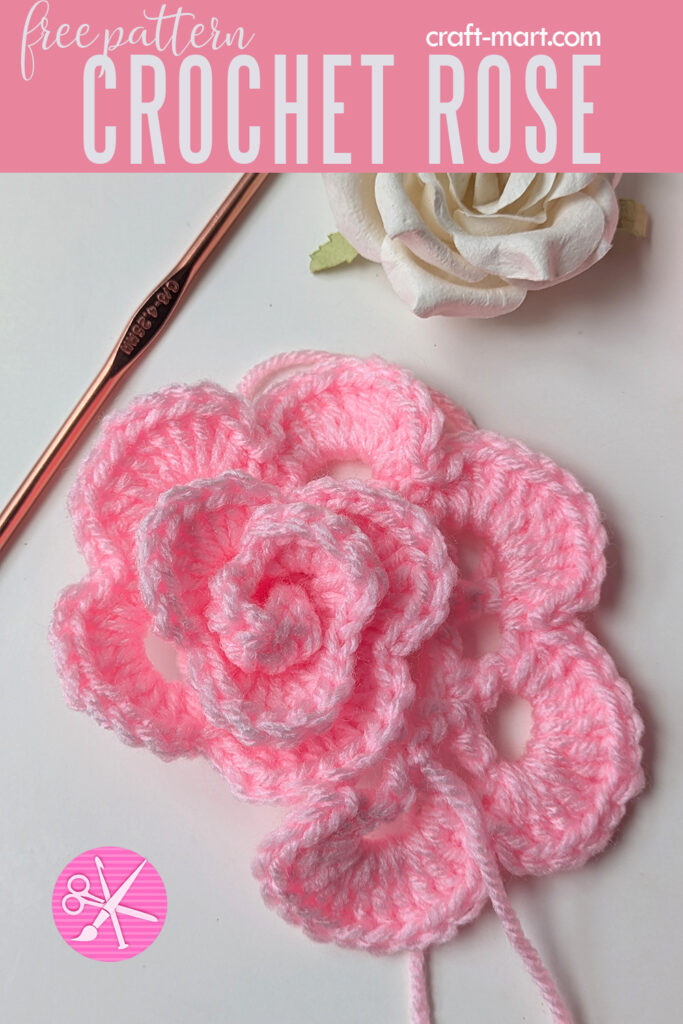
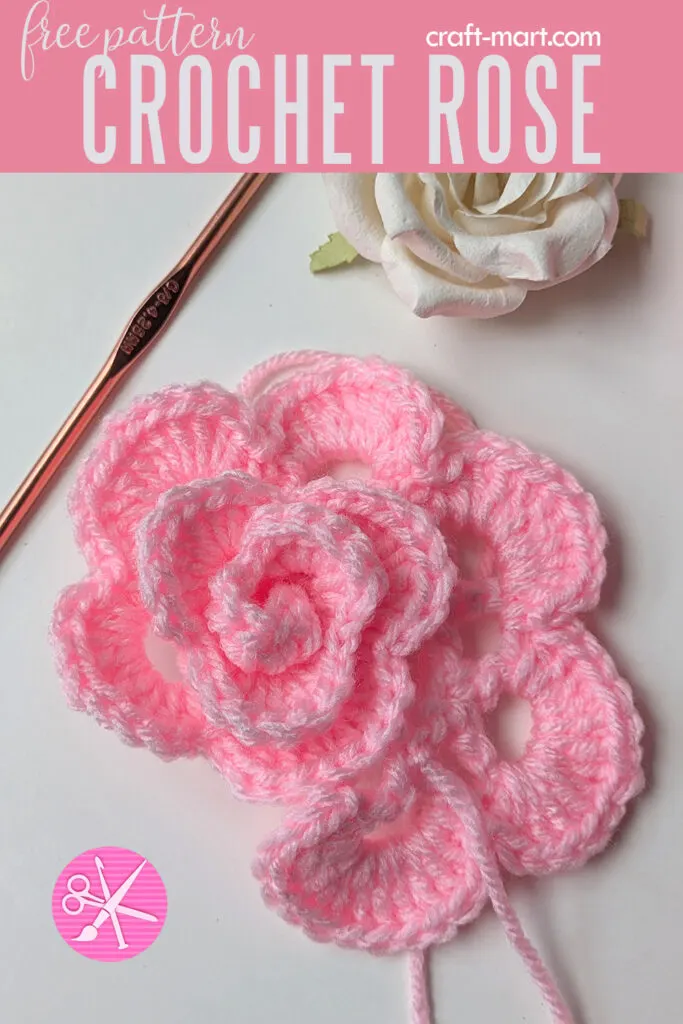
As shown above, our rose petals are all slightly different, going from smallest (fewer stitches) to large )more stitches). As a result, it makes it look more realistic, as a rose created by nature.

How to Use Your Creation
As you finish a few crocheted roses, get ready to admire, use them, and display your hand-crafted beauty. Consequently, you can use them:
- glued to canvas for a unique wall art
- as an applique for crochet baby blankets
- for home decor vignettes
- as bookmarks
- for bouquets (if you add stems and leaves).
Are you interested in rose crafts? Check out this idea: How to draw a Rose (with free printable).
Stay tuned, as we will be adding a free pattern PDF printout for this simple crochet rose pattern. As a result, you’ll be able to print it, relax, and crochet beautiful flowers using up your yarn stash.