This easy watercolor Christmas art tutorial is a great way to reduce stress and get creative. If you’re thinking, “but I’m no artist,” fear not. Even if you have zero experience with watercolors, our easy tutorial will guide you through every step to create beautiful and unique Christmas cards. You’ll need minimal supplies, a bit of patience, and a little sprinkle of holiday cheer.
As we gather with loved ones to celebrate, one of the most beloved traditions is exchanging heartfelt cards. This year, why not take your card-giving game to the next level with a stunning DIY watercolor creation? Not only will it showcase your artistic talents, but it will also add a personal touch to your holiday greetings.

Supplies for Watercolor Christmas Art
First, gather your materials. For this tutorial, you will need watercolor paper, a pencil, watercolor paints, paintbrushes, a cup of water, and black and metallic pens for embellishments. Of course, getting a basic watercolor art set for beginners is a sensible choice. Here are a few suggestions under $20 you can order on Amazon:
- 50 Colors Basic Watercolor Set for Beginners
- Watercolor Paper Pad, 100% Cotton, 15 Sheets, B5 (10.1 x 7.4)
- Artecho Watercolor Paint Set 50 Colors, Travel Watercolor Set with Watercolor Papers
- SAKURA Pigma Micron Fineliner Pens
- Uniball Signo Gel Impact Pens, Bold Point (1.0mm), Assorted Metallic

Sketching the Outline
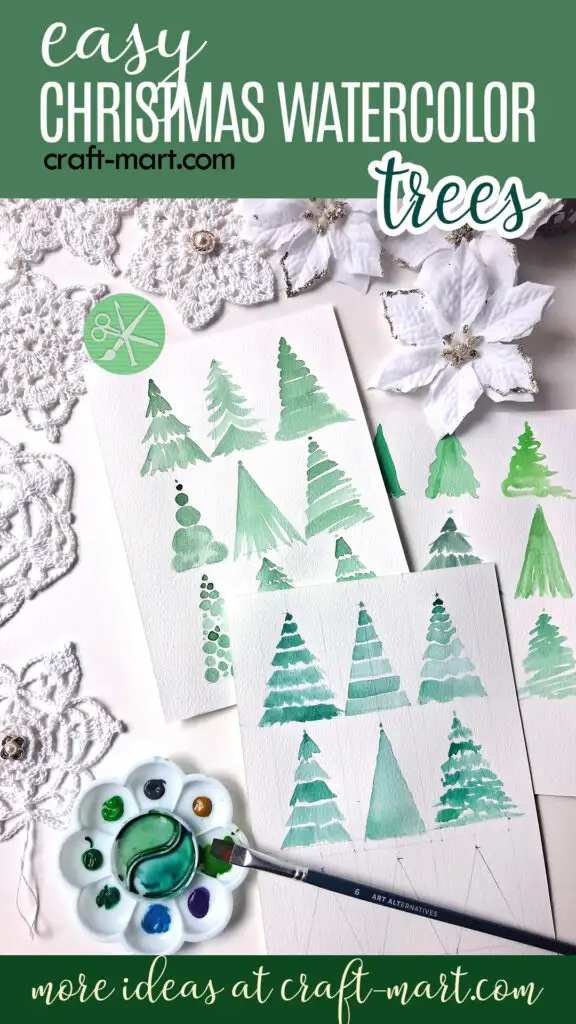
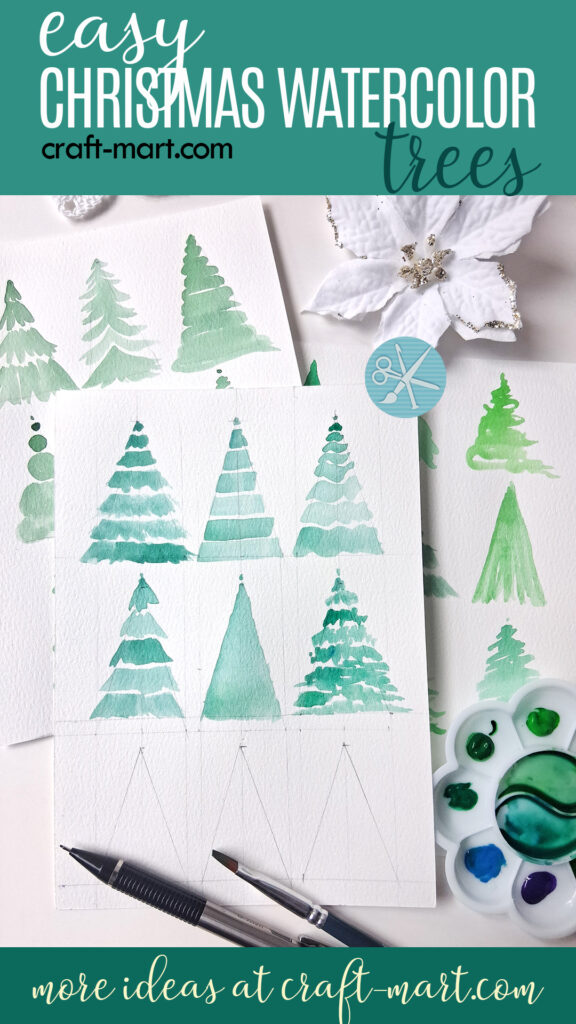
Firstly, we’ll need to sketch out some simple triangles. These will serve as the base for our watercolor Christmas trees. Don’t worry about perfect lines or symmetry – imperfections add character and make each tree truly one-of-a-kind. Or you can use a pencil and a ruler if you want perfect triangles.
We just need simple outlines to practice different watercolor techniques. In our example, we have 6 triangles on a 4″x6″ piece of watercolor paper. You can divide your paper any way you want for practice.
Creating Watercolor Layers
Firstly, to create the base layers of your watercolor Christmas tree, start by adding small drops of green to your palette (our set had watercolors in tubes).
Secondly, mix a light shade of green on your palette. Using a large brush, apply this color in a loose triangle shape on your watercolor paper to represent the tree’s basic form. As a beginner, you can start with a basic triangle.
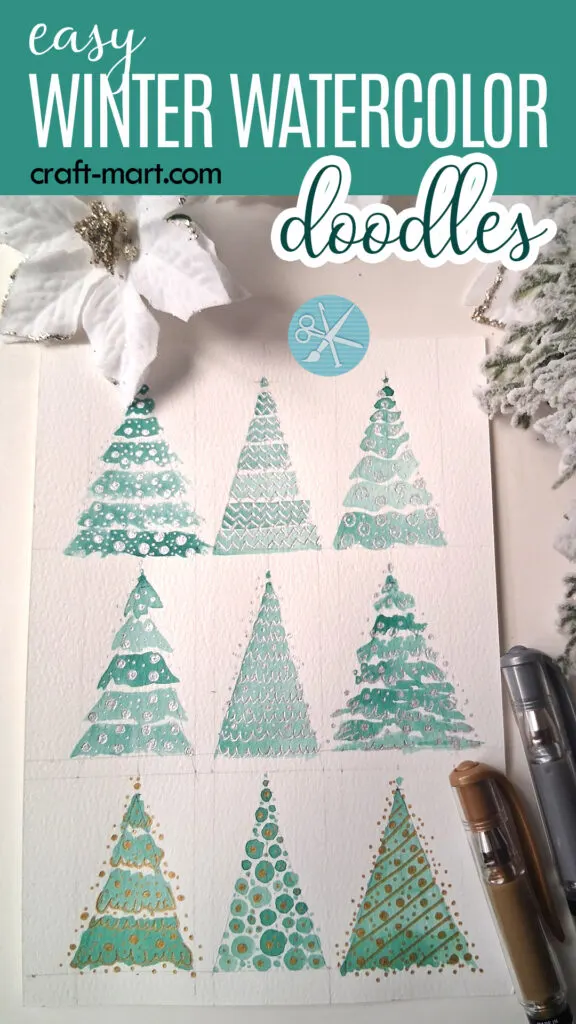
Next, experiment with different ways to fill your triangles with paint. As illustrated, you can use free brush strokes, horizontal lines, vertical lines, and circles.


How to Make Your Trees Unique
And for those looking to add a touch of nature to their art, squiggly brush strokes imitating branches can be used to create a sense of organic movement and texture. These brush strokes can be used to represent branches of fir trees. By blending different shades of color, you can create a sense of depth and bring your artwork to life.
Lastly, as it is a tutorial, you can experiment with many shades of green. After each tree, add a small drop of a different shade to your palette and mix it well. If you like it, you can use it for painting your next tree.
Remember to leave some white space for highlights and dimension. As you add more layers of color, consider varying the intensity to create depth and interest in your painting.
Once you have established the foundation of your Christmas tree, you can start adding details and metallic accents to bring your artwork to life.

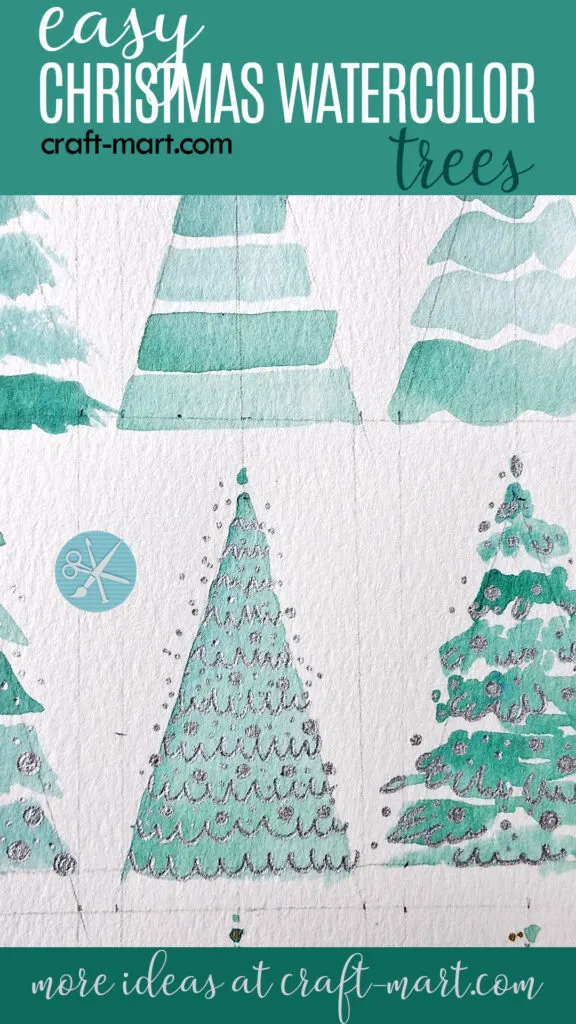
Adding Details with Metallic Pens
To take your watercolor Christmas tree to the next level, consider enhancing your artwork with embellishments. Add a touch of sparkle with glitter, sequins, or metallic pens for a festive shimmer.

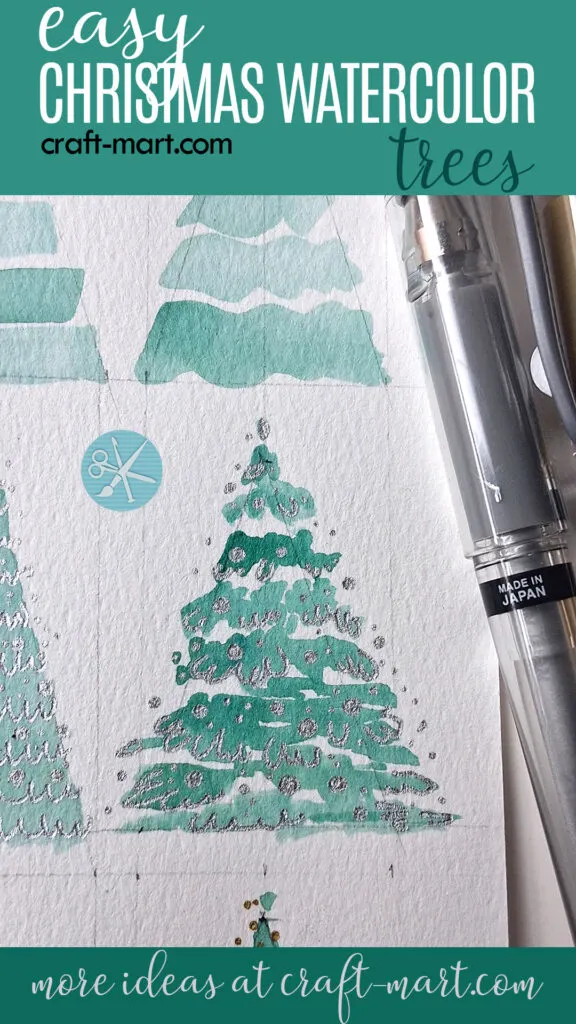
Use your intuition to select the accents and decide which color pairs best with silver and which one with gold. As a guide, silver metallic accents pair well with cooler shades of green. On the contrary, warmer shades of your trees look festive with gold accents.

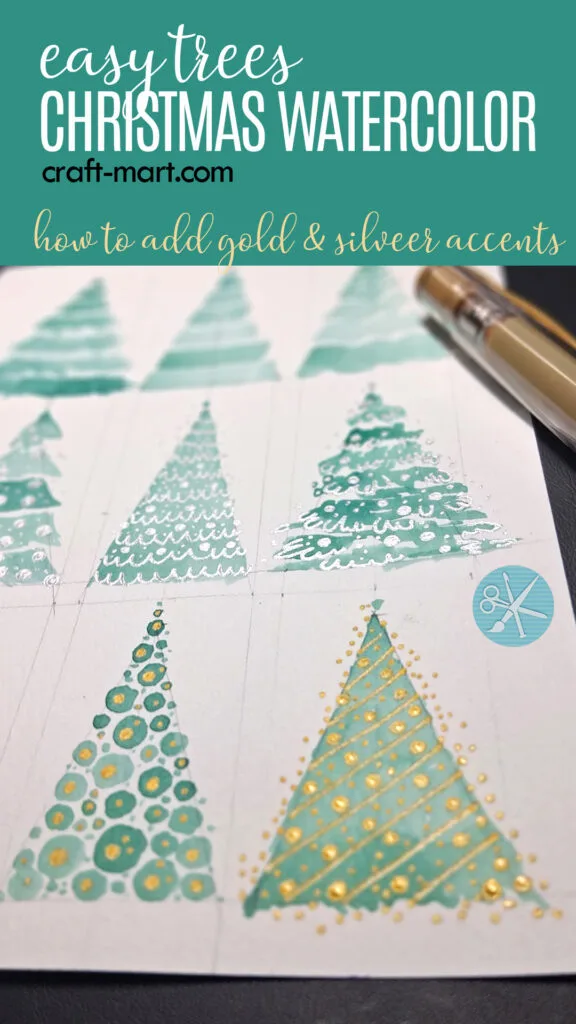
You can experiment with lines, dots, and circles to add details to your trees to make each one unique. Most importantly, wait for the metallic paint to dry completly or you will smudge your watercolor art.
Using Black Accents over Your Watercolor Art
Watercolor art has long been known for its delicate and ethereal quality, but what if you could inject a touch of boldness and contrast into your pieces? Enter black accents. While traditionally used as a form of shading or outlining in other mediums, incorporating black into watercolor art can add an unexpected twist and take your creations to a whole new level.
But how exactly do you use black accents in watercolor? There are a number of techniques and approaches you can take. One popular method is to use black ink or paint to create intricate doodles on top of your watercolor base. This adds depth and texture to your piece, as well as providing a focal point for the eye to be drawn to.
Most importantly, it is very easy (and addictive, in a good way!) Also, you can use simple shapes and lines and achieve amazing results.

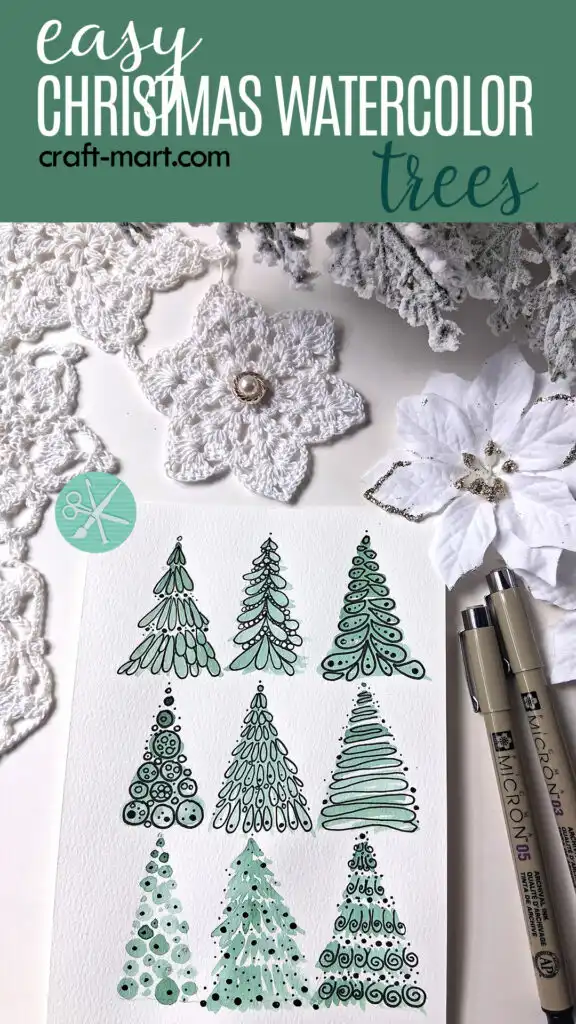
As illustrated, here are six different ways to add black accents to your watercolor trees. Check out our drawing tutorials for more ideas:
You can also incorporate dimension by using ribbons, washi tape, or 3D stickers to create a tactile experience for the recipient. These embellishments will elevate your watercolor art to DIY cards and make them truly special.

In Conclusion
In mastering the art of creating effortless watercolor Christmas trees, you have unlocked a world of creativity and joy. As you share your stunning DIY cards with loved ones, remember that each brushstroke carries a piece of your heart. So spread that joy this holiday season, and let your inner artist shine bright. As you personalize each card, add your own touch of magic, and watch as your creations bring smiles to those who receive them.
As Pablo Picasso once said, “Every child is an artist. The problem is how to remain an artist once he grows up.” Let your inner artist flourish and continue creating beauty in everything you do.