
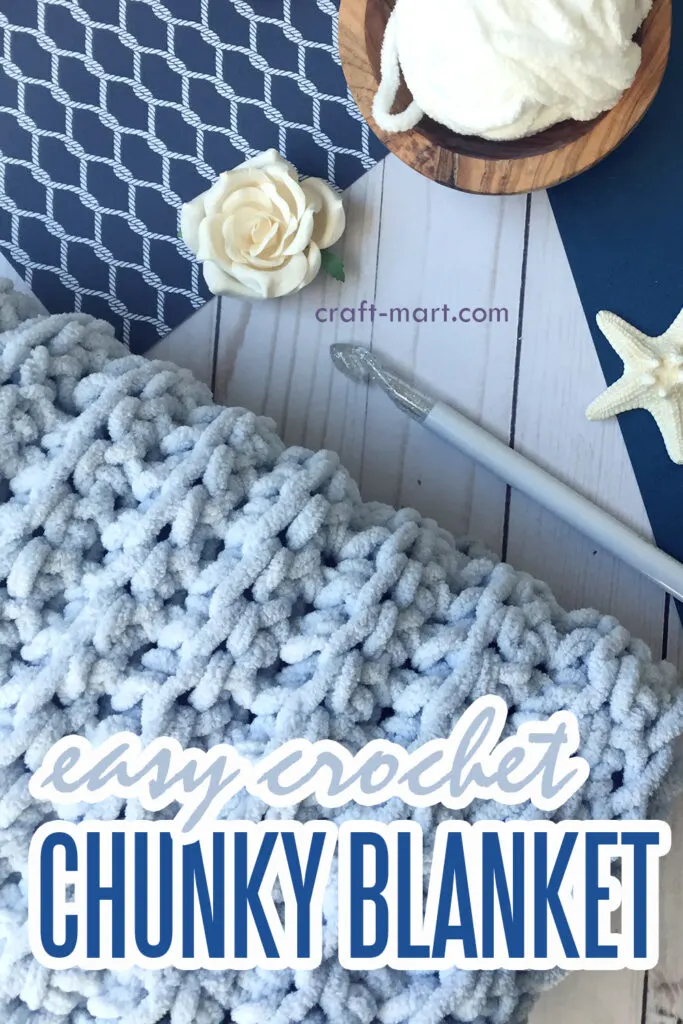
Whether you a seasoned crochet aficionado or just want to learn to crochet, it is only natural to be on the lookout for a simple chunky crochet blanket tutorial – especially when it is free. Why choose this particular pattern out of all other Bernat blanket yarn patterns? Simply because it’s perfectly suitable for beginners.
In this case, we are going to show you in detail how to crochet chunky blankets using one of the simplest FREE Bernat blanket yarn patterns.
Scroll down for a FREE PRINTABLE VERSION of this pattern.

1. What is the best crochet stitch for a blanket?
Most importantly, when you are just contemplating which pattern to pick for a simple crochet blanket, it is to decide what is the best crochet stitch to use. Noteworthy, many crochet professionals would name at least 10 crochet stitches that will be best for an easy blanket.
First, decide what works best for you and, secondly, which stitch would be most suitable for the yarn you’ve picked. Based on its simplicity, for this chunky Bernat Blanket Yarn, we would suggest a single crochet stitch (but with a simple modification) – one of the basic crochet stitches.
You may be wondering, “Is single crochet stitch too easy and too simple to crochet a chunky blanket?” Not at all! In fact, with the genius twist on this basic crochet stitch, we will show you how to create a wonderful chunky ribbed crochet blanket at no time.

2. How many skeins of yarn do you need to crochet a blanket?
Furthermore, the exact number of skeins you would use for a crochet blanket depends on the desired size of your creation. For this fluffy crochet blanket, we used one skein of each color for each color block.
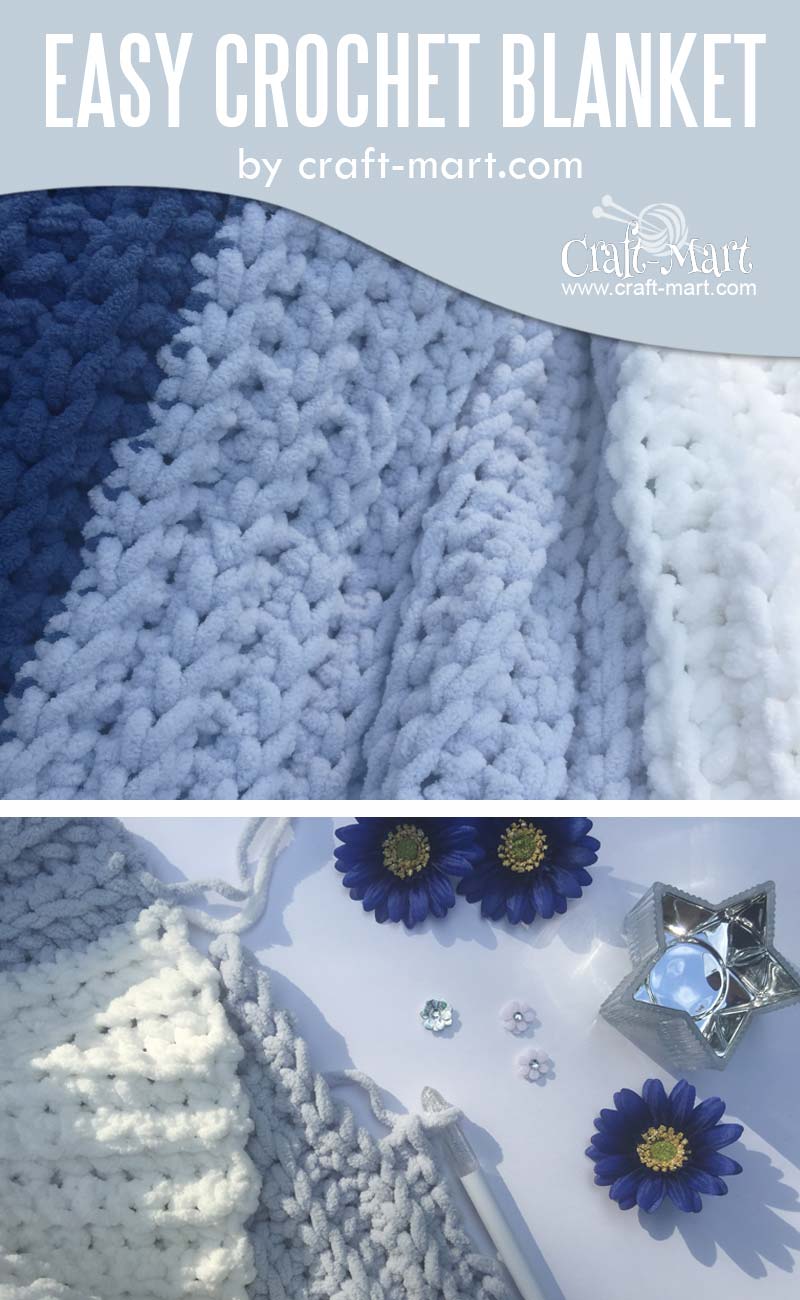
Consequently, we used a simple color block technique: three colors and two blocks of each color. As a result, the whole project required 6 skeins of yarn.
Most importantly, this technique makes it very easy to crochet the whole blanket with minimal need for changing colors and weaving the ends. Furthermore, it makes it easy to estimate how many skeins you would use for the whole project.
Consequently, if you are a beginner trying to crochet your first blanket, it is very frustrating to run out of yarn in the middle of the project. On the positive side, with our chunky crochet blanket tutorial, you will have peace of mind about finishing your beautiful crochet blanket and not running out of yarn.
What are you waiting for? This chunky Bernat blanket yarn crochet pattern – FREE – is here for you to try.
Additionally, this pattern creates beautifully ribbed fabric reminiscent of classy Fisherman Rib Knit Stitch. So, it can be called a “Fisherman blanket crochet pattern.” Overall, created for versatile Bernat Blanket Yarn, this blanket is as gorgeous as it is simple to crochet.

3. What is the fastest crochet stitch for a blanket?
If you are at crossroads to pick the right stitch for a super chunky crochet blanket, you definitely want something you are familiar with. The other question a lot of beginners are asking is: “What is the fastest crochet stitch for a blanket?”
Obviously, your personal crochet speed is determined by your skills and experience. Nevertheless, one of the fastest crochet stitches for a blanket is a single crochet stitch.
It is only logical to assume, that the more hand motions are needed for the particular crochet stitch, the longer it will take you to complete it.
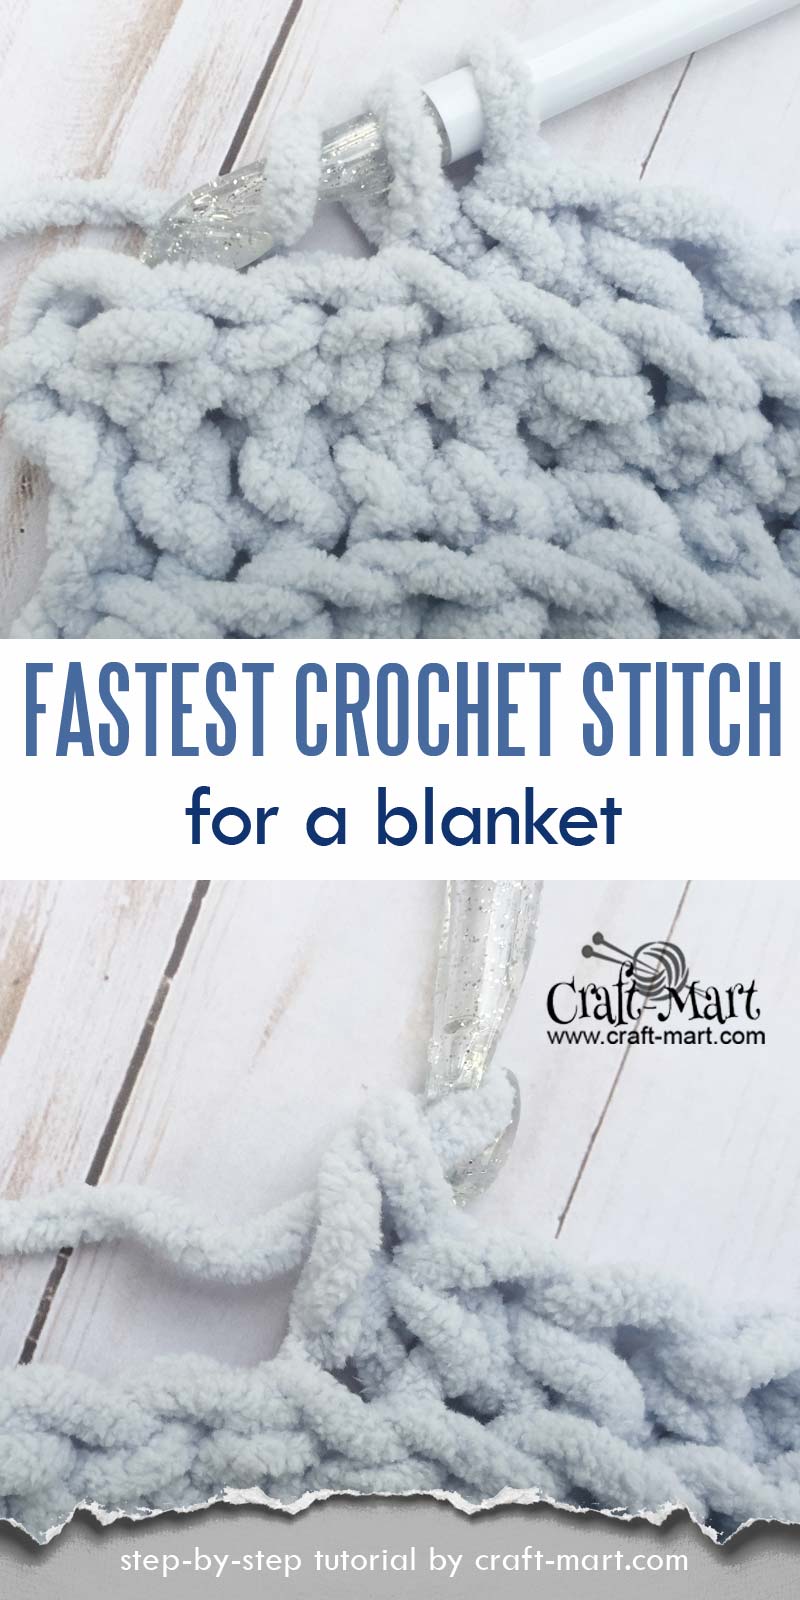

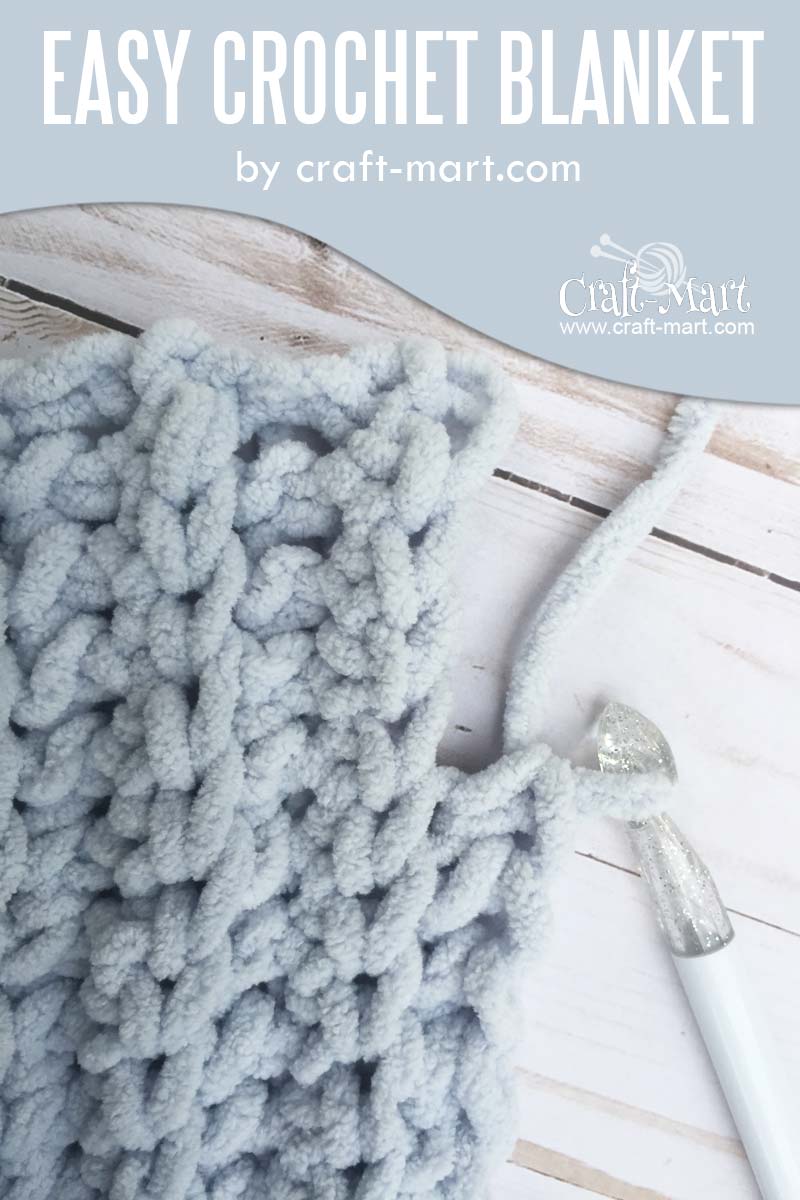
Consequently, for this “How to crochet chunky blankets” tutorial we are using the old trusted single crochet stitch – but with a twist. In fact, you will be single crocheting in the BACK LOOPS ONLY (SC BLO).
This simple trick creates the beautiful ridges that give this blanket a distinctive definition and knit-like texture. It is visually similar to the classic Fisherman Rib Stitch but it is done with a crochet hook.
As a final note on picking the right blanket crochet stitch: to create a chunky crochet blanket with Bernat Blanket Yarn, you want something simple. The basic crochet stitches work best with chunky Bernat Blanket Yarn and you can crochet a simple but beautiful blanket very quickly with this free crochet pattern.
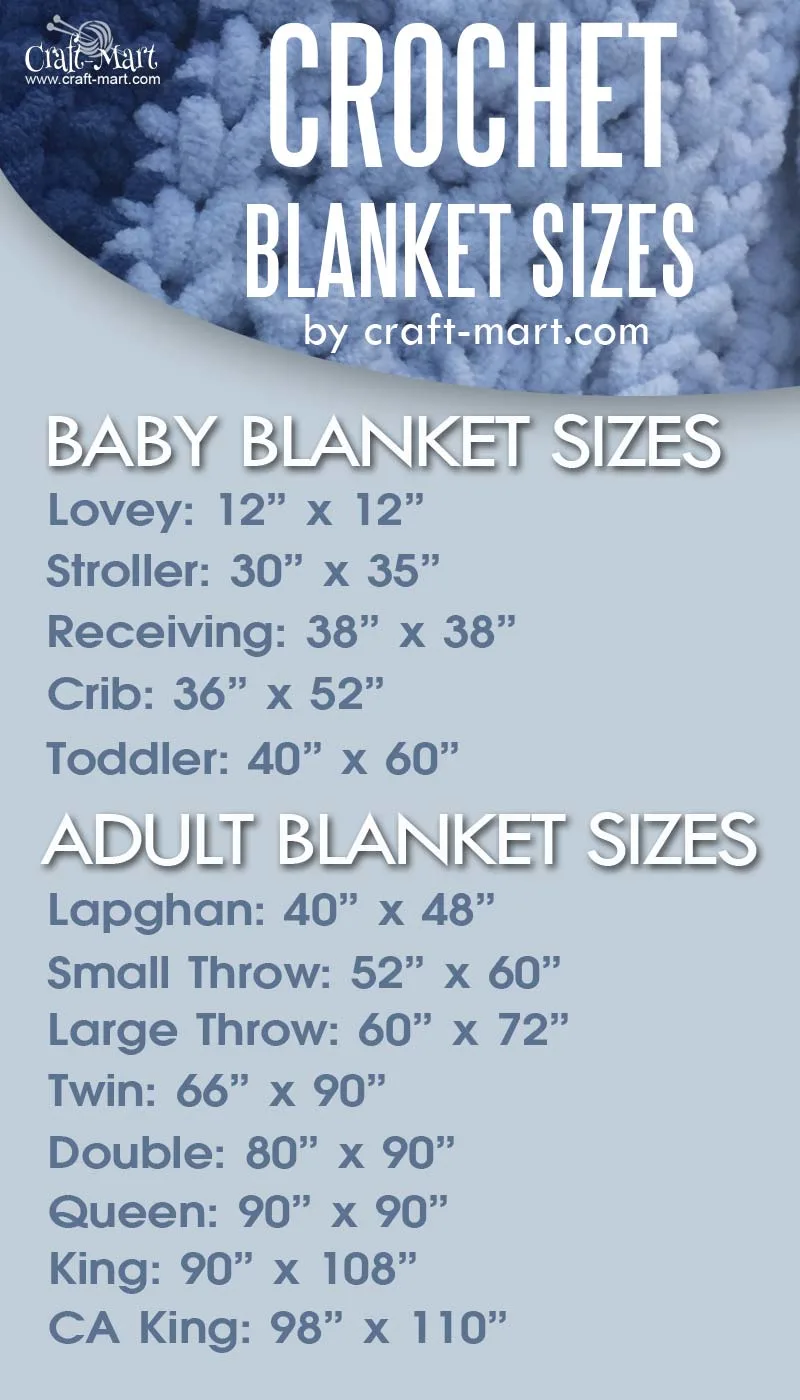
4. What size are crochet blankets?
Generally, from baby blankets to cozy throws and afghans, crochet blankets come in many different sizes. As an illustration, to help you pick yours, we have this handy chart of the most popular blanket sizes.

5. What is a crochet afghan?
Afghan is a throw usually crocheted or knitted as a home decoration and comfort item. As a matter of fact, it is a great accessory for a cozy living room, guest room, or an outdoor patio for a starry night by the fire. Crochet afghans come in different styles and can be handmade using a variety of yarns. Most often they are created using chunky yarns for that soft touch of hygge.
Moreover, if you are puzzled by the knitting vs. crochet dilemma, check out our post comparing KNITTING vs. CROCHET to decide which one is best for you.
6. How long does it take to crochet a blanket?
With Bernat Blanket Yarn and our free crochet pattern, it doesn’t take long to complete this simple and easy crochet blanket. To take the guessing game out of the equation, we used one skein of chunky Bernat blanket yarn for each color strip of this blanket.
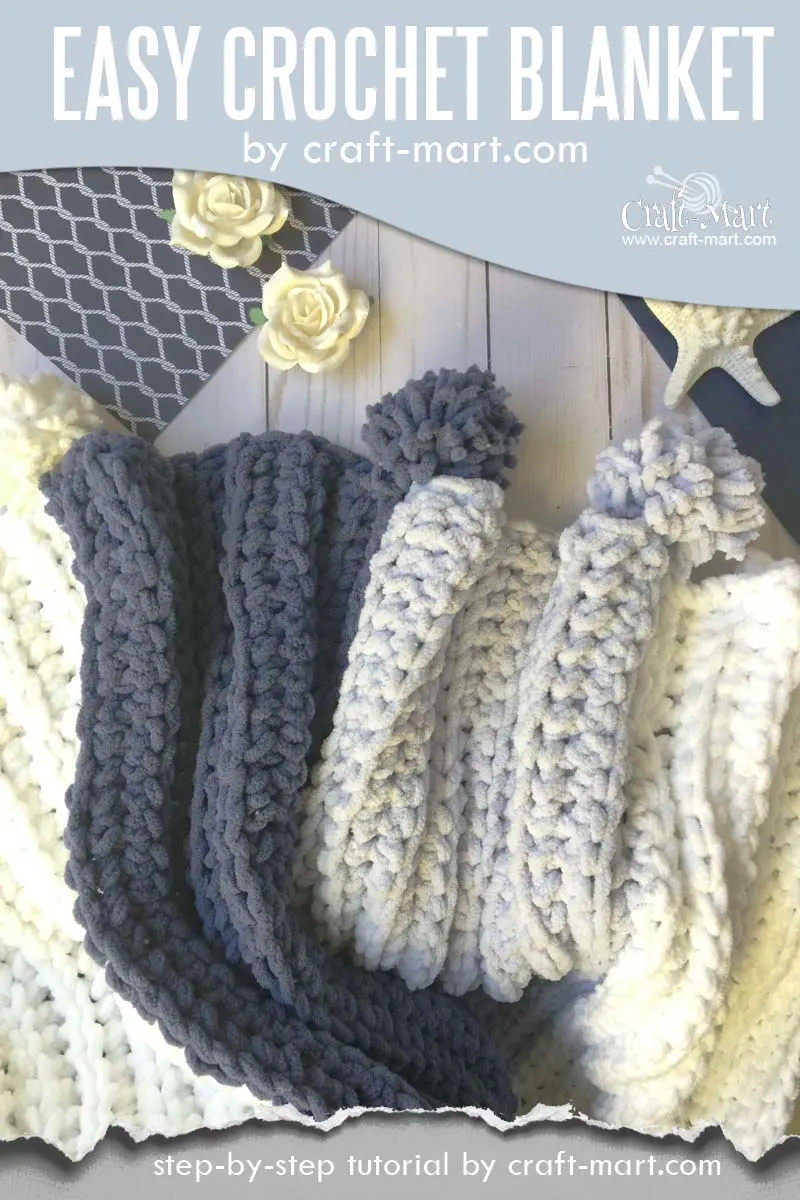
So, if you’d like to make it smaller or bigger, you can adjust the number of skeins you will be using for your crochet blanket. With our free pattern and simple crochet stitch, 6 skeins of Bernat Blanket Yarn were enough to crochet a 66″ x 80″ blanket or large throw) and use the left-over yarn for fun and trendy pom-poms.

Chunky Crochet Blanket Tutorial & FREE Bernat blanket yarn pattern
Watch a VIDEO TUTORIAL to learn this easy blanket crochet stitch:
Single Crochet Back Loops Only Stitch
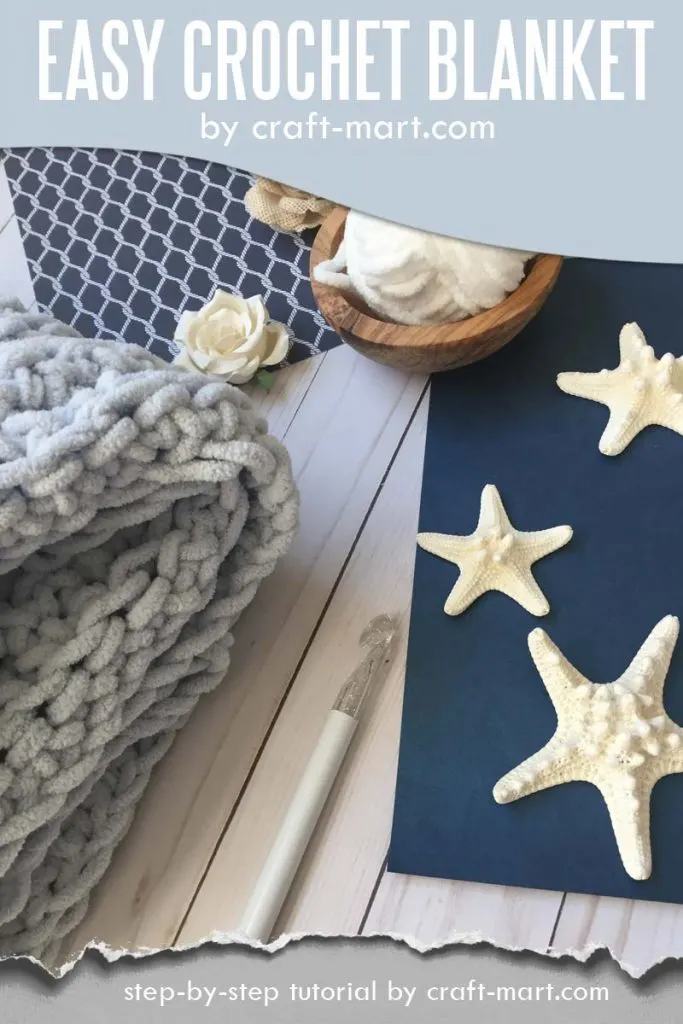
For this chunky blanket, we recommend this easy basic crochet stitch that is perfect even for beginners. Its overall color scheme and chunky ribbed pattern make this blanket a perfect complement for your Coastal Home Decor.
Note, this easy crochet creation can become a cozy back patio throw for the evening under the stars by the pool or at the cabin on the lake.
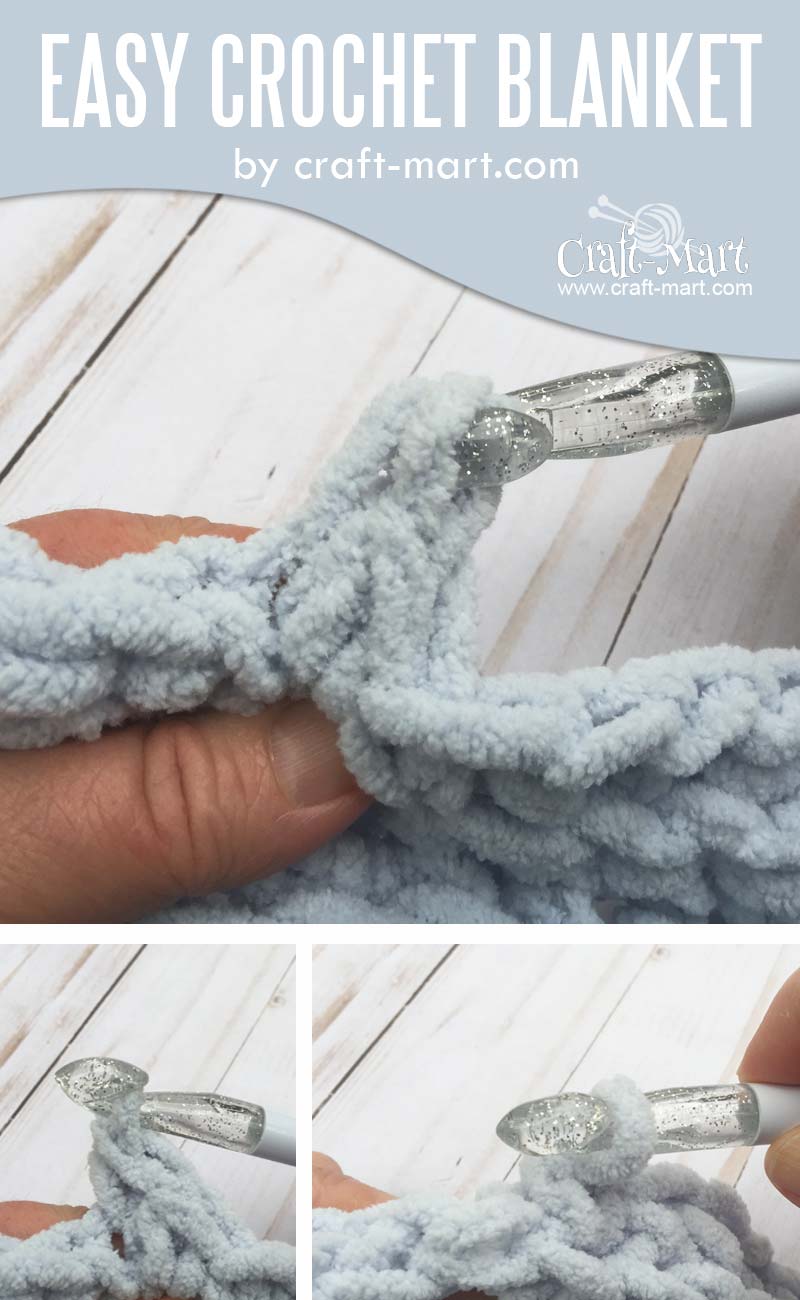
To master this stitch, crochet a sample swatch first. Chain any number. Single crochet into the second chain from the hook and every chain. Chain 1, turn.
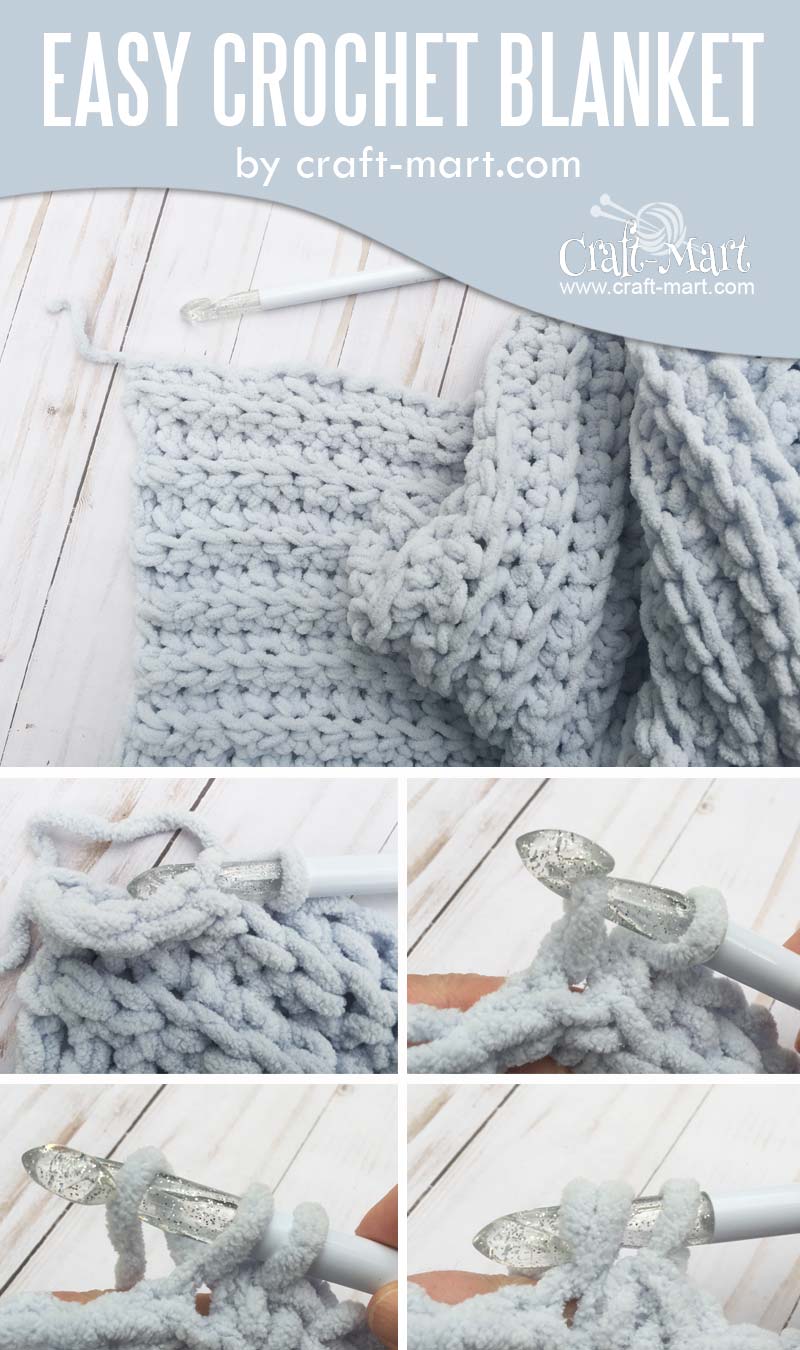

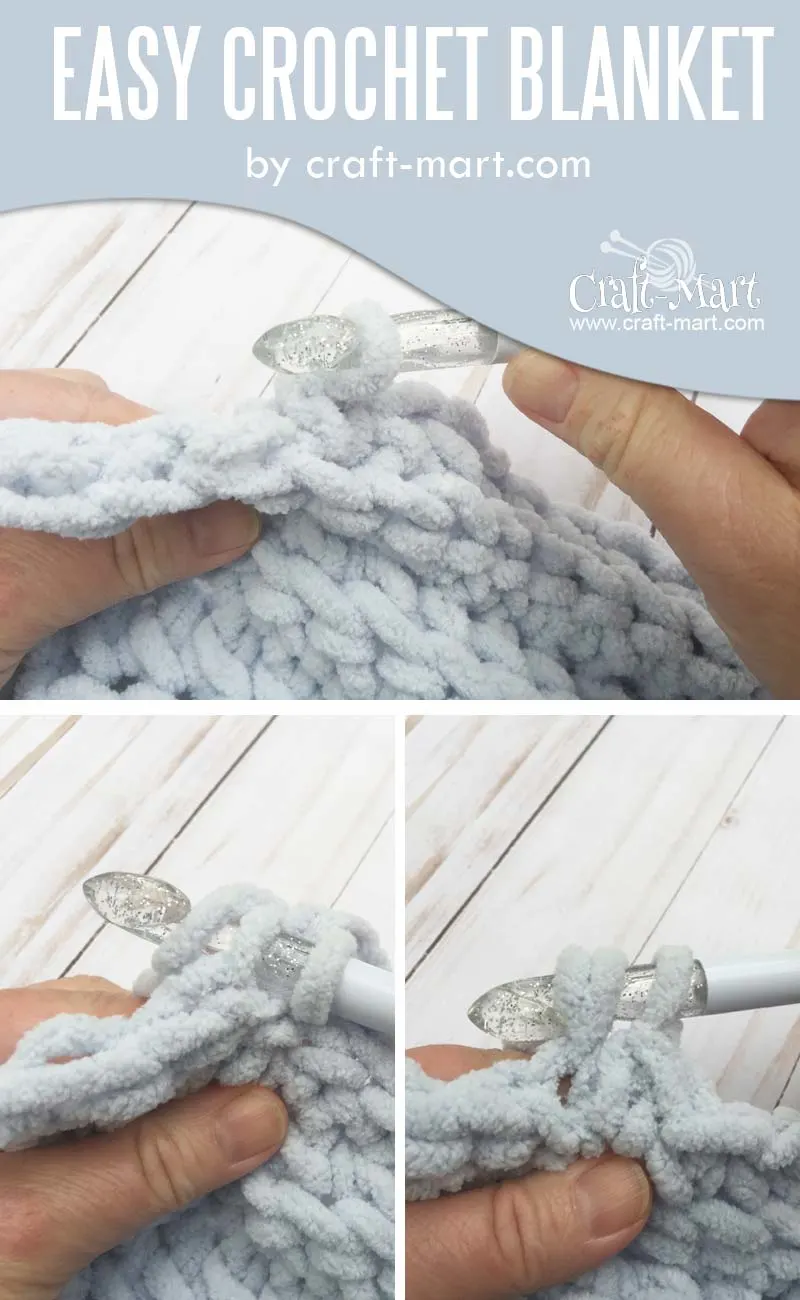
As an illustration, refer to this step-by-step diagram above. It will help you to understand the structure and simple steps needed to learn and master this fastest stitch for a blanket.
First, put your hook through the back loop of the top crochet stitch (that looks like a V). Grab the yarn with the hook and pull it through one loop only. 2 loops on the hook.
Secondly, grab yarn again with your crochet hook and pull it through both loops on your hook. 1 loop on the hook.
Lastly, continue repeating the same stitch to the end of the row. Practice this simple stitch until you feel completely comfortable with this fast and easy SINGLE CROCHET BACK LOOP ONLY STITCH.
In fact, it is a simple repeat of the same stitch and the same row which makes it the fastest stitch that can be used to crochet chunky blankets. It also makes your blanket reversible.
Now you are ready to crochet this gorgeous blanket!
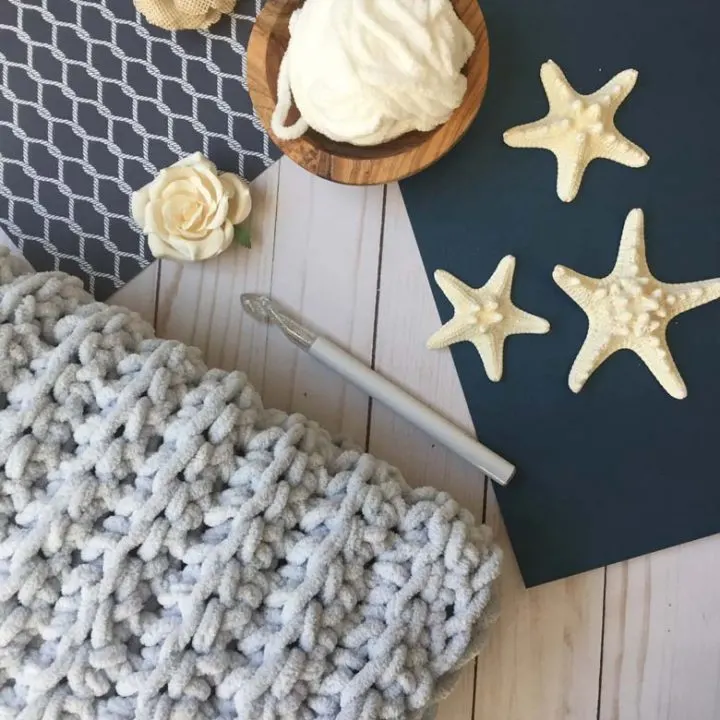
Materials
- In color A: 2 skeins of Bernat Blanket Yarn (each skein 10.5 oz, 300 g) – Country Blue
- In color B: 2 skeins of Bernat Blanket Yarn (dark blue or Lapis)
- In color C: 2 skeins of Bernat Blanket Yarn (White) – each skein is 10.5 oz, 300 g)
- Crochet Hook 12 mm
- Tapestry Needle
- Scissors
- Pom Pom Maker
Each skein of Bernat Blanket Yarn is 10.5 oz, 300 g; 220 yards / 201 m. You may check Yarnspirations for all currently available colors of Bernat Blanket Yarn.
Finished Size: 66″ x 80″

Directions
In color A, chain 110 +1.
Row 1: Sc into the second chain from the hook and into every chain (110 stitches). Ch1.
Row 2: Sc BLO (single crochet into the back loop only) until the end of the row (110 stitches). Ch1.
Row 3-16: Repeat row 2.
Notes:
Crochet repeating the same stitch (SC BLO) until you almost finish one skein of yarn.
We are using the SIZE 12 mm crochet hook for this project (which is bigger than the recommended crochet hook size (8 mm) for this yarn) to create a chunkier blanket. As you crochet, you’ll be creating lovely textured rows reminiscent of classic Fisherman Knit Stich.
When you finish 16 rows, cut your yarn leaving approximately 16″ tail which you’ll use later to attach a pom-pom.
Row 17: Pull with color B leaving approximately 16″ tail. Ch 1. Turn. Sc BLO (single crochet into the back loop only) until the end of the row (110 stitches). Ch1.
Row 18-33: Repeat row 2.
Row 34: Pull with color C leaving approximately 16″ tail. Ch 1. Turn. Sc BLO (single crochet into the back loop only) until the end of the row (110 stitches). Ch1.
Alternate colors until you use all 6 skeins of yarn. You should have several balls of all three colors left which we will use to create pom-poms.
How to make Pom Poms with Pom Pom Maker

Step 1
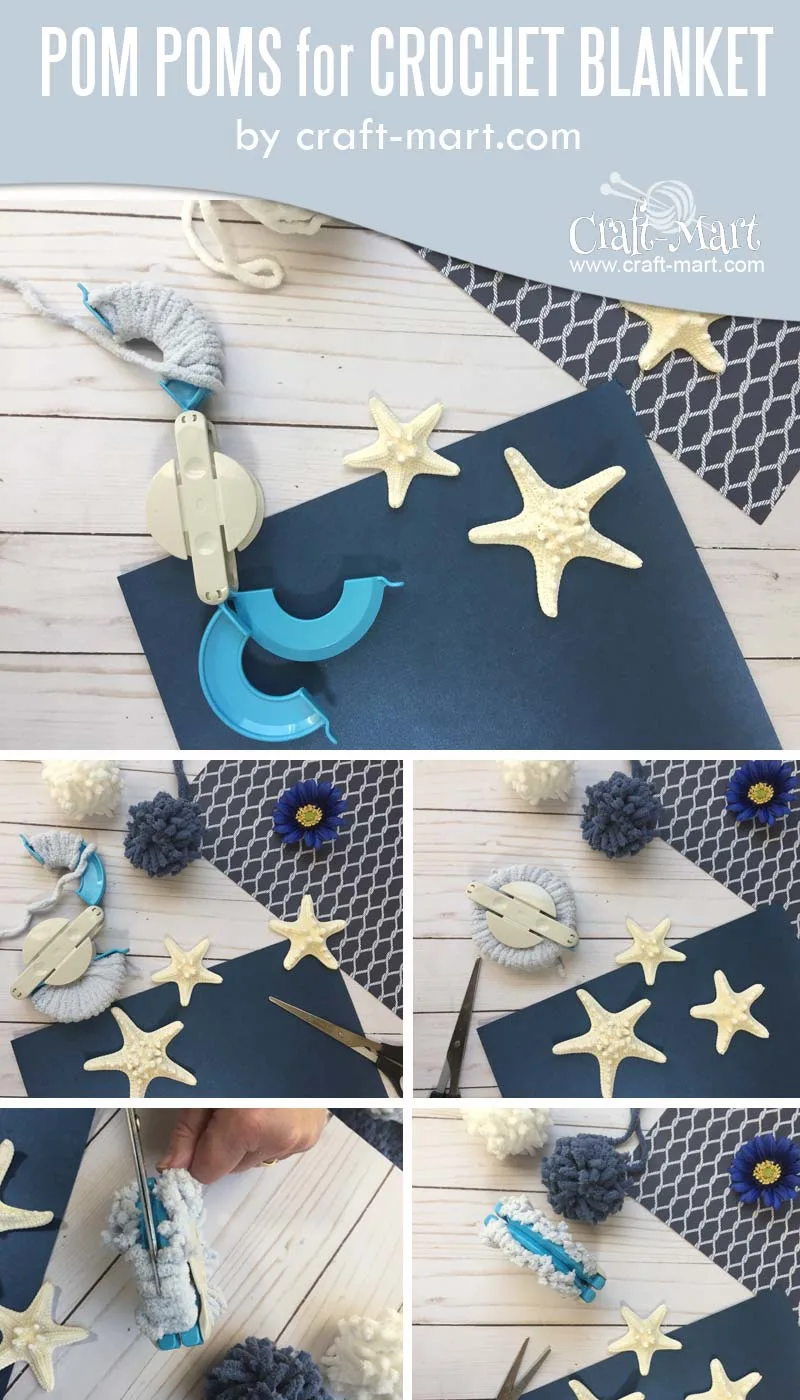
Get familiar with your Pom Pom Maker. It consists of 2 parts connected with a long pin. Each part is identical and has 2 blue semi-circular parts.
First, align blue parts and start looping yarn while moving from left to right. To make your pom-poms the same size, use the same number of loops for each.
I’ve looped my yarn 40 times around each pair of the blue double semi-circles (as in the tutorial above), moving from left to right and then from right to left. Cut the yarn.
Step 2
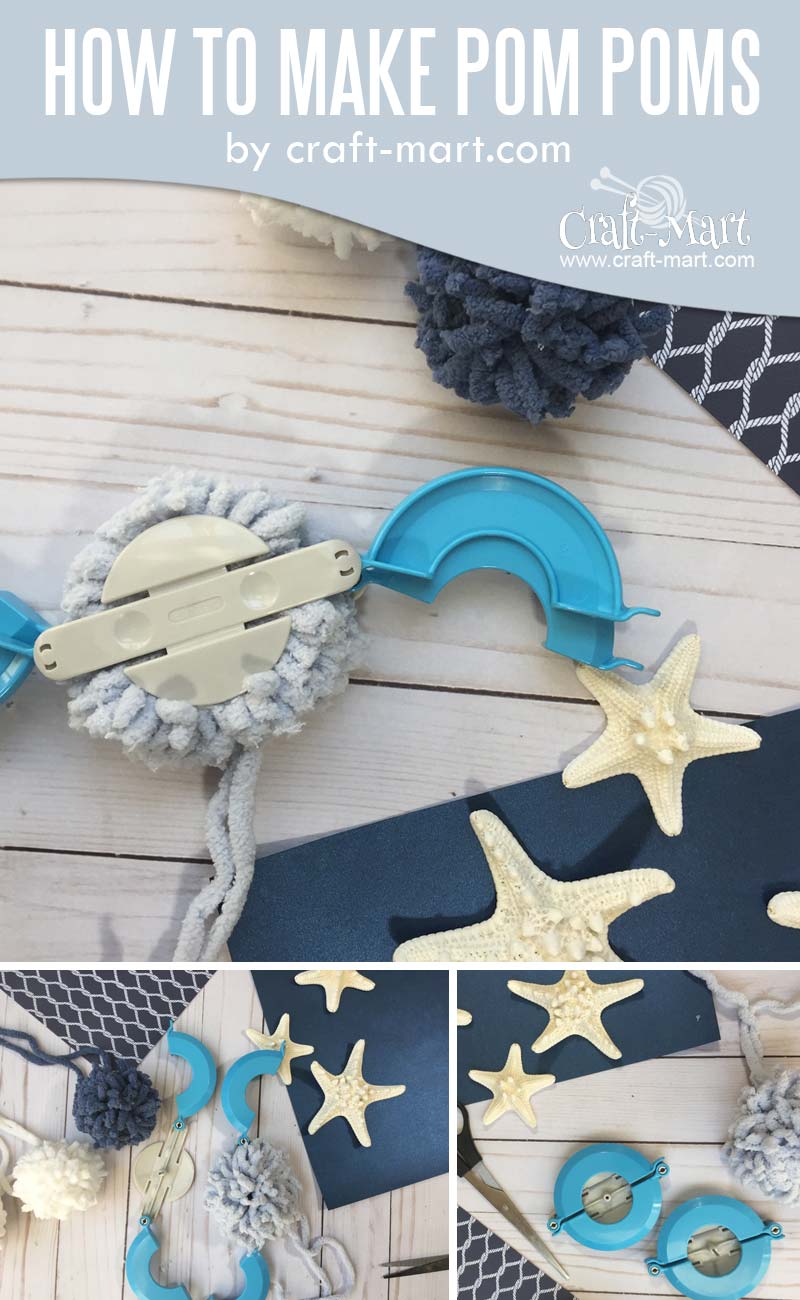
Repeat exactly the same steps using the second part of the pom-pom maker.
Step 3
Close both sides. Using very sharp scissors, cut through the yarn using the middle grove as your guide (you want the little yarn pieces to be the same size though Pom Pom Maker makes it effortless).

Step 4
The last step in pom-pom making is to secure your new fluffy pom-pom. For that, using a fairly long yarn of the same color, pull it through the blue grooves and make a double knot. Tie the double knot one more time.
Step 5
Lastly, you can open the blue parts on both sides. Holding your pom-pom maker with both hands, gently pull the white circles apart revealing the connecting metal needle.
Step 6
Check your pom-pom to make sure that all yarn pieces are approximately the same length. If one is sticking out, give it a gentle trim.
Make 8 pom-poms total for this blanket. Your newly-made pom poms are ready to be attached to the finished crochet blanket!

Finishing Touches
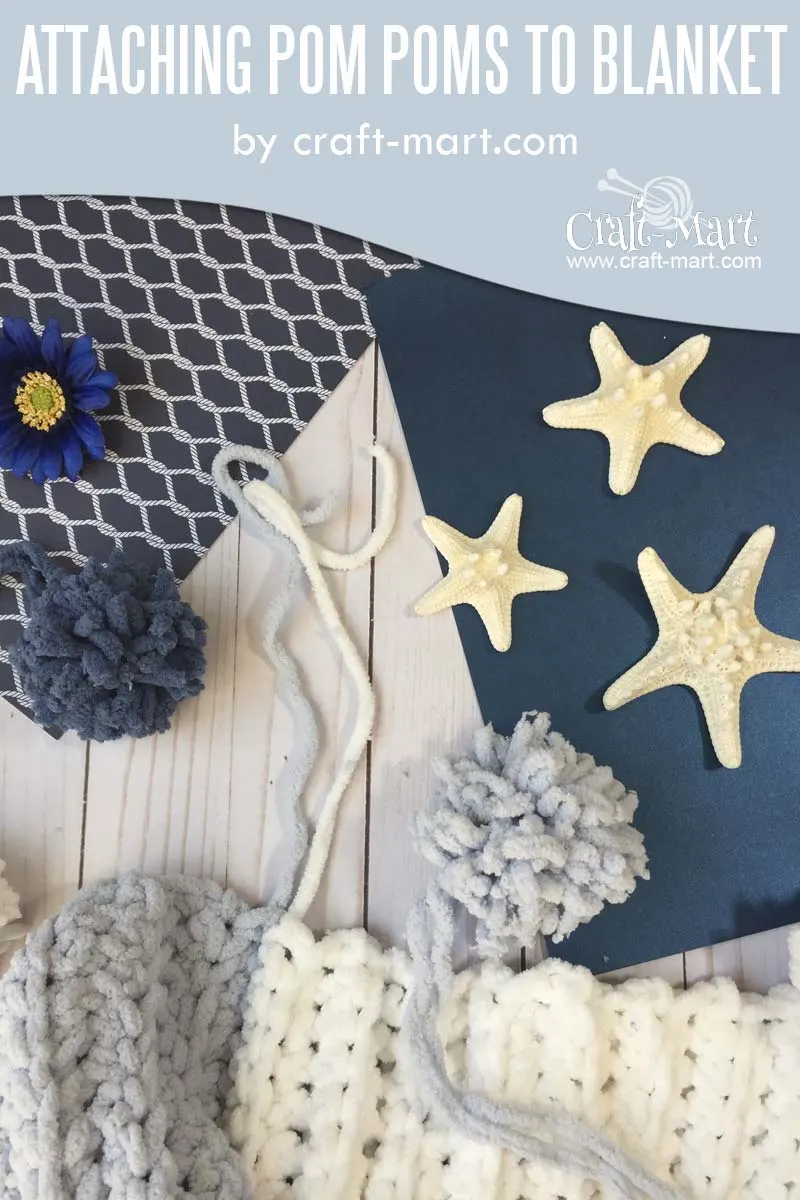
Now you are ready to put some finishing touches on your beautiful blanket. As you have long tails left at the end of each color stripe, you can use them to secure the pom poms.
Note, that all pom-poms will be on one side of the blanket.
Just make a few double knots using different strands of yarn until you feel that your pom-pom is securely attached to the blanket. Lastly, use the tapestry needle to weave in (hide) the ends and cut off the yarn.

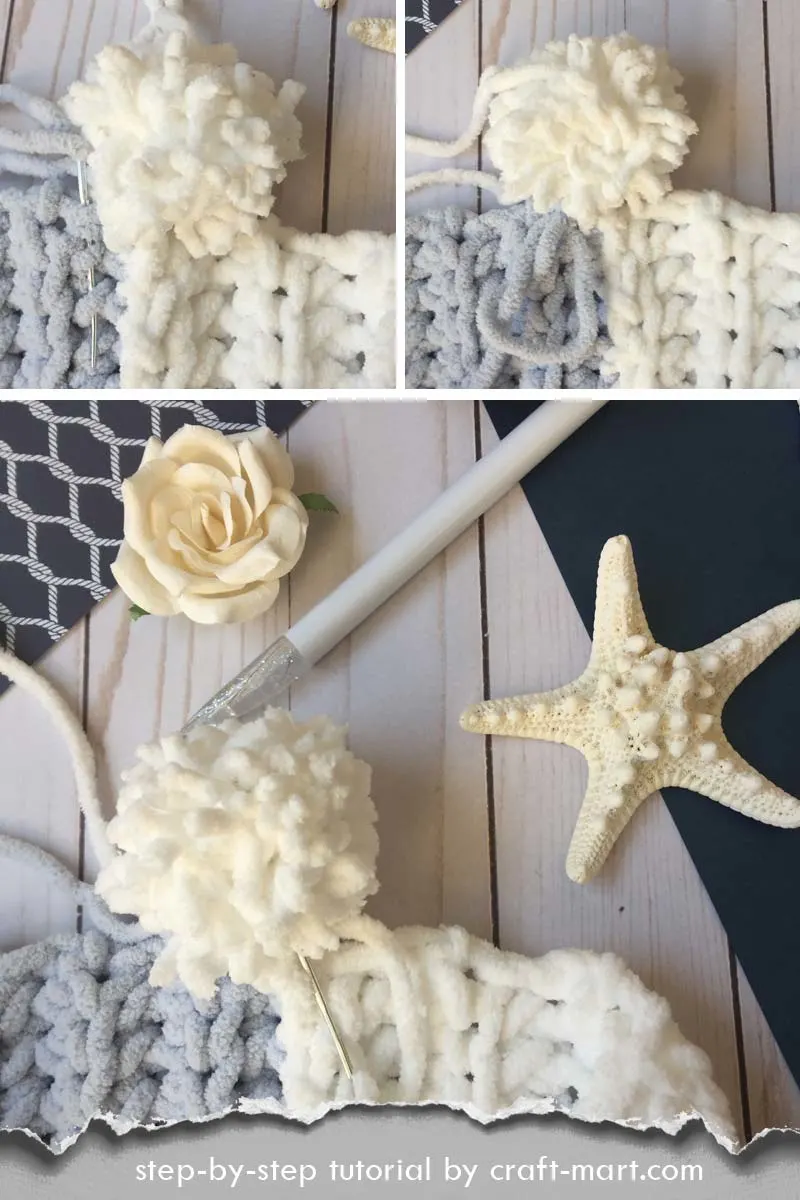
If you have the same long tail end as the color of your pom-pom, you can simply put the tapestry needle through the pom-pom (after securing it with a double knot at the bottom) and cut off the yarn. It will make the tail end blend with the finished pom-pom.
Last step: give your blanket a good shake outside to make sure all little pieces of yarn fly away leaving you with a beautiful new DIY addition to your home decor.
This blanket is perfect for Coastal, Nautical, and Beach home decor or as a cozy patio throw to complement the blue color scheme.

Can you wash Bernat blanket yarn?
Absolutely! That’s the beauty of this durable chunky yarn – it is washable, and so is your finished blanket. Just make sure to use cold water settings and a gentle cycle.

Fisherman Rib Crochet Blanket
Easy beginner-friendly chunky crochet blanket with classic ribbed texture.
Materials
- 2 skeins of Bernat Blanket Yarn in color A (each skein 10.5 oz, 300 g) - Cornflower
- 2 skeins of Bernat Blanket Yarn in color B (each skein 10.5 oz, 300 g) - White
- 2 skeins of Bernat Blanket Yarn in color C (each skein 10.5 oz, 300 g) - Twilight
Tools
- Crochet Hook 12 mm
- Tapestry Needle
- Scissors
- Pom Pom Maker
Instructions
- In color A, CH 110 +1.
- Row 1: SC into the second ch from the hook and into every ch (110 stitches).
- Row 2: CH 1, turn. SC BLO (single crochet into the back loop only) until the end of the row (110 stitches).
- Row 3-16: Repeat row 2. When you finish 16 rows, cut your yarn leaving approximately 16″ tail which you’ll use later to attach a pom-pom.
- Row 17: Pull with color B leaving approximately 16″ tail. CH 1, turn. SC BLO (single crochet into the back loop only) until the end of the row (110 stitches).
- Rows 18-33: Repeat row 2 in color B.
- Row 34: Pull with color C leaving approximately 16″ tail. CH 1. Turn. SC BLO (110 stitches).
- Rows 34-49: Repeat row 2 in color C.
- Alternate colors until you use all 6 skeins of yarn. You should have several balls of all three colors left which will be enough to create pom-poms.
- Get familiar with your Pom Pom Maker. It consists of 2 parts connected with a long pin. Each part is identical and has 2 blue semi-circular parts. First, align blue parts and start looping yarn while moving from left to right. To make your pom-poms the same size, use the same number of loops for each. I’ve looped my yarn 40 times around each pair of the blue double semi-circles (as in the tutorial above), moving from left to right and then from right to left. Cut the yarn.
- Repeat exactly the same steps using the second part of the pom-pom maker.
- Close both sides. Using very sharp scissors, cut through the yarn using the middle grove as your guide (you want the little yarn pieces to be the same size though Pom Pom Maker makes it effortless).
- The last step in pom-pom making is to secure your new fluffy pom-pom. For that, using a fairly long yarn of the same color, pull it through the blue grooves and make a VERY TIGHT double knot. Tie the double knot one more time.
- Lastly, you can open the blue parts on both sides. Holding your pom-pom maker with both hands, gently pull the white circles apart revealing the connecting metal needle.
- Check your pom-pom to make sure that all yarn pieces are approximately the same length. If one is sticking out, give it a gentle trim.
- Make 8 pom-poms total for this blanket. Your newly-made pom poms are ready to be attached to the finished crochet blanket!
- Now you are ready to put some finishing touches on your beautiful blanket. As you have long tails left at the end of each color stripe, you can use them to secure the pom poms. Note, all pom-pom will be on one side of the blanket.
- Just make a few double knots using different strands of yarn until you feel that your pom-pom is securely attached to the blanket. Lastly, use the tapestry needle to weave in (hide) the ends and cut off the yarn.
- If you have the same long tail end as the color of your pom-pom, you can simply put the tapestry needle through the pom-pom (after securing it with a double knot at the bottom) and cut off the yarn. It will make the tail end blend with the finished pom-pom.
- Give your blanket a good shake outside to make sure all little pieces of yarn fly away leaving you with a beautiful new DIY addition to your home decor.
Notes
Your estimated cost could be much less if you shop with a coupon at your local craft store or wait for a sale. Don't forget to check the clearance aisle as it may have exactly what you need.